comfort food

Essie’s Soup

It’s awfully dark out there. And although it looks like the usual gloomy morning when a hurricane-is-about-to-strike, somehow this one seems more ominous. Maybe I’ve just listened to too many news and weather reports, but I’ve prepared for Sandy lik…

It’s awfully dark out there. And although it looks like the usual gloomy morning when a hurricane-is-about-to-strike, somehow this one seems more ominous. Maybe I’ve just listened to too many news and weather reports, but I’ve prepared for Sandy like never before.

Water, batteries, ice. Check, check, check. Take in the outdoor furniture. Check.

Everything is closed. Schools, stores. No government services, like garbage pickup.

Judging by the lines at the gas stations, the horns honking too often when a light turns green, the empty shelves in the supermarket and number of people using ATMs, it seems as if everyone around here in Connecticut is stressed out.

I’ve prepared just-in-case food. Just in case we lose power, which is almost a certainty. During hurricane Irene we were out of power for 4 days.

I fried chicken cutlets and cooked (and sliced) a pot roast so we could have sandwiches. Bought fresh carrots and other vegetables we can eat raw, canned tuna, and milk for cereal. Baked some cookies so we could nibble something sweet.

And made soup. One of my favorites, which we call “Essie’s Soup,” because it was concocted years ago by my cousin Essie.

When my son-in-law Jesse first tasted some he said “what’s the difference between this and cholent?” And I had never thought about that before, but he nailed it. Essie’s soup is as thick as cholent, loaded with beans and dried peas, plus a few extras like: barley, lentils, wheatberries and stuff. Sometimes I add fresh carrots, onions and celery, but didn’t this time because, to tell you the truth, I forgot.

Essie’s soup is very very thick and gets thicker the more it cooks.

There’s no particular recipe really, so I’ll give you the broad parameters in a recipe.

This is a soup I can rewarm on my portable cooktop (which I use for cooking demonstrations). I did also buy extra butane canisters. But it’s also the kind of thing you can eat at room temperature in case that becomes a necessity.

Essie’s Soup

6-8 marrow bones

2 packages Streit’s or Manischewitz packaged vegetable, split pea or lima bean soup

2 cups mixed dried beans

1 cup split peas

1/2 cup barley

1/2 cup wheatberries, farro or spelt

4 carrots, sliced, optional

2-3 stalks celery, sliced, optional

1 large onion, peeled and sliced, optional

salt and freshly ground black pepper to taste

Rinse the bones and place them in a large soup pot. Add water to within 3-inches from the top of the pot. Bring to a boil, lower the heat and skim the surface for a few minutes. Add the entire contents of both packages of soup (including the contents inside the seasoning packet). Add the beans, peas, barley, wheatberries, carrots, celery, onion and salt and pepper to taste. Bring to a boil over high heat, lower the heat to a simmer and cook for several hours (at least 5), stirring occasionally, until the soup is thick. Cook longer if desired. If soup is too thick, add water and heat through. Makes a lot, depending on how long you cook it, but about 4 quarts

Old Fashioned Carrot Soup

In our family, when there’s a baby about to be born, we cook a bunch of stuff to freeze so that the tired, sleep-deprived new Mom and Dad don’t have to worry about dinner. My daughters Meredith and Gillian and I make stuff like Spinach Pie, Baked Zi…

In our family, when there’s a baby about to be born, we cook a bunch of stuff to freeze so that the tired, sleep-deprived new Mom and Dad don’t have to worry about dinner. My daughters Meredith and Gillian and I make stuff like Spinach Pie, Baked Ziti, Bean Soup and so on, pack them into family-size containers and put them in cold storage until the time comes.

So it’s a good thing we start well ahead because SURPRISE, we got a call at about 4:00 a.m. on September 30th that Gillian was on her way to the birthing center, 17 days before the due date and lickety-split, baby Carina Joy was born before we could even get there.

We are thrilled of course. New babies do that. Carina has a head-full of hair and two fat dimples. Gillian, who worked out almost every day and is fit as ever, is doing well and looks great.

All of this happened suddenly to Gillian and Jesse after a big move and in the middle of pre-school applications for Remy, age 2 (for next year!).

So yesterday I opened the freezer and brought them a few stored items, including this carrot soup. Dinner was all done.

Old Fashioned Carrot Soup


·      2 tablespoons butter or margarine

·      2 tablespoons vegetable oil

·      1 medium onion, coarsely chopped

·      2 pounds carrots, coarsely chopped

·      2 medium all-purpose potatoes, peeled and coarsely chopped

·      1/4 cup chopped parsley

·      2 tablespoons chopped fresh dill

·      1-1/2 teaspoons salt, or to taste

·      freshly ground black pepper to taste

·      7 cups vegetable stock

·      pinch of sugar

·      1 cup cream (any kind) or cream substitute


Heat the butter and vegetable oil together in a soup pot over medium heat. When the butter has melted and looks foamy, add the onion and cook for 3-4 minutes or until softened. Add the carrots, potatoes, parsley, dill, salt and pepper and cook for 3-4 minutes, stirring occasionally. Add the stock and sugar. Bring the soup to a simmer. Cook, partially covered, for 45 minutes. Puree the soup in a food processor or blender (or use a hand blender). Return the soup to the pan. Stir in the cream. Heat the soup through and serve.


Makes 6 servings


The Kugel to End all Kugels

This is the kugel to end all kugels.I mean it. I am a kugel-eating expert, if only because when I grew up my grandmother and mom made salty kugel stuffed with mushrooms and onions and it was only when I was grown, married and with kids that I had my…

This is the kugel to end all kugels.

I mean it. I am a kugel-eating expert, if only because when I grew up my grandmother and mom made salty kugel stuffed with mushrooms and onions and it was only when I was grown, married and with kids that I had my first taste of this. That taste was a transforming moment.

My friend Susan brought this dish to my annual Break-the-fast (she got the recipe from her friend Linda and I don’t know where Linda got it).

For years after that I have tasted more kugels than you could possibly imagine (including those hard, dried up things they sell in some supermarkets) always trying to surpass that moment of culinary discovery. 

I was even a judge once in a kugel contest.

I have made some wonderful kugels since then. But this is still my favorite. I always ask Susan to make an extra one so there will be leftovers. I pack pieces of it in my freezer so I can have a little treat whenever.

Don’t even think about the calories. Just enjoy.


Susan/Linda’s Sweet Noodle Kugel

      1 12-ounce package egg noodles

      1 8-ounce package cream cheese at room temperature

      1/4 pound unsalted butter at room temperature

      1 cup sugar

      2 cups dairy sour cream

      6 large eggs

      1 teaspoon cinnamon

      1 cup raisins, optional

      2 cups crushed frosted flakes or corn flakes

      4 tablespoons melted butter

Preheat the oven to 350 degrees. Cook the noodles in slightly salted water until al dente (not soft). Drain and set aside. In an electric mixer, beat the cream cheese and butter until thoroughly blended and softened. Beat in the sugar until well blended. Add the sour cream and blend thoroughly. Add the eggs one at a time, beating after each addition. Stir in the cinnamon and raisins, if used. Pour the mixture into the noodles and toss to coat them completely. Place in a baking dish. Combine the frosted flakes and melted butter and sprinkle on top of the noodles. Bake for about 40 minutes or until the top is crispy. 

Makes 8 servings  

Milk and Honey White Bread

95954099_2581425922125465_2398630099697008640_n.jpg
Milk and Honey Bread

Milk and Honey Bread

Sometimes I’m just bored with all food. It frequently happens after a summer’s worth of grilling and when roasting a turkey or making a hearty stew doesn’t seem right yet.

Also, the tomatoes are coming in now. Real tomatoes. Red, red ones. Aromatic, juicy, sweet, oozing seeds tomatoes. Late August tomatoes.

Then, for dinner, at least one night, I can make tomato sandwiches. Nothing special. I have no need for $40 olive oil or rare, aged Balsamic vinegar. No chili pepper additions. No teriyaki or hummus. No fusion version.

Just white bread, mayo and sliced tomatoes.

Nothing more. Life is sweet.

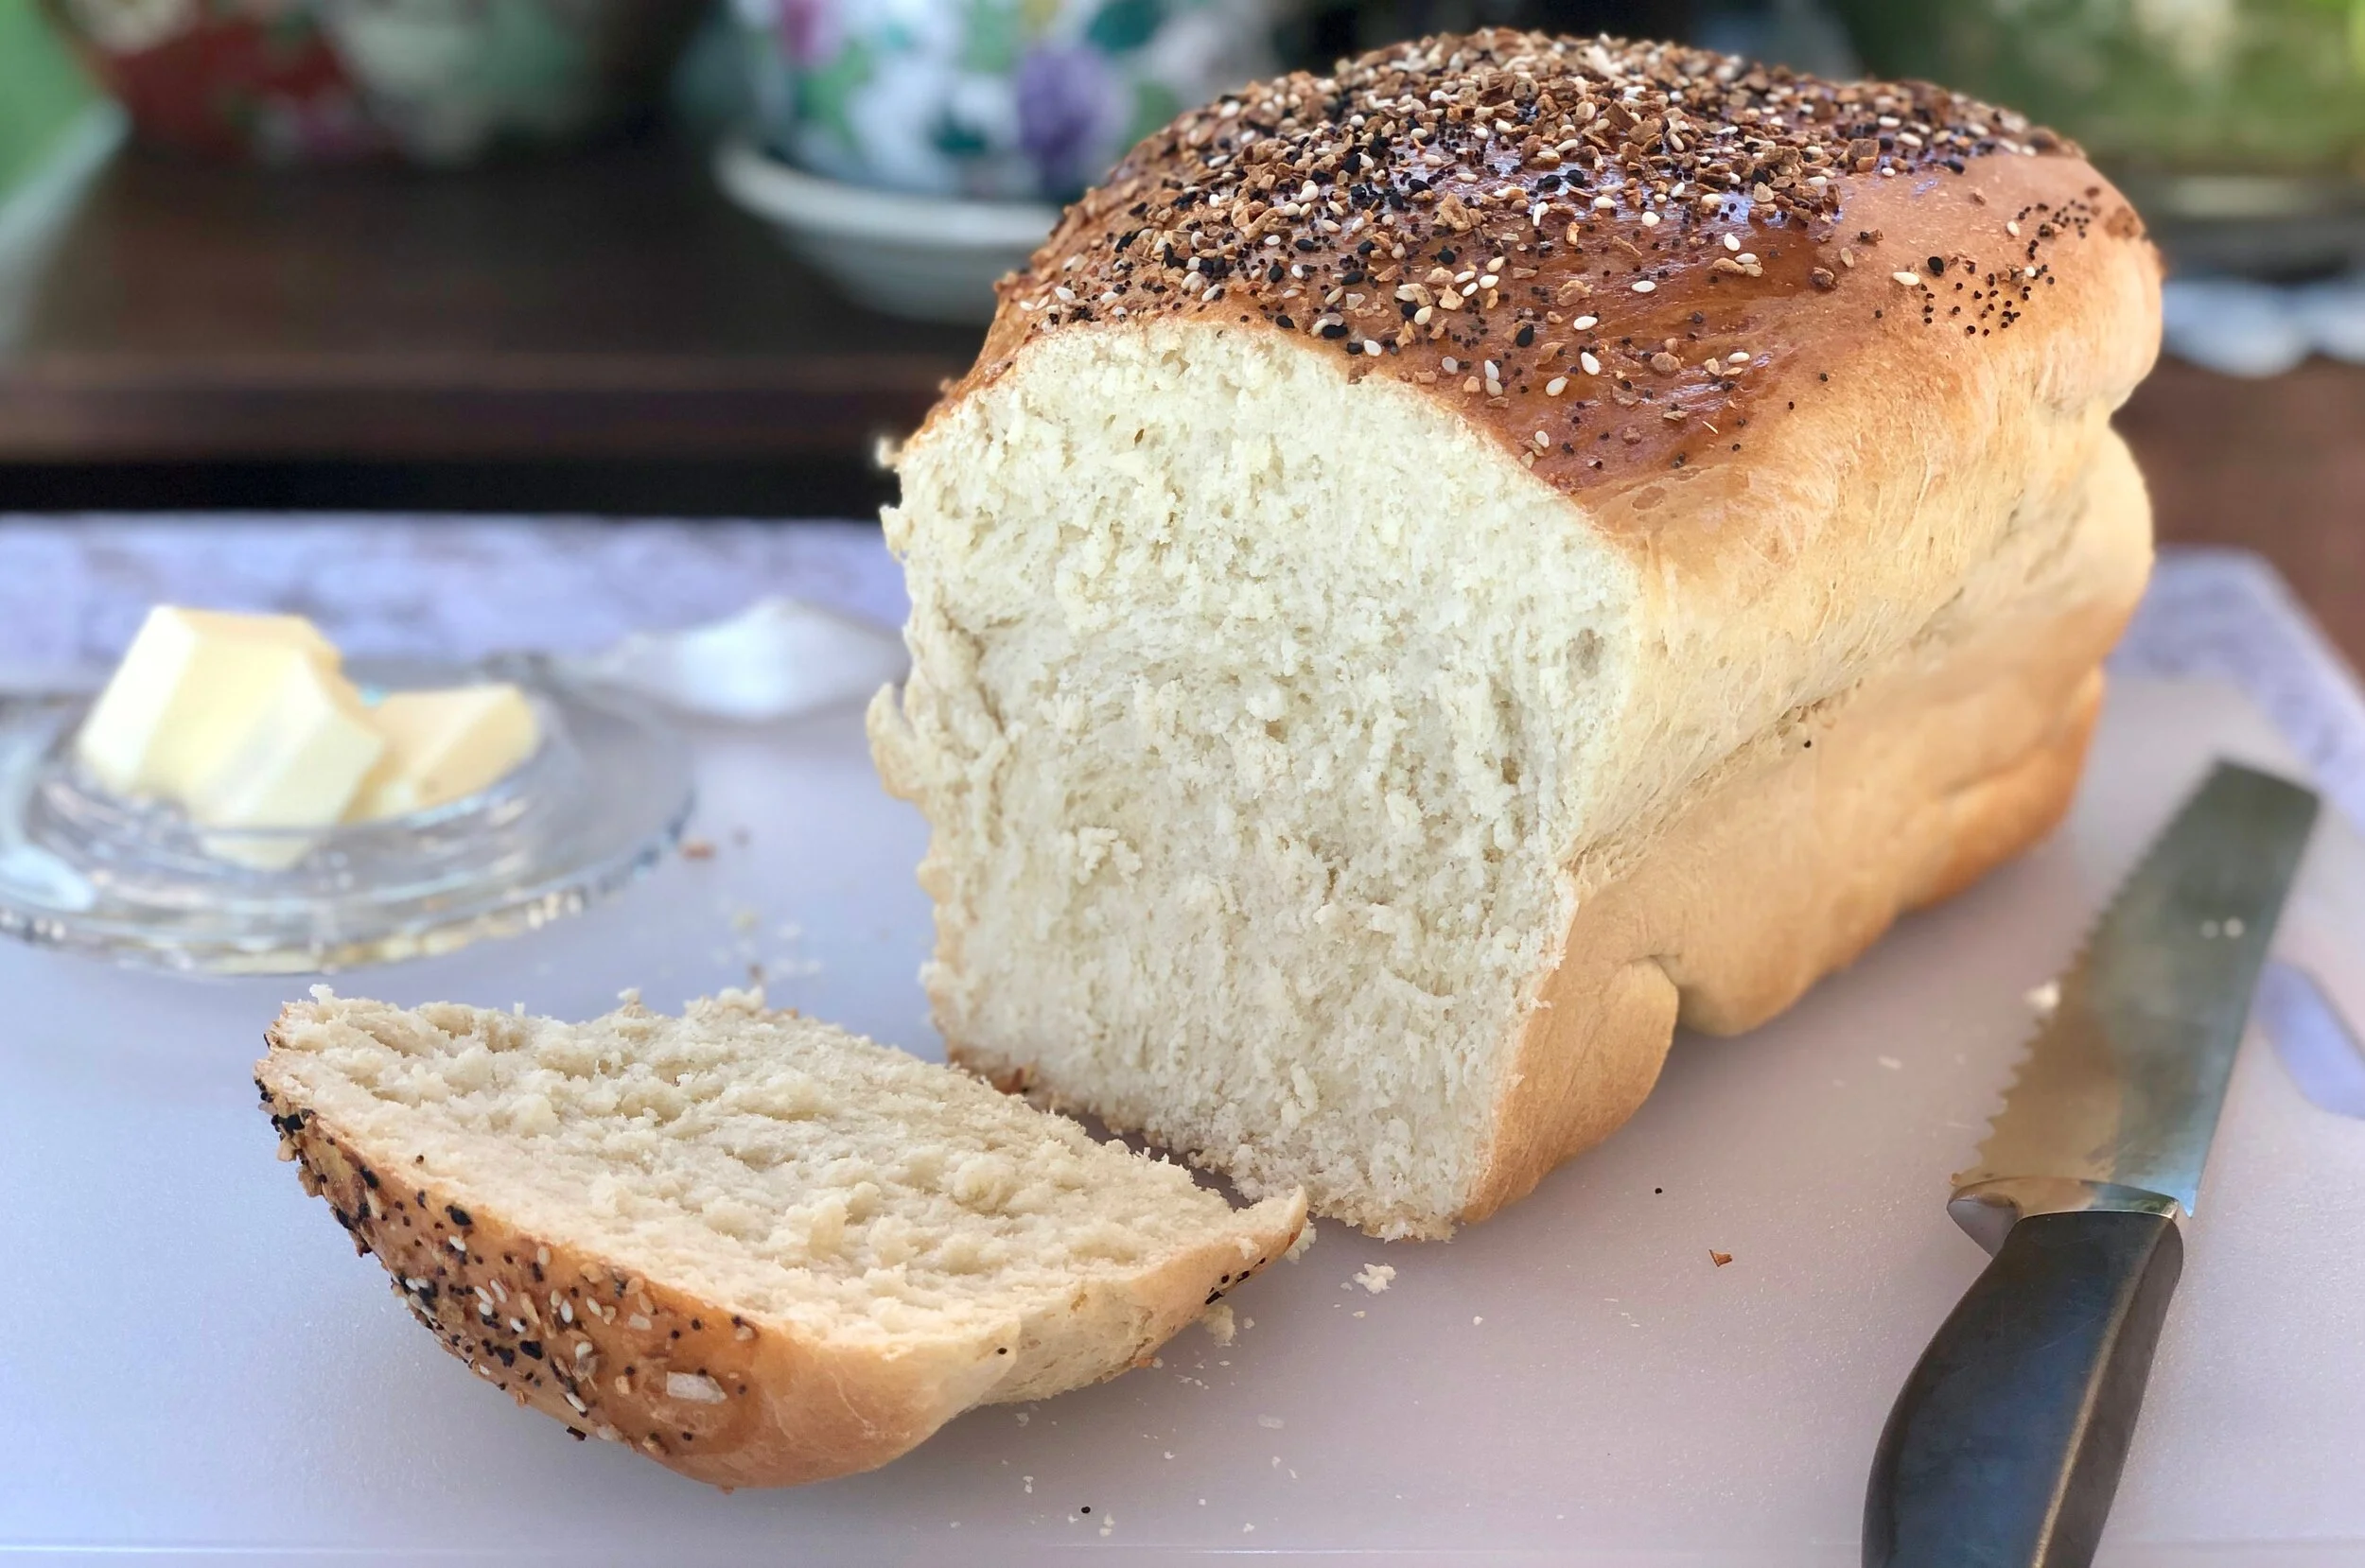
Packaged (not soft white) or bakery white bread will do. But if you like to bake and have a few moments, here’s a recipe for a spectacular bread that measures up to a good tomato.

Milk and Honey White Bread

  • 1 package active dry yeast

  • 1/4 cup warm water (105-110 degrees)

  • 1/4 teaspoon sugar

  • 4 cups all purpose flour, approximately

  • 1-1/2 teaspoons salt

  • 2 large eggs

  • 2 tablespoons softened butter or vegetable oil

  • 3/4 cup warm milk

  • 2 tablespoons honey

In a small bowl, mix the yeast, water, sugar and 1/2 teaspoon flour. Stir, set aside and let rest for 5 minutes or until the mixture is bubbly. In a bowl of an electric mixer, combine the remaining flour and salt. Add the eggs, butter, milk and honey. Add the yeast mixture. Blend ingredients thoroughly, then knead using the kneading hook, for 4-5 minutes or until the dough is smooth and elastic (or knead by hand for about 10 minutes). Add more flour as necessary to keep the dough from being sticky. (Dough may be made in a food processor). Cover the bowl of dough and put it in a warm place to rise for about 1-1/2 hours or until doubled in bulk. Punch down the dough, cover the bowl and let rise again for about 30 minutes or until doubled. Lightly oil a 9” loaf pan. Place the dough in the pan. Let rise in a warm place for 30 minutes. Preheat the oven to 350 degrees. Bake for about 25 minutes or until firm and golden brown.

Makes one

Corn fritters

Do you ever daydream about foods you haven’t had in a long time?Like the fried chicken you used to eat but you don’t now because it’s too fattening, too fatty and too messy to make?Or Mac n’ Cheese the way your Grandma made it, but it doesn’t taste …

Do you ever daydream about foods you haven’t had in a long time?

Like the fried chicken you used to eat but you don’t now because it’s too fattening, too fatty and too messy to make?

Or Mac n’ Cheese the way your Grandma made it, but it doesn’t taste the same since she’s gone?

Or the original Bonomo’s Turkish Taffy that doesn’t taste anything like it used to so you don’t bother?

One of the foods I think about more than occasionally is my Mom’s Corn Fritters. Crispy outside, soft and puffy within, and loaded with corn. Great for breakfast, lunch or dinner. With a little real maple syrup.

It’s an indulgence, to be sure, so I don’t make them too often. But I just had to have some yesterday. I had been thinking about them, mostly because I had some corn left over from a few extra cobs I cooked over the weekend.

So I made some. I changed one important ingredient though. I switched from dairy milk to coconut milk. UNSWEETENED refrigerator case coconut milk (not canned).

The fritters were vaguely sweeter, but every bit as wonderful, delicate, crispy-edged and perfect. I think Mom would approve.


CORN FRITTERS


2 tablespoons margarine or butter

1 large egg

1 cup coconut milk (or use regular, whole milk)

2 cups cooked corn kernels (about 4 ears of corn)

1-1/4 cups all-purpose flour

1 tablespoon baking powder

1 teaspoon sugar

1-1/4 teaspoons salt (or to taste)

margarine/butter/vegetable oil for frying

maple syrup, optional

Melt the butter and set it aside to cool. In a bowl, beat the egg and coconut milk together. Stir in the cooled melted butter and the corn kernels. In a second bowl, mix the flour, baking powder, sugar and salt; add this to the corn mixture and stir ingredients gently to blend them together. Heat enough margarine, butter and/or vegetable oil in a saute pan over medium heat. When the fat has melted and looks foamy (or the vegetable oil is hot), drop the corn batter by the 1/4-cupful. Cook for about 2 minutes or until the bottom has browned. Flip the pancakes and cook for another 2 minutes or until the second side is brown. Serve with maple syrup if desired.

Makes 6-8 servings

Milk and Honey White Bread

IMG_4602.jpeg

Would you believe — there’s a book entirely devoted to white bread. It’s called, (of course), “White Bread” and has a cover reminiscent of a loaf of packaged Wonder Bread.

I thought the scorn for white bread was something new. But according to the author, Aaron Bobrow-Sprain, apparently there’s been a lot of controversy about this stuff on and off for centuries. Some of it had to do with food safety issues. But some of it had to do with racism (one health advocate apparently thought white bread was “threatening white racial superiority”).

Who knew?

When I was growing up my Mom would buy bakery rye bread and something called “corn bread” which isn’t that yellow, cakey Southern style stuff but more like sour-dough rye bread and was known in Jewish neighborhoods as “Jewish corn bread.” Those were for having with dinner. Or toasting for breakfast. Or for deli sandwiches.

But she bought packaged white bread too. It was the modern thing. The help-the-little-lady convenience food. It was too convenient not to buy. And there weren’t very many choices in packaged bread anyway. Maybe whole wheat, but I didn’t know anyone whose mother bought packaged whole wheat bread.

My mother bought packaged white bread for this reason (which Bobrow-Sprain also acknowledges), and that is, there are certain kinds of sandwiches that just don’t work with rye, corn bread or any kind of fancy artisinal loaves.

Like peanut butter and jelly and mostly, my mother’s fried-to-a-crisp kosher salami with yellow mustard. That salami was hot and sizzling, right out of the pan when she put it on the mustard-slathered slices and when you held the sandwich to take a bite, your fingers would make such deep indentations in the soft bread that sometimes it made a hole in the sandwich. Never mind. That’s the way it was supposed to be with packaged white bread.

I could actually have one of those sandwiches now. It’s been years.

No, decades.

Generations.

I don’t remember when I last bought packaged white bread. 

I do bake white bread though. With one of my help-the-little-lady convenience machines like my KitchenAid mixer and my Cuisinart food processor. With either of those it’s not that difficult to make a good loaf of bread.

I don’t agree with those who say white bread is bland. Sometimes it’s the ingredients on the bread that you want to give a starring role, not the bread itself. Like that fried salami.

So, for any of you who would like to have a good white bread, try this recipe.

Milk and Honey White Bread

  • 1 package active dry yeast

  • 1/4 cup warm water

  • 4 cups all-purpose flour, approximately

  • 1/4 teaspoon sugar

  • 1-1/2 teaspoons salt

  • 2 large eggs

  • 2 tablespoons softened butter

  • 3/4 cup warm milk

  • 2 tablespoons honey

  • 1 egg beaten with 1 teaspoon water

Place the yeast and 1/4 cup water in a small bowl. Add 1 teaspoon flour and the sugar. Mix well and set aside for about 5 minutes. In the bowl of an electric mixer, combine the remaining flour and salt. Add the 2 eggs, butter, milk, honey and the yeast mixture. Blend ingredients thoroughly. Knead until the dough is smooth and elastic, adding more flour if the dough seems too sticky. Dough should be soft but not sticky. Place the dough in a bowl, cover and let rise in a warm place for about 1-1/2 hours or until doubled in bulk. Punch down the dough, knead briefly and let rise again for 20 minutes.

Preheat the oven to 350 degrees. 

Lightly grease a 9” loaf pan. Place the dough inside the pan. Let rise for another 30 minutes. Brush the surface of the bread with the beaten egg. Bake for about 30 minutes or until golden brown and well risen.

Makes one loaf

Macaroni and Cheese

What do I cook when the grandkids come for a visit? Well, lots of things depending on which one, but I know I am safe if I have some Macaroni and Cheese on hand. Just in case.

All of my grandchildren like Macaroni and Cheese.

Doesn’t everybody?

If I have time, I make the recipe ahead and freeze portions in one-serving casserole dishes, then thaw and bake them until they’re hot enough.

Macaroni and Cheese is easy enough to make. And yet people ask me questions about it all the time. Mostly about the sauce separating or feeling grainy or gritty. So, here’s some tips for would-be Macaroni and Cheese makers out there. Followed by my standard recipe.

1. You can use a variety of cheeses, even blue-type cheeses, which give the dish a tangy taste. Although most people use cheddar by itself, that can make the texture grainy.

2. Use young cheeses such as asiago, non-aged cheddar, havarti, muenster, non-aged gouda, and so on. These have more water content than aged, older, drier cheeses and melt more easily, keeping the mixture stable.

3. Include American cheese; adding a bit of American cheese to the mix can stabilize the sauce too.

4. Use whole milk rather than skim because fat serves as a stabilizer.

5: Shred, chop or grate the cheese so that it melts more easily when you add it to the hot white sauce. Only add a little at a time and mix it in thoroughly before adding more. If you add cheese all at once there’s more of a tendency for the sauce to separate.

Macaroni and Cheese

  • 8 ounces elbow macaroni

  • 3 tablespoons butter

  • 3 tablespoons all-purpose flour

  • 2 cups whole milk

  • 1/2 teaspoon salt or to taste

  • pinch or two of freshly grated nutmeg

  • 4 ounces American cheese, shredded or chopped

  • 2 ounces Muenster, Gouda or a blue-veined cheese, shredded, chopped or crumbled

  • 2 ounces sharp cheddar cheese, shredded or chopped

  • 1/2 cup grated cheddar cheese

Preheat the oven to 350 degrees. Cook the macaroni until it is al dente, drain and set aside. In a saucepan melt the butter over low-medium heat. When it looks foamy, add the flour and cook, stirring constantly, for 2 minutes, without letting the mixture become brown. Gradually add the milk and stir constantly using a whisk until the sauce is smooth and thickened. Stir in the salt, nutmeg, American cheese, Muenster (or other) cheese and 2 ounces of cheddar cheese and whisk the sauce until the cheese has melted and the sauce is smooth. Stir the sauce into the cooked macaroni. Spoon into a baking dish and top with grated cheddar cheese. Bake for a few minutes until the grated cheese is hot and melty or the bread crumbs are golden brown.

Makes 4 servings

Rice Krispy Crusted Macaroni and Cheese

Mac and Cheese

"What are you going to be for Hallowe’en?"

It’s the question my granddaughter Nina asked recently as we were walking down the street.

So I said “I’m going as a grandma. And Grandpa is going as a grandpa.”

She thought that answer was so funny she stopped to laugh out loud for a long time. And said “but you are already grandma!”

So I told her that I was going to buy a gray-haired wig and a cane and go trick-or-treating looking like an old, bent-over woman. And I showed her how I would do it and what I would sound like when I said “trick or treat” with my best old-person voice.

But of course I am not going trick or treating because I am in Egypt. Yes, that’s right. Egypt. Cairo. Tahrir Square, the Pyramids, Sphinx and the whole bit. That’s why I haven’t been blogging as much as usual.

But I also just learned that our group, which has 9 women, will be having an early Halloween and we will be wearing gulabyas (Egyptian dresses) so I guess I will be in costume after all.

When my neighbors at home come to my door on the real Halloween and they realize I am not home I hope they don’t vandalize the place too much. One year our doors got sprayed with that stuff that comes flying out of a can like neon colored string and we had to have everything painted because the string didn’t come off.

It’s been years since I went trick-or-treating with my children. They are grown and go trick-or-treating with their own kids now. But I remember that Halloween night was always the turning point for the weather. It was always cold and frequently rainy on that night (why couldn’t nature wait one more day???)

So there was always something warm and delicious when we got home. Like soup or Mac and Cheese and certainly hot chocolate with marshmallows.

If you go trick-or-treating and need some warm nourishment afterwards, before the candy gobbling, try Macaroni and Cheese. I would give a nourishing and warm Egyptian recipe but —- more on that some other day. Here’s a good recipe for Macaroni and Cheese.

Macaroni and Cheese

  • 8 ounces elbow macaroni

  • 2 tablespoons butter

  • 3 tablespoons all-purpose flour

  • 2 cups whole milk

  • 1/2 teaspoon salt

  • few grindings of nutmeg

  • 4 ounces American cheese, cut into small pieces

  • 4 ounces cheddar cheese, grated or chopped

  • 1 cup Rice Krispies cereal (or similar), optional

  • 2 tablespoons melted butter, optional

Preheat the oven to 350 degrees. Cook the macaroni until it is al dente. Drain and set aside. In a saucepan, melt the two tablespoons of butter over medium heat. When the butter has melted and looks foamy, add the flour and stir it into the melted butter using a whisk. Cook for about a minute. Gradually add the milk, whisking constantly to form a smooth sauce. Add the salt, nutmeg, American cheese and cheddar cheese and stir until the sauce is smooth and thick. Stir in the macaroni and coat all the pieces. Spoon the macaroni into a baking dish. If you like a top crust, mix the cereal and melted butter and sprinkle on top of the macaroni. Bake for 12-15 minutes or until the cereal is browned and crispy.

Makes 4 servings

Carrot and Parsnip Soup

Need a quick soup for Rosh Hashanah? Try this Carrot and Parsnip Soup, which comes from my book Hip Kosher. Just a few ingredients. And ingredients can be substituted to make it fit in a meat, dairy or pareve meal. It can be frozen too, so you can m…

Need a quick soup for Rosh Hashanah? Try this Carrot and Parsnip Soup, which comes from my book Hip Kosher. Just a few ingredients. And ingredients can be substituted to make it fit in a meat, dairy or pareve meal. It can be frozen too, so you can make plenty and store it for when it’s cold outside and you need a good, light, but nourishing starter for dinner.

And also — it’s loaded with vegetables. That’s a good thing.

Carrots and parsnips are both sweet vegetables, which makes this soup particularly nice for Rosh Hashanah, when sweet foods are in order. While not quite as ubiquitous as honey, carrots have always been a key High Holiday food. The Yiddish word for carrot is “mehren,” which means to “increase” or “multiply,” and thus underscores wishes for good fortune and good deeds in the new year.

So here it is. Good, cheap and easy to make.


Carrot and Parsnip Soup


·      2 tablespoons olive oil

·      1 large onion, chopped

·      2 medium garlic cloves, chopped

·      1 teaspoon finely chopped fresh ginger

·      1/2 pound carrots, peeled and chopped

·      1/2 pound parsnips, peeled and chopped

·      1 teaspoon ground cumin

·      3/4 teaspoon ground coriander

·      salt and freshly ground black pepper to taste

·      4 cups vegetable or chicken stock


Heat the olive oil in a soup pot or large saucepan over medium heat. Add the onion and cook for 2-3 minutes, or until the onion is slightly softened. Add the garlic and ginger and cook for another minute. Add the carrots, parsnips, cumin, coriander and salt and pepper to taste and stir. Pour in the stock and one cup water. Bring to a boil, then lower the heat to a simmer. Cook, partially covered, for about 25 minutes or until the vegetables are tender. Puree the ingredients, return the soup to the pan and reheat to serve.


Makes 4-6 servings


For cream soup: use vegetable stock; add 1/2 cup half and half cream; reheat.

For dairy soup: prepare soup with vegetable stock and serve with a dollop of plain yogurt or dairy sour cream

For parve cream soup: use coconut milk or soy milk

Garnish: with croutons or pita crisps

Pita crisps: brush pita bread wedges with olive oil and bake for 5-6 minutes at 400 degrees (or until crispy and browned)


Lily Vail's Apple Pie; Sibling Rivalry, part 1

fullsizeoutput_97f0.jpeg

Sibling Rivalry, Part I

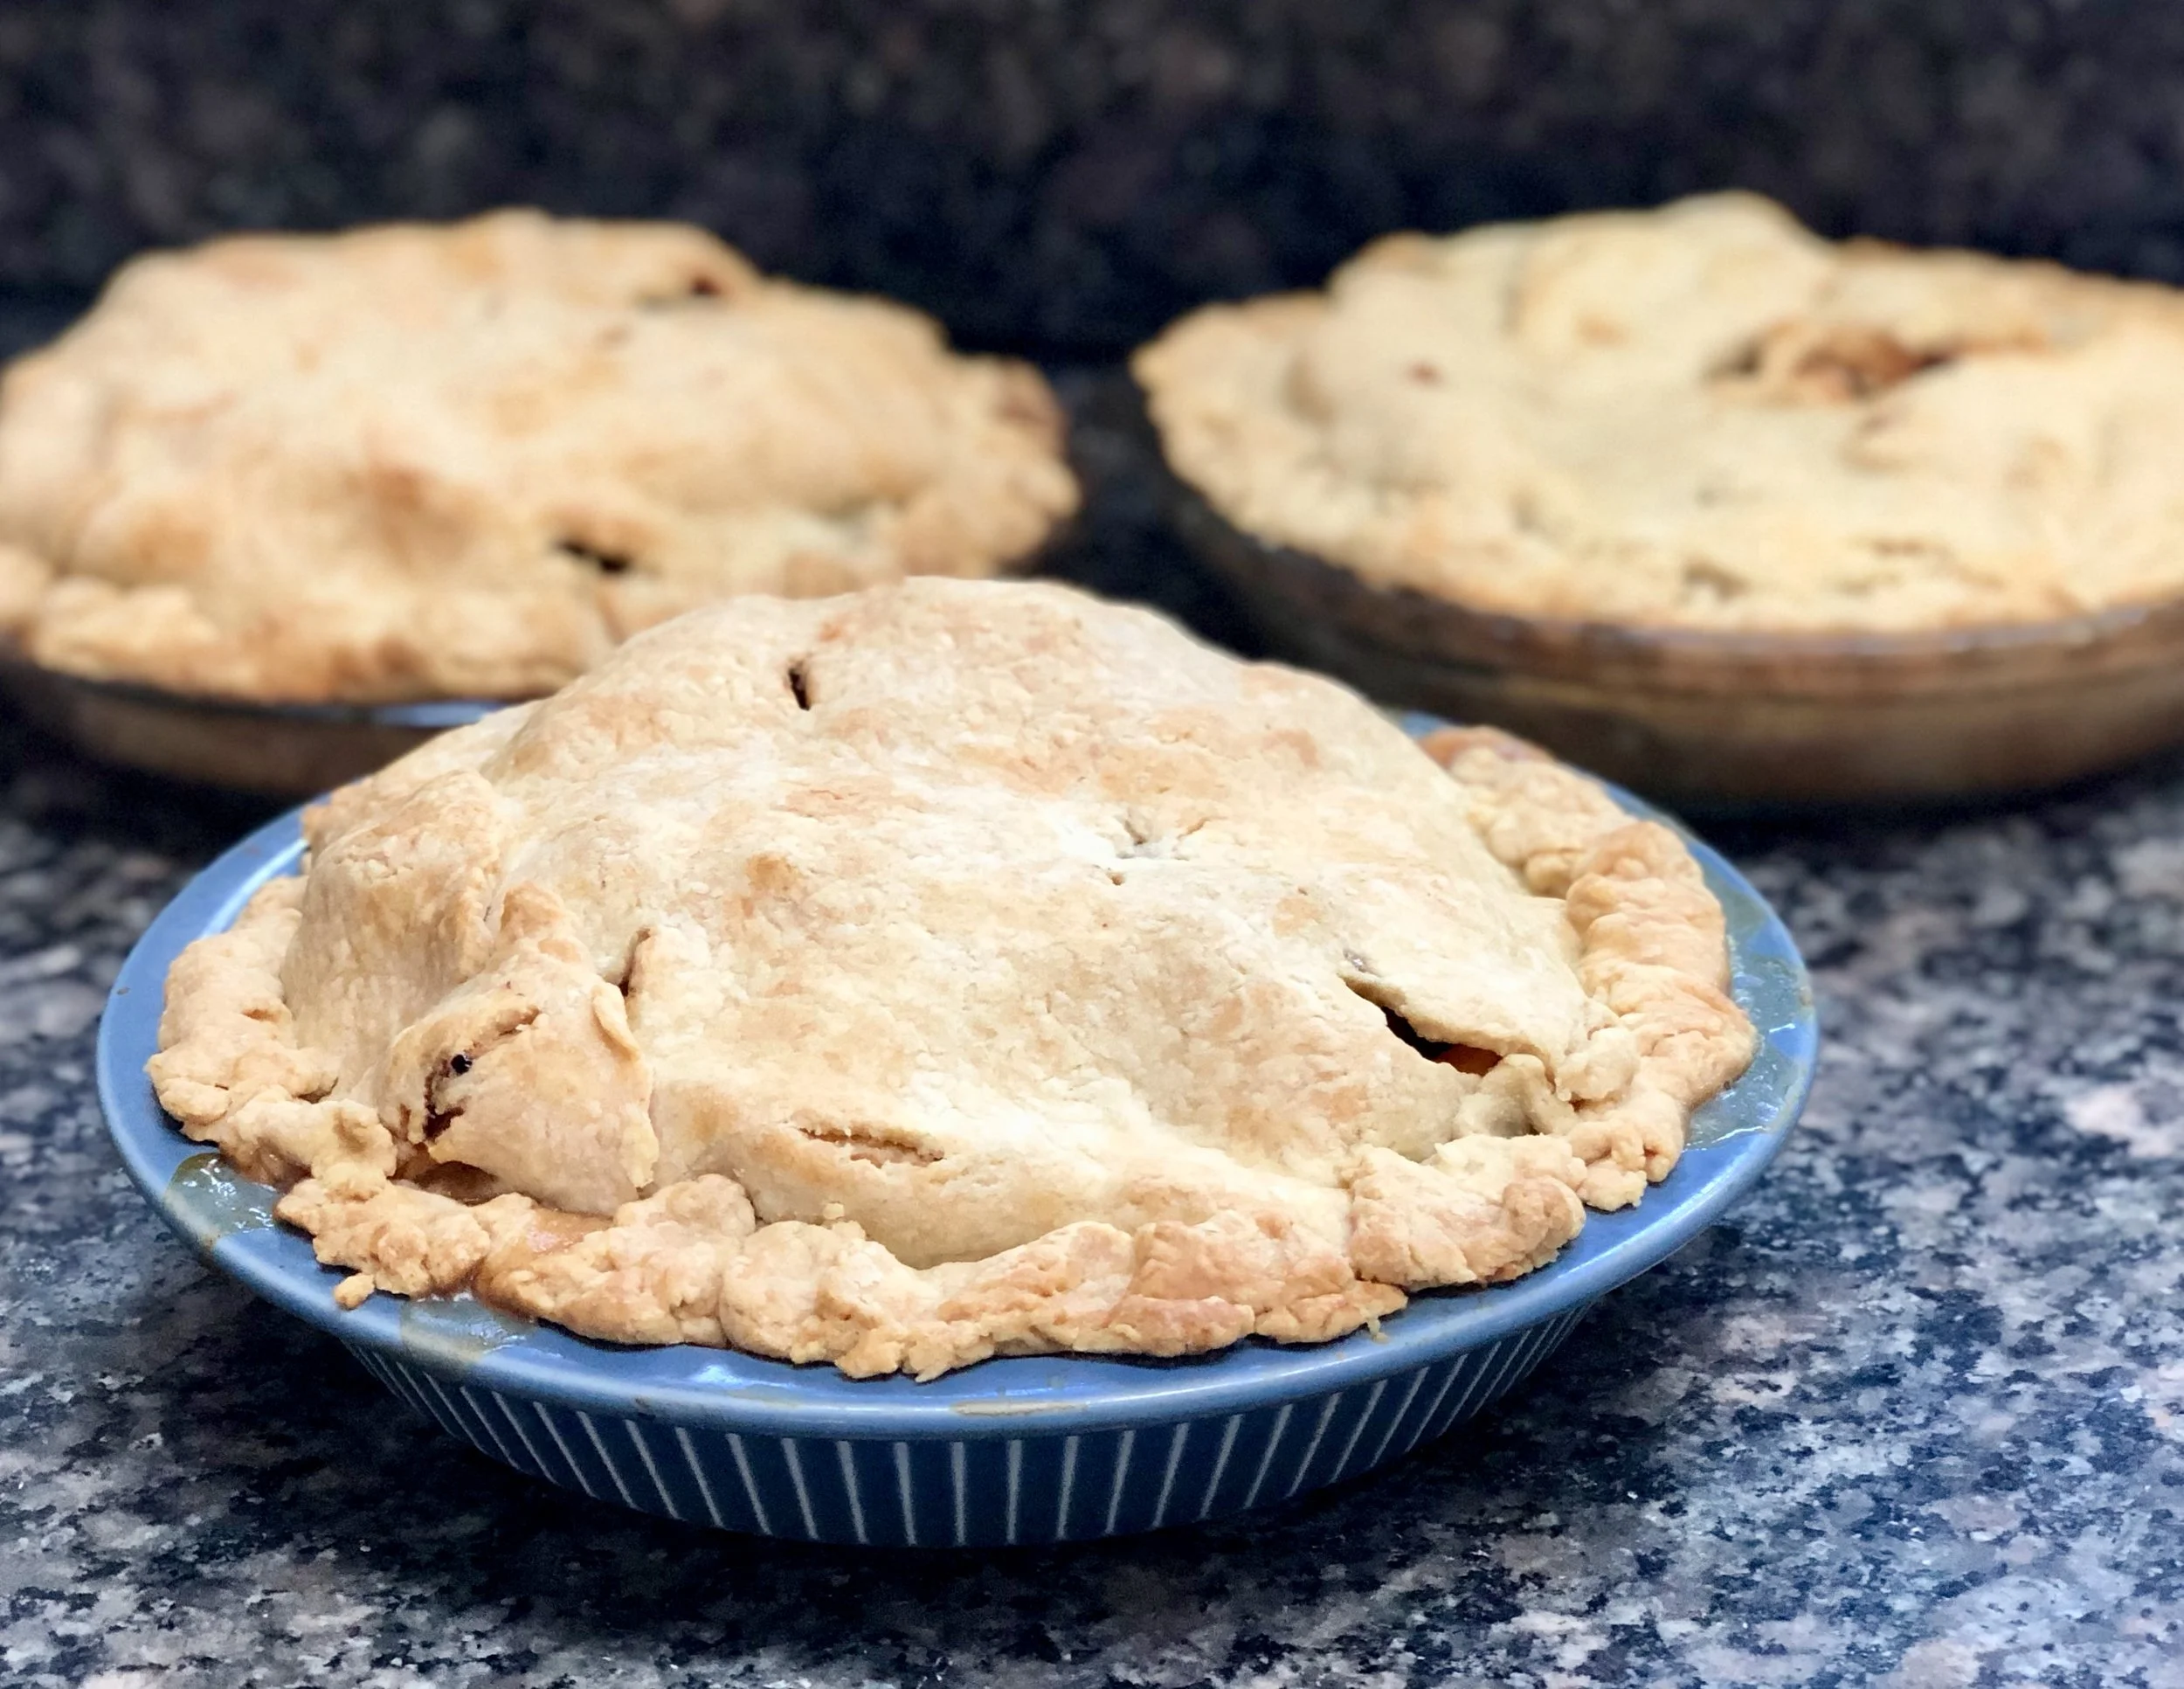
I timed last year’s apple pies perfectly. Every September I call Blue Jay Orchards in Bethel, Connecticut and order a bushel of Rhode Island Greening apples. They are one of the only orchards that I know who still grows this stupendously wonderful apple variety that is the absolutely best apple for pie no matter what anyone else, even the most expert of experts in the food business, says.

I make 12 apple pies every year and then, as the months go by, eat them down when company or my eldest grand child (who eats almost nothing but likes my apple pie) comes.

So now I have one pie left, which we will have this week because I just called Blue Jay and put in my order for this year.

When I called them last week they weren’t sure they would have the apples this year because of all the rain and hurricanes, especially Hurricane Irene. Ohmyohmyohmy, that sounded like terrible news at the time and I actually began to think about other apples I could bake into a pie.

But they told me to call back in a day or so and sure enough, when I did they told me that they have some! So I am in luck.

I never did decide on what apples I would have used.

Anyway, my Mom made apple pie every year too. Her sister, my Aunt Beck, made apple cake. And, you know, sisters will be sisters. They loved each other lots but they had this kind of apple-baking rivalry come September, when the new apples came out. They each not-so-secretly let everyone in the family know that the pie or cake was much better than the cake or pie.

And so it went. I liked both, but, being daughter to the pie baker, I learned to bake the pie.

My mother was the one who clued me into the Rhode Island Greening apples. And she showed me how to make the dough and how to cut the butter and shortening into the flour so the crust would be crumbly and how not to add too much liquid because that makes the dough rubbery. She also taught me how to roll the dough gently, so it would be tender. “Don’t murder the dough!,” she used to caution.

Her apple pies were the best of the best and I use her recipe, so, well, I don’t want to brag but —- everyone says mine are the best of the best.

Here’s the recipe., You might not be able to find Rhode Island Greening apples. So you’re on your own here. If you use a sweeter apple, cut back on the sugar.

Apple Pie

crust:

  • 2-1/2 cups all-purpose flour

  • 1 teaspoon sugar

  • 3/4 teaspoon salt

  • 1 teaspoon grated fresh lemon peel, optional

  • 1/2 cup cold butter

  • 1/3 cup cold vegetable shortening

  • 4-6 tablespoons cold milk, juice, water or melted ice cream

  • apple filling

  • 1 tablespoon butter

To make the crust: Combine the flour, sugar, salt, and lemon peel, if used, in a large bowl. Cut the butter and shortening into chunks and add the chunks to the flour mixture. Work the fat into the flour mixture until the ingredients resemble crumbs (use your hands, a pastry blender or the pulse feature of a food processor). Add the liquid, using only enough to gather pastry into a soft ball of dough (start with 4 tablespoons). Cut the dough in half and flatten each half to make a disk shape. Wrap the dough in plastic wrap and let it stand at least 30 minutes.

Preheat the oven to 350 degrees. Lightly flour a pastry board or clean work surface. With a rolling pin, roll one half of the dough on the floured surface into a circle about 1/8-inch thick, making sure the circle is larger than the pie pan by about 1 inch. Place the dough in a 9” or 10” pie pan. Pour the apple filling into the pastry-lined pan. Cut the butter into small pieces and place on top of the filling. Roll out the remaining dough and place it over the filling. Gently press the bottom and top crusts together along the flared edge of the pie pan. For a fluted rim, press your thumb and index finger against the outside of the rim, or crimp it with the tines of a fork or the blunt side of a knife. Cut steam vents in the top crust with the tip of a sharp knife or the tines of a fork. Bake the pie for 50-60 minutes or until golden brown.

Apple Filling:

  • 3 pounds pie apples (Rhode Island Greenings, Granny Smith, Gravenstein, Northern Spy, Golden Delicious, Idared, Stayman, Winesap, Baldwin, Jonagold, Braeburn

  • 1/2 cup sugar, approximately

  • 2 tablespoons lemon juice

  • 3/4 teaspoon ground cinnamon

  • 2 tablespoons all-purpose flour

Peel and core the apples then cut them into slices. Place the slices in a bowl. Add the sugar, lemon juice, cinnamon and flour and toss the ingredients to coat the apple slices evenly.