comfort food

What to cook when it's just me for dinner

fullsizeoutput_86a7.jpeg

My husband won’t be home for dinner tonight so it’s just me. So this can be a delicious night of something that only I like to eat. Or it can be a night of picking tidbits from the fridge and thinking I am eating nothing but actually consuming millions of calories.

My husband Ed likes almost everything I cook, so looking for something he doesn’t like but that I do is nearly impossible. I am not complaining here. His good humor about dinner is a blessing.

But cooking for one shouldn’t be a lonely, burdensome deal. Better for it to be a guilty pleasure of sorts.

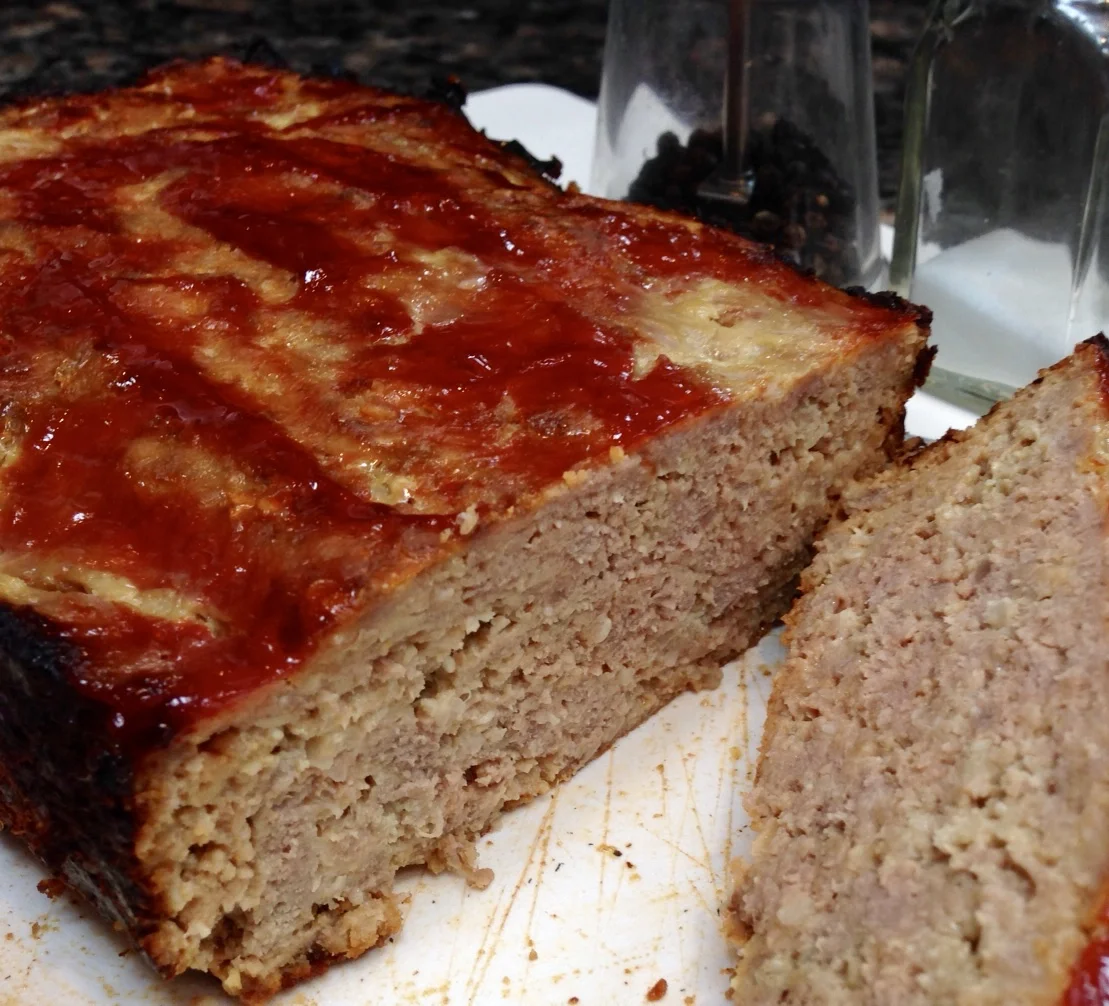
Maybe I’ll make meatloaf. Ed hates meatloaf. He always hated it and keeps telling us the story about how his grandmother made meatloaf for him and hid it under the spaghetti, which he did like, so that when he got to the bottom of the pile of pasta, there it was, a slab of beef he had to eat because his grandmother was watching.

His aunt Alice, who was also at the house on occasion would say “Ma, you know Eddie doesn’t like meatloaf!” To which grandma would insist that Eddie did.

When Ed and I were married he made me promise never to make meatloaf. He’s one of the only men I know who really doesn’t like it despite what his grandmother said.

So, because I can’t think of anything else he hates, I guess I’ll make meatloaf because I love it. Especially the next day, cold, on a sandwich with ketchup.

I hate ketchup. But that’s another story for another day.

Meatloaf

  • 2 tablespoons olive oil
  • 1 small onion, finely chopped
  • 1 stalk celery, finely chopped
  • 2/3 cup fresh bread crumbs
  • 1 8-ounce can tomato sauce
  • 1/2 cup water
  • 2-3 tablespoons chopped fresh parsley
  • 1 pound ground beef
  • 1/2 pound ground veal
  • 1/2 pound ground turkey
  • 1 large egg
  • 2 teaspoons Worcestershire sauce
  • 2 teaspoons fresh thyme leaves
  • salt and freshly ground black pepper to taste
  • 1 cup bottled chili sauce, optional

Preheat the oven to 350 degrees. Heat the olive oil in a saute pan over medium heat. Add the onion and celery and cook for 3-4 minutes or until the vegetables are soft. Set aside to cool. In a large bowl, combine the bread crumbs, tomato sauce and water and let soak until all the liquid has been absorbed. Add the beef, veal, turkey, egg, Worcestershire sauce, thyme, salt and pepper and the cooled vegetables. Mix gently but thoroughly to distribute the ingredients evenly. Place the mixture in a loaf pan (or shape the mixture into a large oval and place it in a roasting pan). Bake for 30 minutes. Top with the chili sauce, if desired and bake for another 30 minutes.

Makes 6 servings
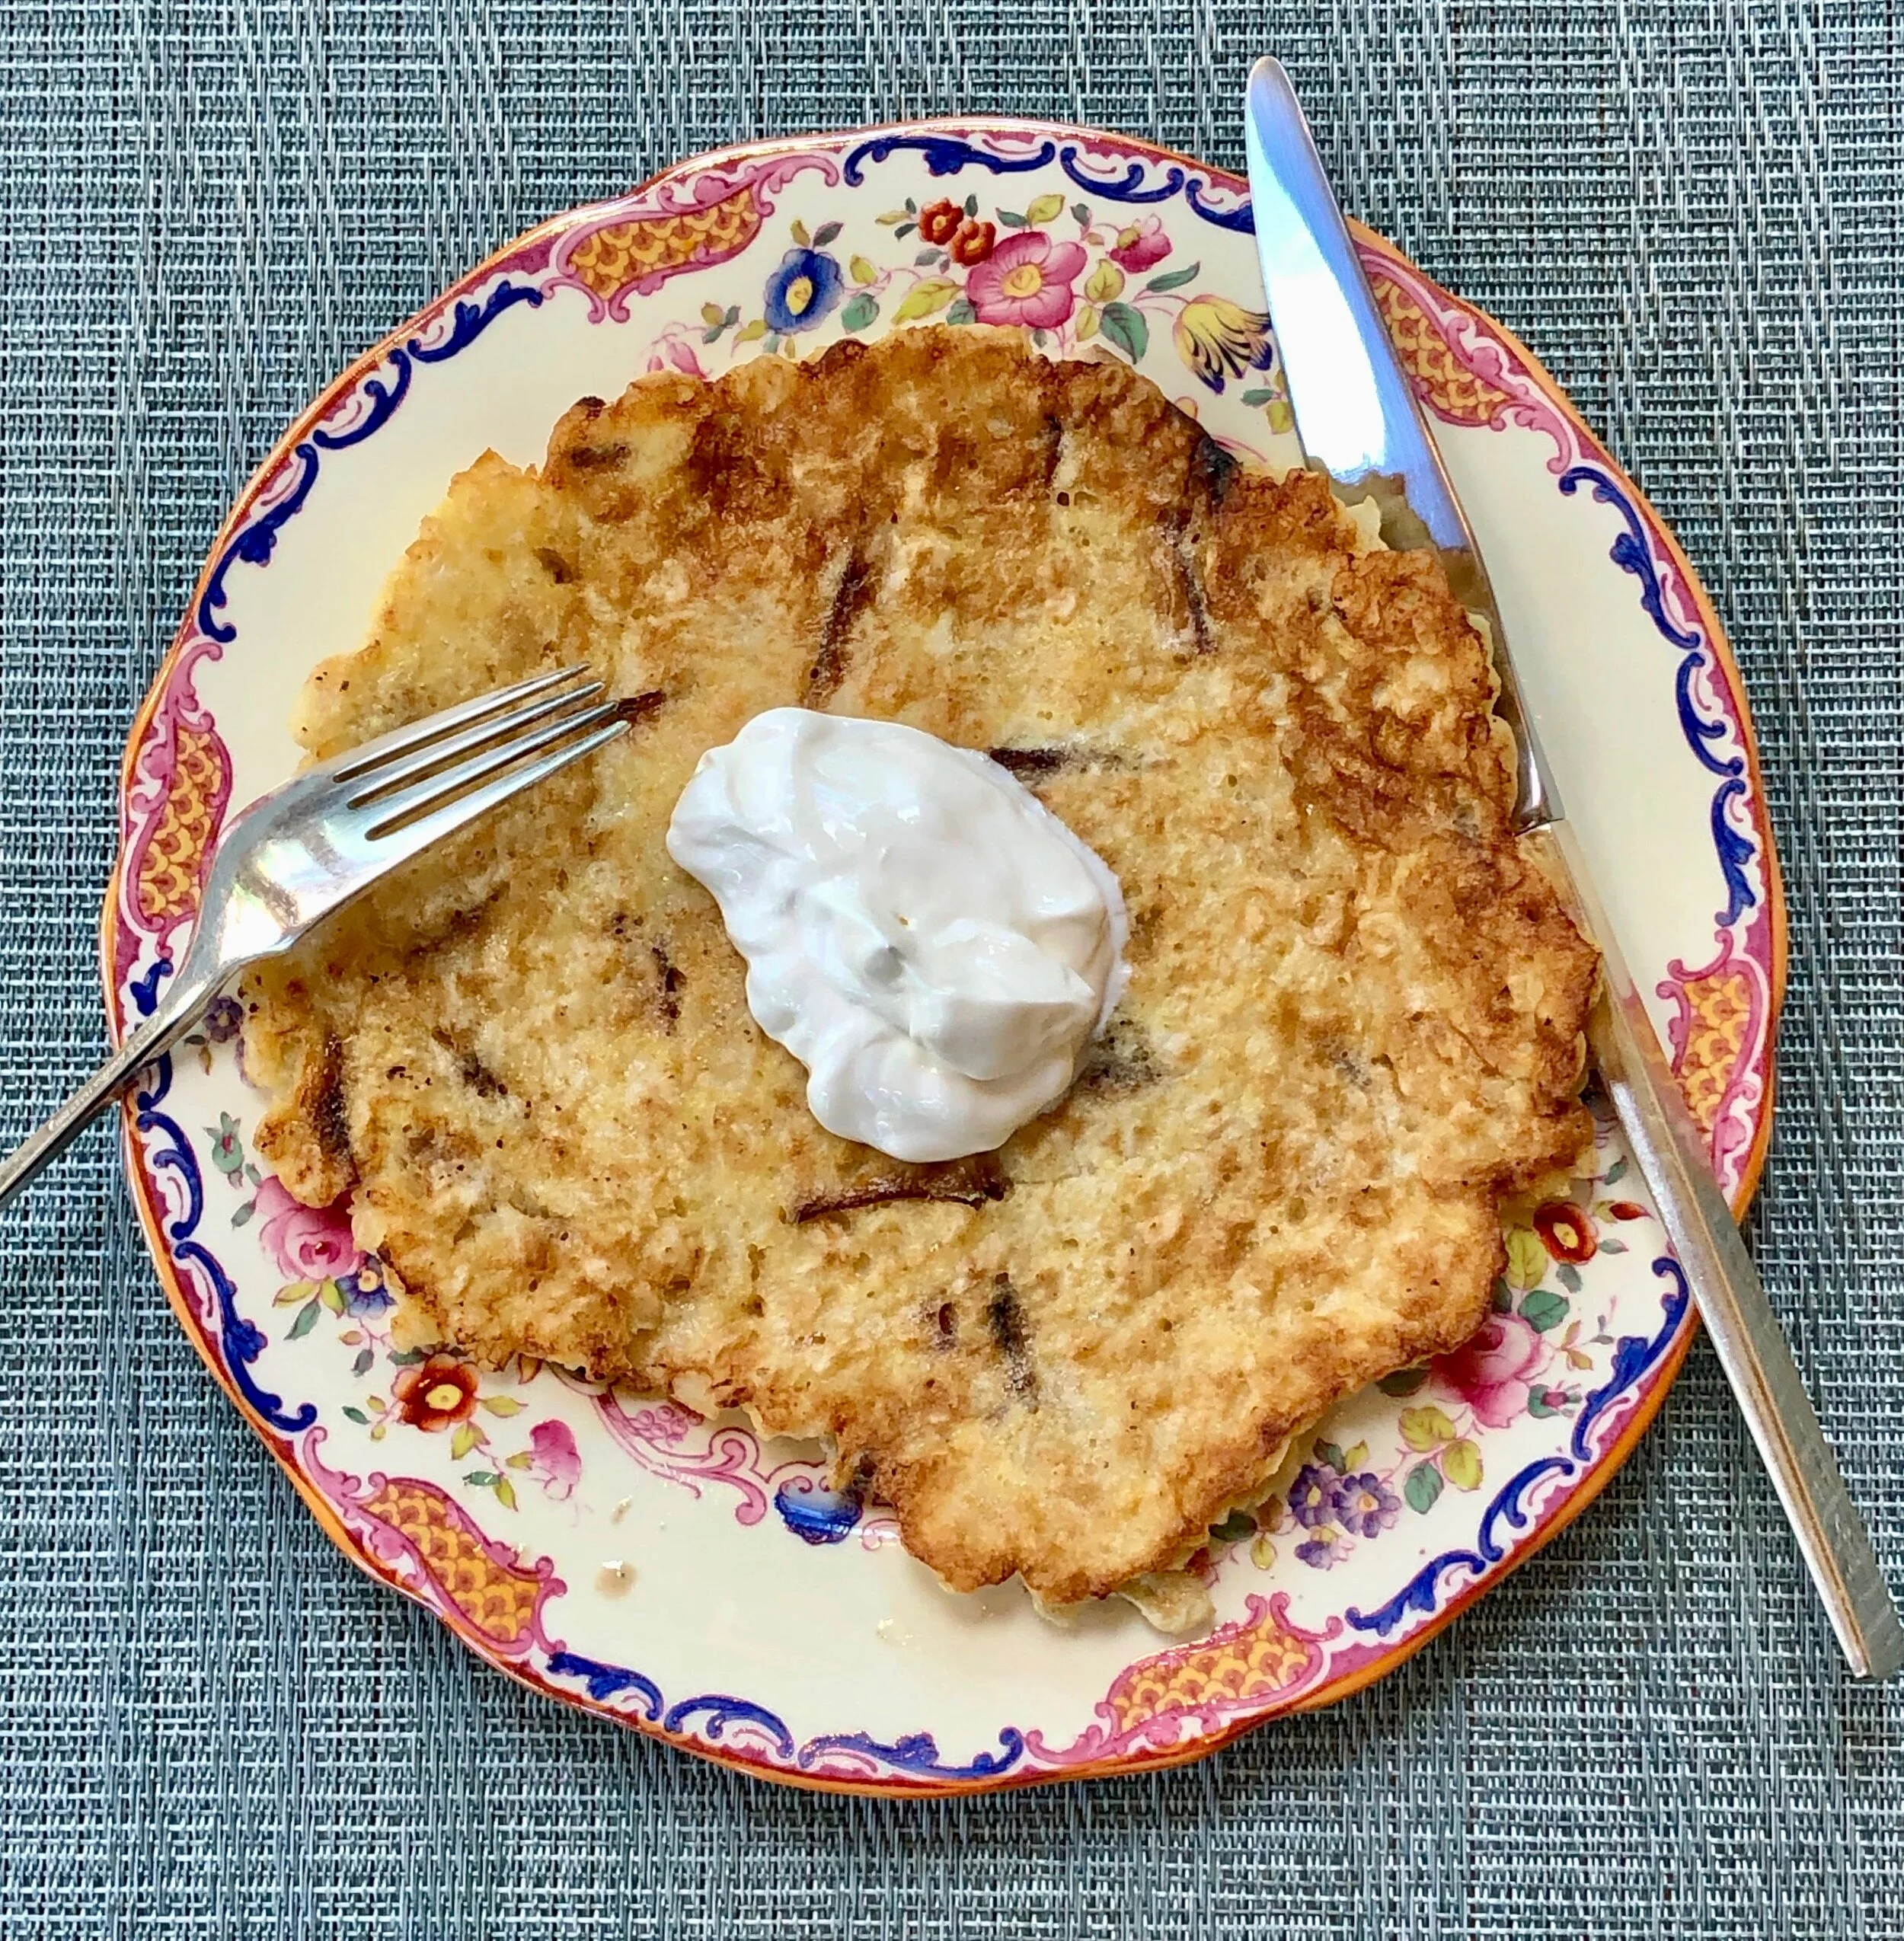
Soft Matzo Brei

IMG_4290.jpeg

“There’s no French Toast during Passover.” That’s what I told my grandkids when they were here for a few days for Seders and sleepovers. They’re used to French Toast when they come to grandma’s house because I always have a spare challah in the freezer, or we make one and then have leftovers, and everyone on earth knows that the best French Toast is made with challah.

But never mind that. “Israeli Toast” is on the menu, is what I told them.

You know. Matzo Brei. It’s the same thing as French Toast but instead of using bread, you use matzo.

But here’s a dilemma. Topping for French Toast is easy: either maple syrup, cinnamon sugar or jelly. A lot of people do the same for Matzo Brei. But when I was a little girl my grandma served Matzo Brei sprinkled with salt and topped with a big blob of sour cream. Sometimes applesauce.

My husband Ed always thought this was weird. But it’s how I served it to my own daughters too, who think it’s weird to drizzle matzo brei with anything as sweet as maple syrup. If I had sour cream in the fridge, that’s what they would choose. But we’ve switched to fat-free Greek yogurt instead.

“Israeli Toast” or Matzo Brei is so easy to make. And a delicious switch from every other cereal-based breakfast. So if you want to give it a try, here’s my recipe:

Matzo Brei

  • 3 pieces of matzo

  • hot water

  • 2 large eggs

  • salt

  • butter

  • sour cream or plain Greek style yogurt

Break the matzot into small pieces into a bowl. Cover with hot water and let it soak until the pieces are soft. Drain any non-absorbed water, then squeeze the pieces to extract as much excess water as possible. Add the eggs to the soft matzo pieces and mix until the matzo and egg are well combined. Sprinkle to taste with salt. Heat the butter in a saute pan over medium heat. When the butter has melted and looks foamy, add the egg-matzo mixture. Cook for 2-3 minutes per side or until golden brown and crispy. Serve with sour cream or plain yogurt, or, if you must, with maple syrup.

Makes 2-3 servings

The Differences Among Matzo Balls

OMG it’s April already! April 1st! No fooling!

Passover is only 18 days away.

It’s not as if I haven’t been thinking about it. I have written three separate articles about it already (you can see one in Jewish Woman Magazine about Passover desserts here: http://www.jwi.org/Page.aspx?pid=2751) and the one at kosher.com about Haroset here: http://blog.kosher.com/2011/03/25/old-world-charosis-gets-a-hip-makeover/. The third article (on quinoa) hasn’t appeared yet and I’ll post it when it comes out next week.

But I haven’t really thought about my own Seder yet.

Except for the turkey. There’s always a turkey.

And there’s always a bunch of other stuff like spinach pie and braised eggplant. Cranberry sauce. A lot of veggies. And even though I like to make new recipes and serve less traditional foods, it wouldn’t be Passover without Matzo Ball Soup.

In our family we have had the same important discussions about these as everyone else: which is better, light fluffy matzo balls or chewy firms ones? Like politics, opinions on this subject tend to be definite and once decided, difficult to change. 

When I was a kid and my grandma and then mother had the Seders, my cousin Essie would bring her famous matzo balls. They were cannonballs, like in a children’s picture book — you could picture one falling out of the plate and bouncing out the window and into the city streets and out into the countryside.

But her husband and kids loved them. Fortunately, my mother also made a batch of spongier ones too.

The difference among matzo balls has to do with how many eggs you use, what kind of fat you mix in, how much you handle the dough, how long you cook them, whether you include spices or chopped fresh herbs and so on and so on. I use goose fat, which I put in in the freezer in December (from the goose I make for Hanukkah) because it gives the matzo balls a smooth, rich texture. And I include chopped fresh parsley or dill because it adds some flavor but also enhances the look. And mostly I use chicken soup in the mix, though occasionally I will use seltzer instead.

Here’s the recipe we use. These make medium, slightly-firm, soup soaked delicious matzo balls.

Matzo Balls

1 cup matzo meal

1 teaspoon salt

freshly ground black or white pepper to taste

1 tablespoon finely chopped fresh parsley or dill, or both, optional

4 whole large or extra large eggs, slightly beaten

1/4 cup melted goose fat, chicken fat, margarine or vegetable oil

1/4 cup chicken soup, water or seltzer

In a bowl. combine the matzo meal, salt, pepper and parsley or dill (or both). In another bowl, beat the eggs, melted fat and soup together. Add the egg mixture to the matzo mixture and blend thoroughly. Stir in the liquid. Cover the ingredients and refrigerate for about 30 minutes.. Bring a large pot of lightly salted water to a boil. With wet cold hands shape the matzo mixture into balls 1/2-inch to 1-inch balls (you may have to re-wet hands occasionally). Add the matzo balls one by one to the boiling water. Lower the heat so that the water is at a simmer. Cover the pan and cook for at least 50 minutes (do not lift the cover) or until they are tender. Remove the matzo balls from the water. Place into the soup to soak up more flavor. Makes up to 20

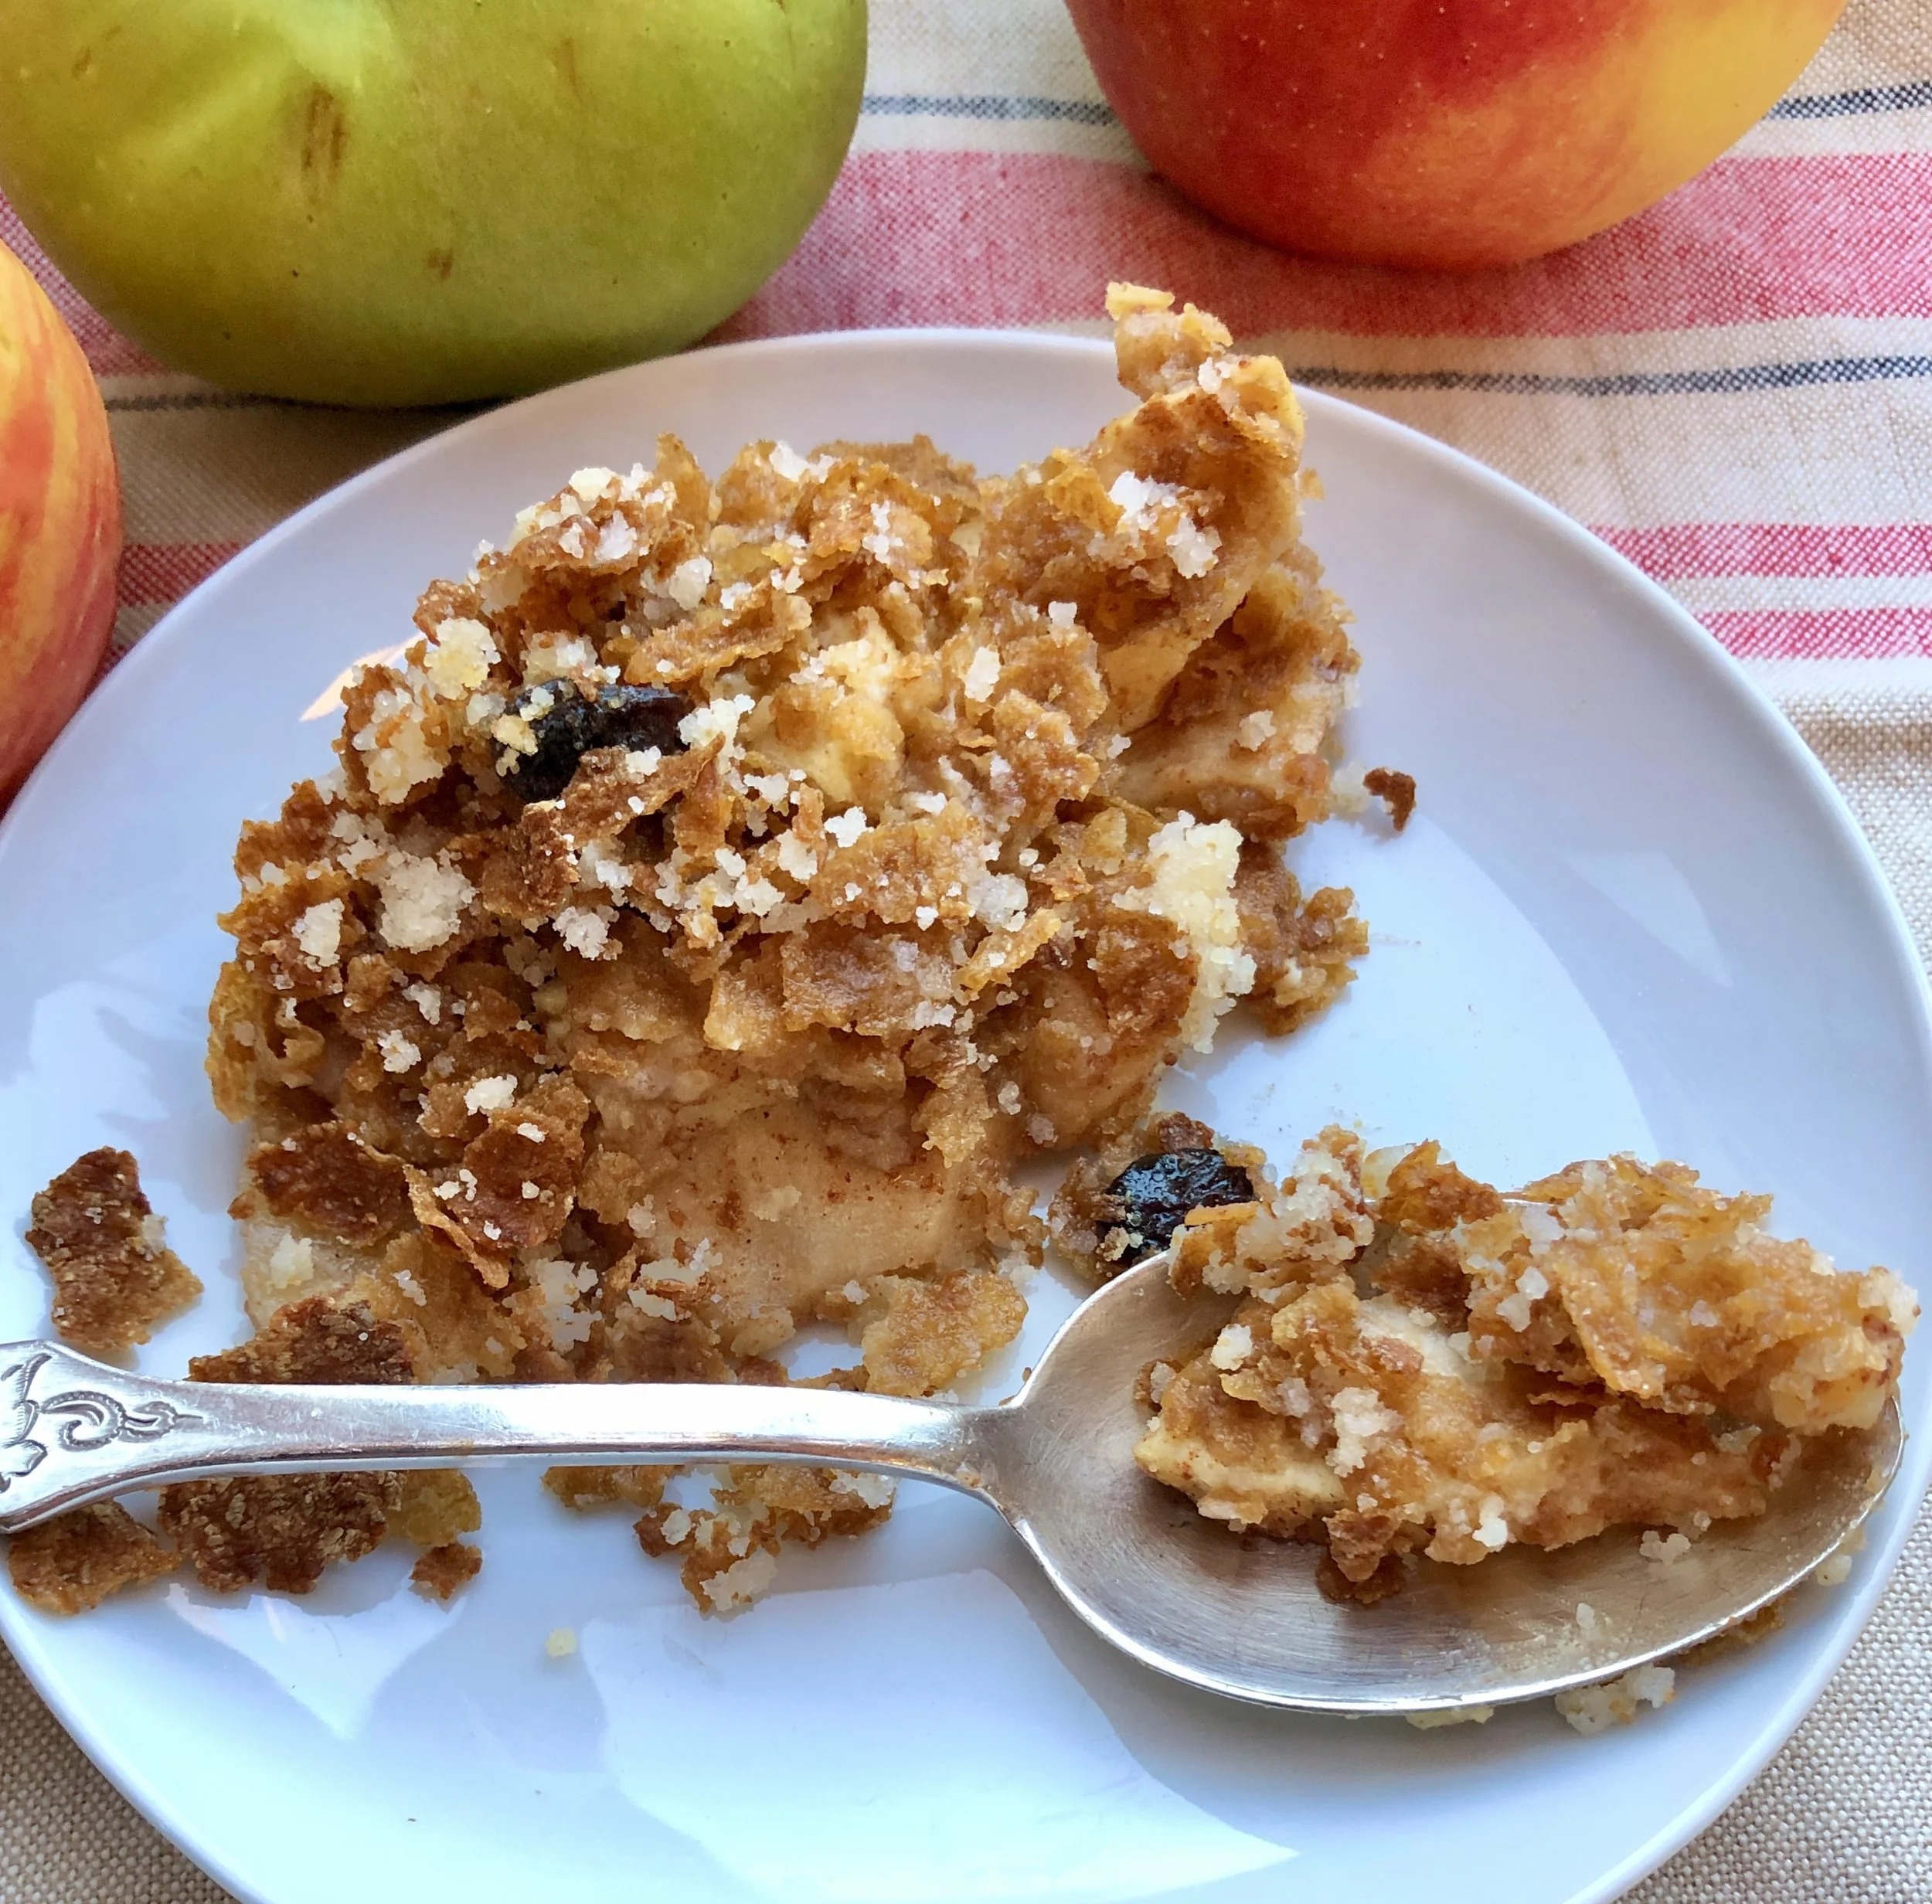
Mom’s Raisin Bran Apple Crisp

Wanna Sell Your House? Smell this!

Yesterday I baked a Banana Bread that I couldn’t eat because I’m allergic. But I always have leftover bananas around so I make Banana Bread a lot. I love the aroma. In fact, I mentioned yesterday that it is one of the best kitchen smells there is.

Which reminded me about when we were selling our old house. The real estate agent told us to make sure there were some good aromas coming out of the kitchen in order to entice prospective buyers.

So I got to thinking about the good smells that come out of a kitchen and what I could bake or make to make my kitchen be the one someone wanted to cook in and therefore buy my house. I even wrote one of my newspaper articles about house-selling aromas.

Choices I considered: fresh coffee, tomato sauce, fresh-baked yeast bread, anything with baking apples.

Well, fresh coffee is the easiest but you can’t have it going all day or it tastes and begins to smell bitter.

Yeast bread is my favorite, but I didn’t always have the time to bake one.

Tomato sauce may be among my favorites but the garlic could be off-putting to some.

So, apple it was. Baked apple. Apple pie. Apple Crisp. 

Fortunately we had some wonderful desserts during that time. We did sell the house too!

Here’s a recipe with an intoxicating aroma — my 

 Mom’s Raisin Bran Apple Crisp:

  •  2 tablespoons butter

  • 4-5 large, tart apples, peeled, cored and sliced

  • 2 tablespoons sugar or honey

  • 1 teaspoon cinnamon

  • pinch or two of salt

  • 1/3 cup sugar

  • 3 tablespoons butter

  • 1 tablespoon all-purpose flour

  • 2 cups slightly crushed raisin bran cereal

Preheat the oven to 350 degrees. Melt the 2 tablespoons butter and set aside to cool slightly. Combine the apples, 2 tablespoons sugar, cinnamon, salt and melted butter and place in a baking dish. Cream the 1/3 cup sugar and 3 tablespoons butter with an electric beater until well combined. Beat in the flour. Add the raisin bran and work it into the creamed mixture gently, leaving the bran flakes more or less intact. Sprinkle this mixture on top of the apples. Cover the pan and bake for 30 minutes. Remove the cover and bake for 10-15 minutes or until crisp and golden brown.

Makes 8 servings

Loft's Butter Crunch

Which was better, Loft’s Butter Crunch or Loft’s Parleys?For you young ones, those are the two iconic candies once sold by Loft’s, a candy company that went out of business in 1990. I’ve been in mourning ever since.Their Butter Crunch was always my …

Which was better, Loft’s Butter Crunch or Loft’s Parleys?

For you young ones, those are the two iconic candies once sold by Loft’s, a candy company that went out of business in 1990. I’ve been in mourning ever since.

Their Butter Crunch was always my favorite. My brother insisted that the better choice was the Parley, a giant milk chocolate cigar looking thing with soft nougaty stuff inside.

Parleys were okay but Loft’s Butter Crunch was incomparable. The toffee was thick and brittle. It snapped when you broke it. The chocolate layer wasn’t overly thick so it didn’t detract from the candy part. And the nuts on the outside were tiny and soft, a sensational contrast to the velvety-tender chocolate and the crunchy center.

As well balanced as a dinner straight out of the government’s food pyramid.

I have tried for years to find a Butter Crunch as good as Loft’s, to no avail. There are fancier ones, made with single-estate chocolate or 70% cocoa chocolate. Some really expensive stuff and others from mass producers. Nothing comes close. I will grant you that Loft’s probably didn’t use great chocolate. It wasn’t your most upscale store. It sold modestly priced candies.

It’s just that their Butter Crunch was the best I ever ate.

When I was pregnant with my older daughter I refrained from sweets, to keep my weight at a decent level. But right after she was born I polished off the 2 boxes of Loft’s Butter Crunch that someone brought to me as a gift.

I’ve been experimenting making my own version lately. I made the ones in the photo yesterday to bring as a dinner gift this evening. These are good, so I’m posting the recipe. If you make them with milk chocolate and in a smaller cake pan (8”x8”) they’ll taste like Loft’s. Otherwise use dark chocolate of your choosing and use the larger pan — most people like the crunch part thinner than I do.


Butter Crunch

1 cup butter

3/4 cup sugar

1/4 teaspoon salt

2 tablespoons light corn syrup

2 tablespoons water

9 ounces semisweet chocolate, chopped (1-1/2 cups chocolate chips)

3/4 cup chopped lightly toasted almonds

Lightly butter a 9”x13” sheet cake pan. Place the butter, sugar, salt, corn syrup and water into a deep saucepan. Cook over medium heat, stirring constantly with a wooden spoon until the mixture starts to bubble. Continue to cook, stirring occasionally, until the mixture is golden brown (about 7-8 minutes) or until a candy thermometer reads 280 degrees. Pour the mixture into the prepared pan and spread it out evenly. Immediately sprinkle the chocolate on top. Let it melt briefly, then use a spatula or the back of a large spoon to spread the chocolate evenly over the candy. Keep spreading until the chocolate is completely melted and smooth. Sprinkle the nuts on top and press them in lightly. Let cool until the chocolate is firm and set, about 2 hours. Break into pieces. Makes about 1-1/4 pounds

One Bowl Chocolate Cake with Fudge Frosting

image.jpg

Today is National Chocolate Cake Day. And also a snow day for a lot of us (we got at least another 14-inch dump of snow over the night and into the morning). I have to say, I resent a nighttime snow fall because I like watching the flakes come down. It’s so soft and quiet and makes me feel cozy and safe inside. When I woke up this morning it was all over, but for the plowing.

But I digress. It is National Chocolate Cake Day. A good day all around to make a dark, luscious, tender cake to enjoy while also maybe taking a snow day. It’s a good dessert for Valentine’s Day too. Or anytime really.

Here’s a cake I’ve been making ever since I was 12 years old, when I baked this for my own Bat Mitzvah celebration. I’ve tried dozens of different chocolate cake recipes over the years and haven’t found one I like better. And it’s easy to make too.

So, until I find a better cake, here’s my recipe for:

One Bowl Chocolate Cake with Fudge Frosting

  • 2 cups cake flour

  • 1-1/2 cups sugar

  • 2/3 cup unsweetened cocoa

  • 1-1/2 teaspoons baking soda

  • 1 teaspoon salt

  • 1-1/2 cups buttermilk

  • 1/2 cup vegetable shortening

  • 2 large eggs

  • 1-1/2 teaspoons vanilla extract

Preheat the oven to 350 degrees. Lightly grease 2 9-inch cake pans. Sift the flour, sugar, cocoa, baking soda and salt together into the bowl of an electric mixer (or large bowl for use with a hand mixer). Add the buttermilk and shortening and beat the ingredients at medium speed for about 2 minutes, scraping down the sides of the bowl occasionally. Add the eggs and vanilla extract and beat the ingredients for another 2 minutes, scraping down the sides of the bowl occasionally. Pour the batter into the prepared pans. Bake for 30-35 minutes or until a cake tester inserted into the center comes out clean. Let the cake layers cool in the pans for 10 minutes, then invert onto a cake rack to cool completely. Frost the layer and outside of the cake with the fudge frosting. Refrigerate leftovers.

Makes one 9-inch cake

Fudge Frosting

  • 12 ounces semisweet chocolate

  • 1 cup dairy sour cream

  • pinch of salt

  • 1 teaspoon vanilla extract

Melt the chocolate in the top part of a double boiler set over barely simmering water. When the chocolate has melted, remove the top pan from the bottom part of the double boiler. Add the sour cream, salt and vanilla extract to the chocolate and beat the ingredients vigorously with a whisk to blend them completely into a smooth frosting. Let cool for a few minutes, until it has a spreading consistency. Use between layers and for outside of the cake.

The Hallowe'en "Season"

Has anyone else noticed that Hallowe’en is no longer a “day” but a whole “season?” And it starts just after Labor Day and everywhere you go there are window displays complete with ghosts and witches, spiders, skeletons and pumpkins. You can buy any kind of costume, from princesses to vampires.

And the candy! TONS of it. In my local supermarkets the Hallowe’en candy takes up more space than boxed cereal. And that is saying something!

If people are actually buying all this stuff our economy must be in better shape than we think it is.

Hallowe’en was much simpler when I was a kid. I hate to sound like an old codger, but back in the day if we went out trick-or-treating it was during the afternoon and we went to just a few neighbors, who would give us some homemade cookies.

Imagine that.

Most of the time we had a family Hallowe’en “party” (that meant my brothers and me and sometimes my cousin Leslie) at home.

My Dad would put coins in apples, put the apples in a huge bowl filled with water and we would dunk our faces in and try to bite an apple (and get to keep the coin). Sometimes he would tie the coin-stuffed apples to a string and we would have to jump up to bite them.

It was fun. And always followed by roasted marshmallows and my father’s fabulous hot chocolate.

Those were good days and warm, terrific, safe and fun Hallowe’ens.

Here’s his recipe. He made it with whole milk, but use what you want.

My Dad’s Fabulous Hot Chocolate

  • 2 cups milk

  • 4 regular size marshmallows

  • 3 tablespoons unsweetened cocoa powder

  • 2 tablespoons sugar

  • pinch of salt

  • 3 tablespoons very hot or boiling water

  • 3/4 teaspoon vanilla extract

Heat the milk with 2 of the marshmallows over medium heat until near-boiling (the marshmallows should be melted or almost completely melted). While the milk is heating, mix the cocoa powder, sugar and salt together in a bowl. Pour in the hot water and stir ingredients to form a paste. When the milk is ready, add the cocoa paste and vanilla extract to the milk and stir to combine ingredients. Pour into 2 cups OR, for better results, whirl the mixture in a blender, then pour into 2 cups. Add one marshmallow to each cup.

Makes 2

Old Fashioned Stuffed Cabbage

For me, Stuffed Cabbage is like hot dogs, blooming onions and caramel corn. Foods I love to eat but don’t, except for once a year because once I take that first bite I over indulge and stuff myself and then feel awful the next day.

Right now is Stuffed Cabbage time.

I never actually tasted stuffed cabbage until after I was married. It was something the women in my husband Ed’s family would cook. My grandmother made Stuffed Grape Leaves, which are similar, but the leaves are tangier and her sauce more sour than the typical one for Stuffed Cabbage.

Over the years I tried to develop a recipe that Ed would like and later, would appeal to my sons-in-law, who like the dish sweeter than I was used to. This year I got it right, according to everyone in the extended family, and that’s saying a lot because we are an opinionated bunch.

Here’s the recipe:

Stuffed Cabbage

  • 1 large head of green cabbage
  • 2 pounds ground beef
  • 1 medium onion, grated
  • 1 large egg
  • 1/4 cup raw white rice
  • 2 tablespoons matzo meal or plain bread crumbs
  • salt and freshly ground black pepper to taste
  • 2 tablespoons vegetable oil
  • 1 large onion, finely chopped
  • 1 cup brown sugar
  • 1 12-ounce bottle chili sauce
  • 1/2 cup fresh lemon juice
  • 1/2 cup raisins

Preheat the oven to 350 degrees F. Bring a large pot half filled with water to a boil. Cut out the hard center cabbage core. Remove the large cabbage leaves. Place the cabbage leaves plus the smaller remaining cabbage in the boiling water. Cook the cabbage leaves for about 3 minutes, or until they wilt. Cook the remaining cabbage core for 3-5 more minutes, or until you can easily remove the leaves. Cut off the hard stem portions from the large leaves so that they can be rolled easily. Set the leaves aside.

ALTERNATELY: if you plan ahead you can freeze the entire head of cabbage for 24 hours (or more). Thaw the cabbage and the leaves will already be wilted and you can avoid cooking them.

In a large bowl, mix the ground beef, grated onion, egg, rice, matzo meal and salt and pepper to taste. Place a mound of this mixture in the center of each leaf (more on the larger leaves of course). Enclose the meat by wrapping the cabbage leaves, envelope style. Place the stuffed cabbage leaves, seam side down, in deep baking dishes. (I separate the large rolls and smaller ones.)

Heat the vegetable oil in a saute pan over medium heat. Add the onion and cook for 4-5 minutes or until softened. Stir in the brown sugar, chili sauce, lemon juice and raisins and cook for 3-4 minutes. Pour the sauce over the cabbage rolls. Cover the pan. Bake for 2 hours (or, to cook ahead, bake for one hour, freeze, thaw and bake for an additional hour).

Makes 18-24

Roasted Chicken with Orange, Lemon and Ginger

Roasted Chicken with Orange, Lemon and GingerToday I gave a private cooking lesson and one of the foods I taught was roasted chicken. A long time ago I read that if you know how to roast a chicken you can cook a delicious dinner anytime.This was del…

Roasted Chicken with Orange, Lemon and Ginger

Today I gave a private cooking lesson and one of the foods I taught was roasted chicken. A long time ago I read that if you know how to roast a chicken you can cook a delicious dinner anytime.

This was delicious. It had a refreshing ginger-citrus-honey coating and it came out glossy and dark-skinned and crispy. The pan juices were sweet and tangy all at the same time. There was enough liquid for the meat and also for the rice I made as an accompaniment (roasted asparagus with Balsamic vinegar too).

Here’s the recipe:

Roasted Chicken with Orange, Lemon and Ginger

  • 1 roasting chicken, about 4-6 pounds

  • 1 orange

  • 1 lemon

  • 1 large scallion, finely chopped

  • 2 tablespoons finely chopped parsley

  • 1 tablespoon finely chopped fresh ginger

  • 2 tablespoons softened margarine, or use coconut oil

  • 2 tablespoons honey

  • salt and freshly ground black pepper

  • 1/2 cup orange juice

  • 2 tablespoons lemon juice

Preheat the oven to 400 degrees. Rinse and dry the chicken; remove pinfeathers; remove the giblets. Grate the orange and lemon rinds into a bowl. Halve the fruit and squeeze the orange to extract the juice; add more if necessary to make the 1/2 cup. Squeeze the lemon to make the 2 tablespoons of juice. Mix the orange and lemon juices together and set aside. Place the fruit inside the cavity of the chicken. To the bowl of citrus peels, add the scallion, parsley, ginger, margarine and honey. Mix the ingredients until well blended. Rub onto all sides of the chicken. Sprinkle with salt and pepper. Place the chicken breast side down on a rack in a roasting pan. Roast for 15 minutes. Reduce the heat to 350 degrees. Roast another 15 minutes. Pour the reserved juices over the chicken and roast another 15 minutes. Turn chicken breast side up. Continue to roast, basting occasionally, for another 45-60 minutes or until fully cooked (a meat thermometer inserted into the thickest part of the breast reads 160 degrees. Remove the chicken to a carving board and let rest for 15 minutes before carving. Serve with the pan juices. Makes 6 servings