parve

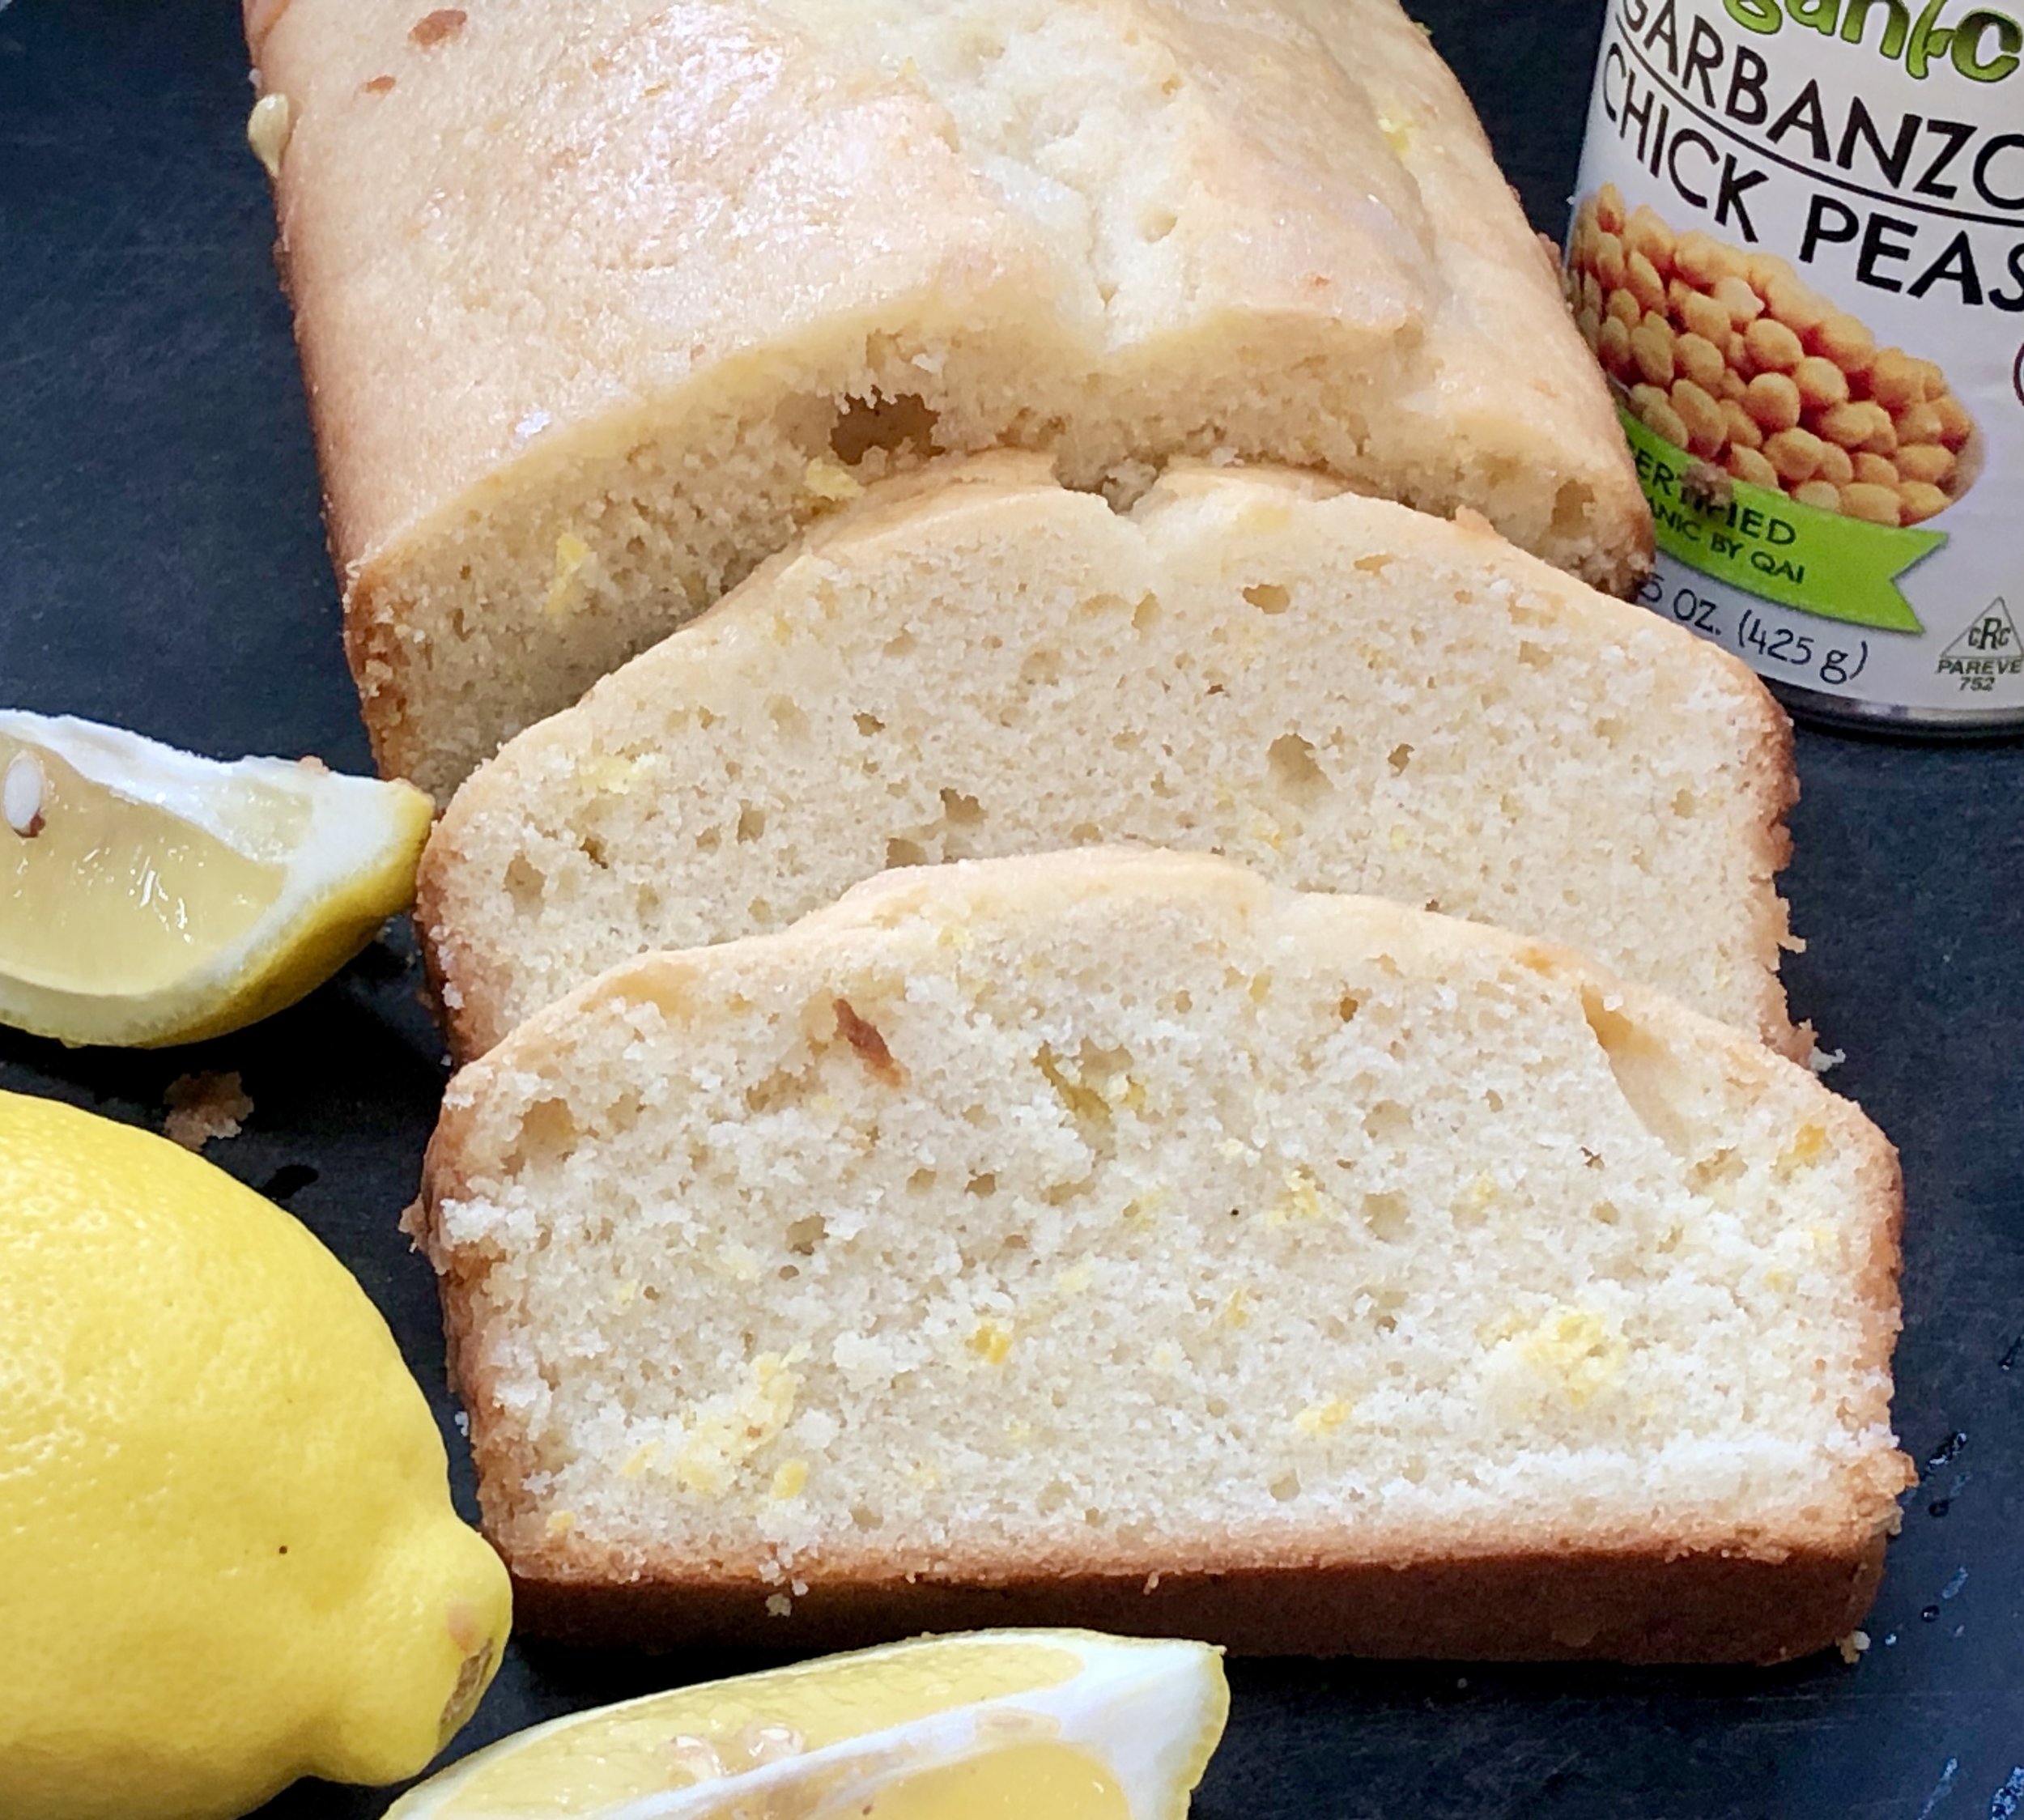
Lemon Aquafaba Bread

fullsizeoutput_9516.jpeg

At this particular time, when we are going through a world-wide crisis, a terrifying pandemic, it can be therapeutic for many of us to cook and bake.

I am one of those people.

I have plenty of ingredients to cook with because over the years I’ve learned to keep shelf-stable foods on hand in case I can’t shop: ingredients such as canned beans, rice, frozen veggies, dried fruit, canned or packaged milk, and so on.

Equally important for me is — don’t waste food (I’ve talked about that often). I believe that it is important to use all resources — “food forage” as my colleague Susan Barocas calls it. Don’t throw out any ingredient that’s useable, including leftovers.

With all this in mind I offer this lemon bread.

I have lots of lemons in my crisper because of an article I am writing. I’ve developed the recipe for that, so I need to make use of the extra lemons.

I also needed to do something with the liquid leftover from a can of chick peas that I opened for a salad. Chick pea liquid is incredibly useful.

In case you aren’t familiar with this leftover liquid (also from canned beans), it is called aquafaba and it can be used in place of eggs. That makes it an ideal ingredient for vegans and anyone who is allergic to or otherwise can’t eat eggs.

When you beat chick pea liquid with a whisk, it traps air like eggs do, so baked goods have both structure and also a light, tender crumb.

I am trying not to use too many fresh eggs that I might need for meals, so I used the aquafaba instead to make this lemon bread.

Dee-lish!

To get the most out of the liquid in a can of chick peas, be sure to scrape the residue at the bottom of the can. For best results, reduce the liquid slowly over medium-low heat until it becomes the consistency of egg white. Use about 3 tablespoons of the liquid in place of each egg. 

For another delicious recipe (carrot bread) using aquafaba, click here.

Lemon Aquafaba Bread

  • 6 tablespoons aquafaba

  • 4 tablespoons coconut oil

  • 3/4 cup sugar

  • 1 tablespoon finely grated fresh lemon peel

  • 2 cups all-purpose flour

  • 2-1/2 teaspoons baking powder

  • 3/4 teaspoon salt

  • 1 cup coconut milk

  • 1/4 cup fresh lemon juice

  • 1-1/2 tablespoons sugar

Preheat the oven to 350 degrees. Grease a 9”x5”x3” loaf pan. If the aquafaba seems thin, boil it for a few minutes to thicken slightly to the consistency of egg white. Set aside to cool. In the bowl of an electric mixer, beat the coconut oil and 3/4 cup sugar at medium speed for 1-2 minutes or until well combined. Add the lemon peel and aquafaba and blend them in. Mix the flour, baking powder and salt in a small bowl. Add the dry ingredients to the creamed mixture in thirds, alternating with the coconut milk. Beat to blend the ingredients to a smooth, even batter. Spoon the batter into the prepared pan. Bake for 50-55 minutes or until a cake tester inserted into the center comes out clean. While the bread is baking, combine the lemon juice and 1-1/2 tablespoons sugar in a small saucepan and cook over medium heat for 1-2 minutes or until the sugar has dissolved. When the bread comes out of the oven, pour the lemon juice mixture on top. Cool the bread in the pan for 10 minutes. Invert onto a cake rack to cool completely.

Makes one bread
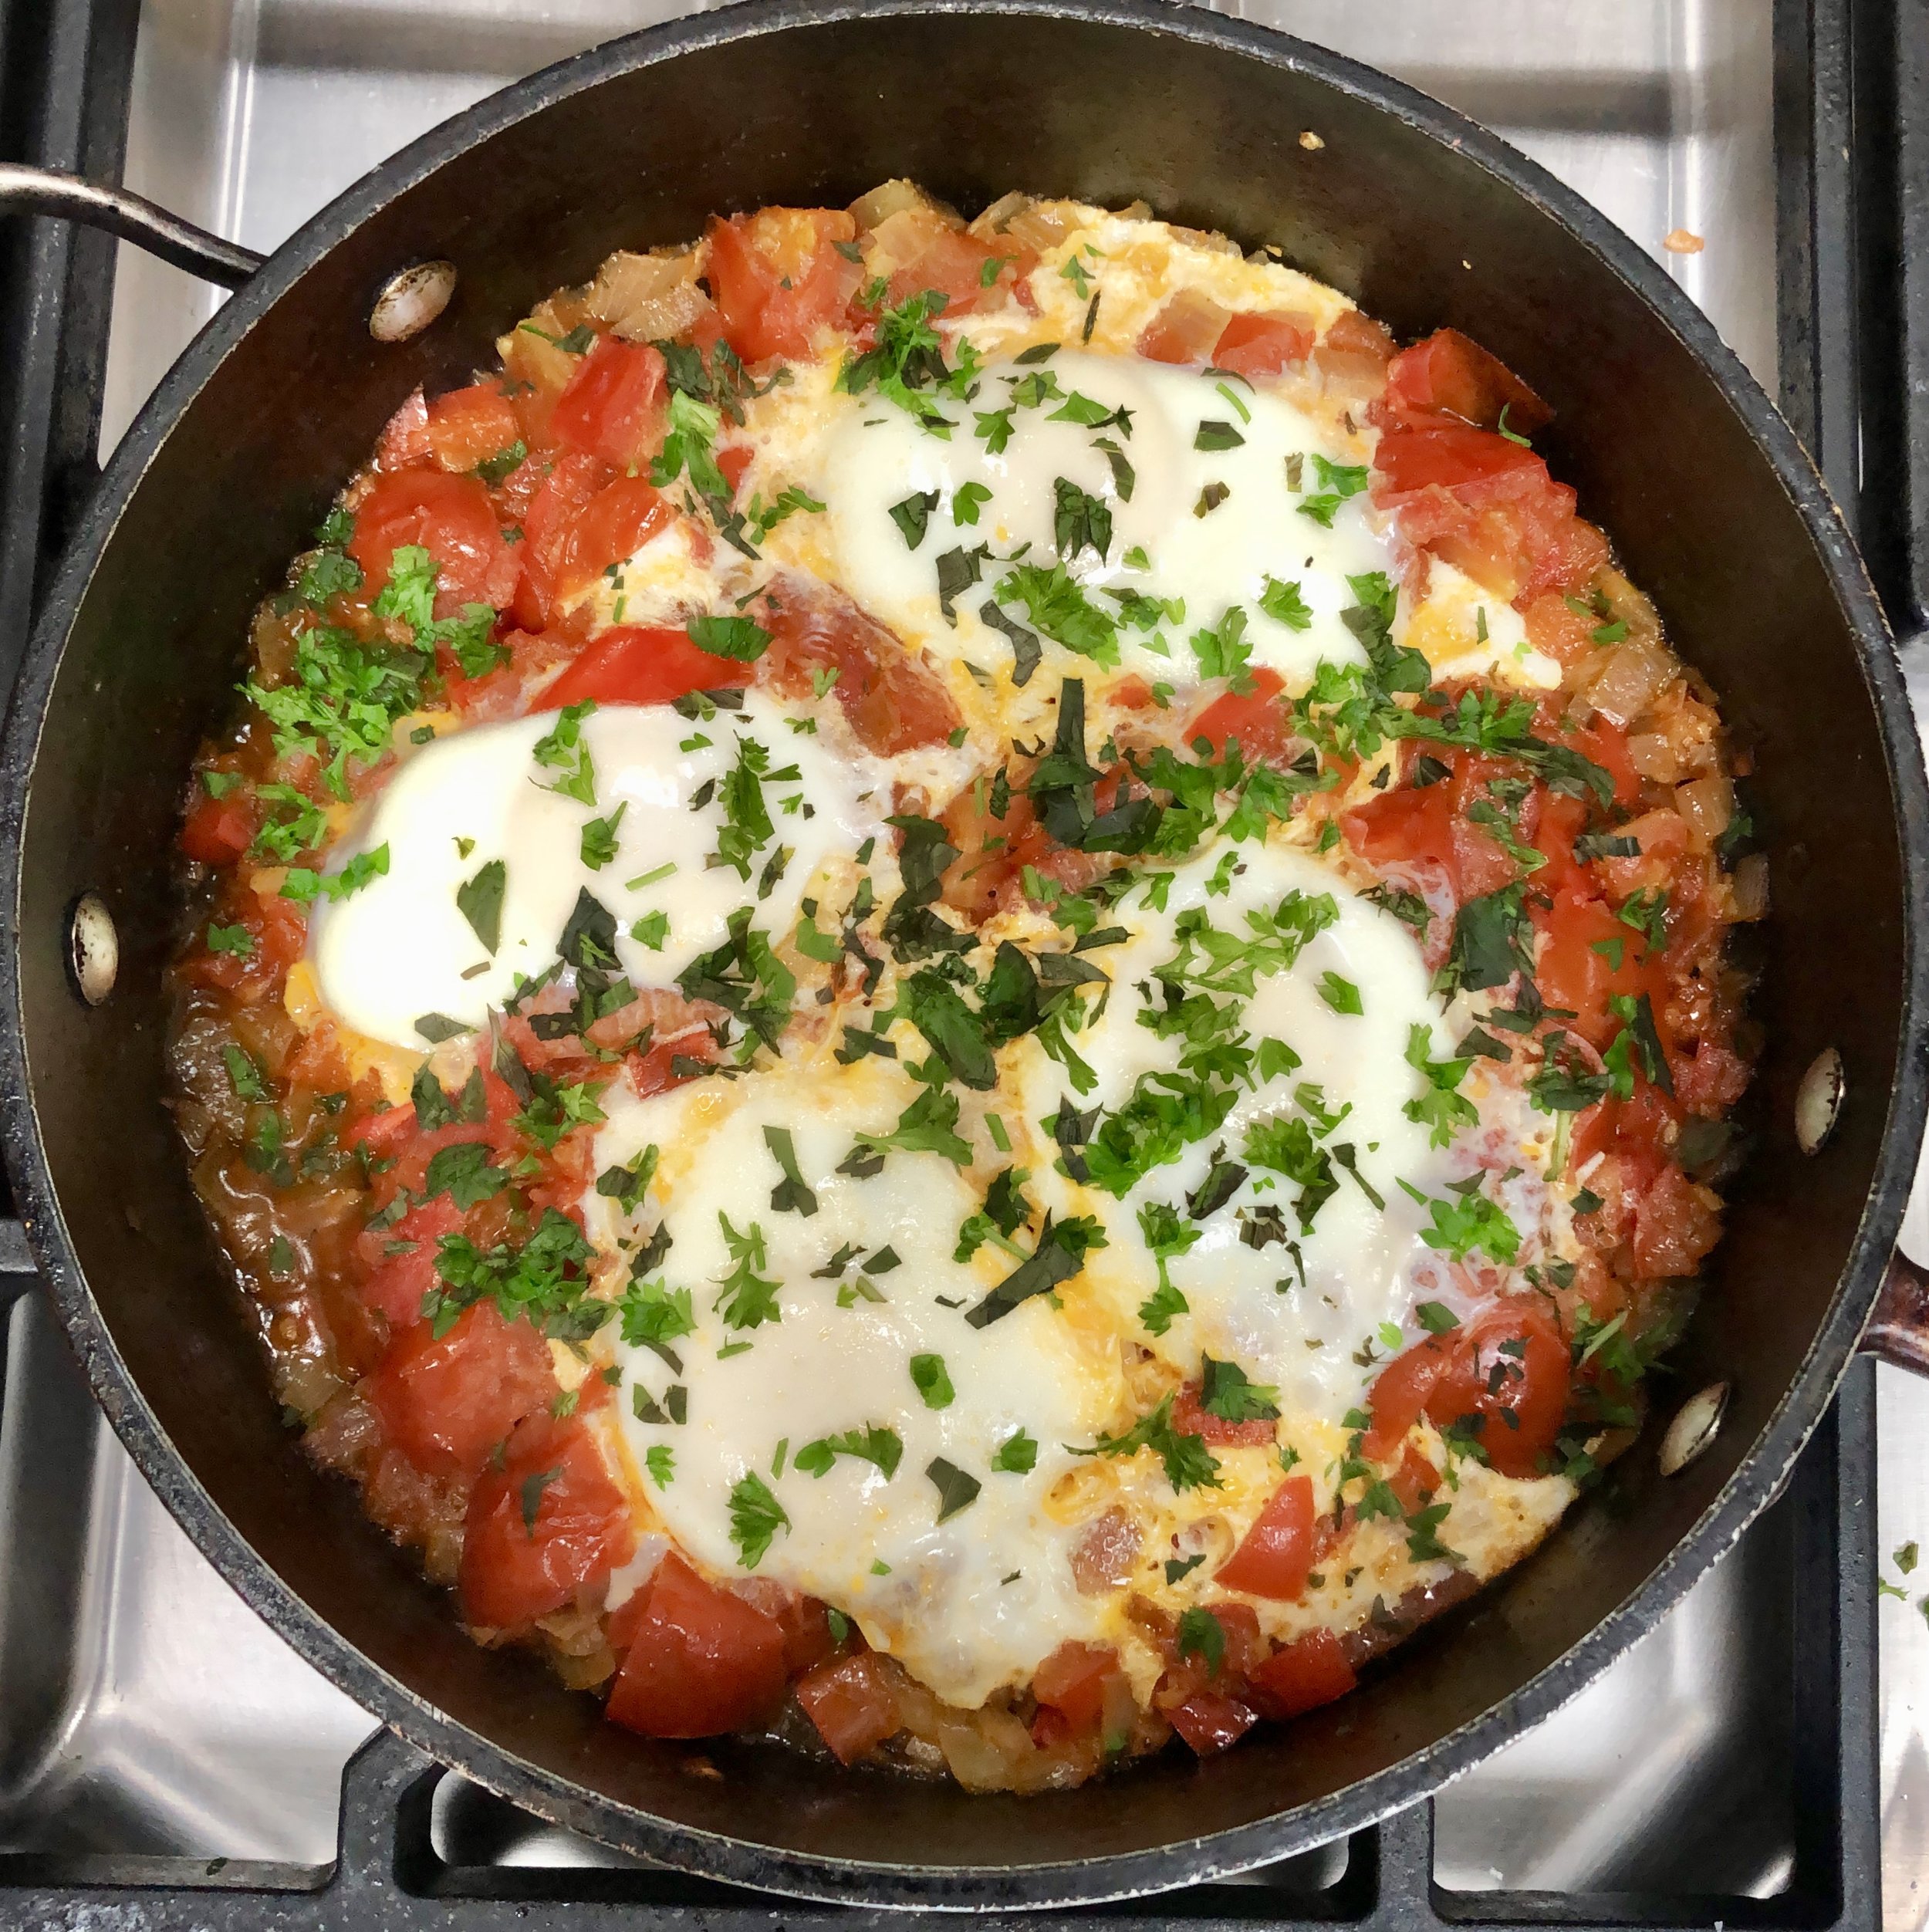
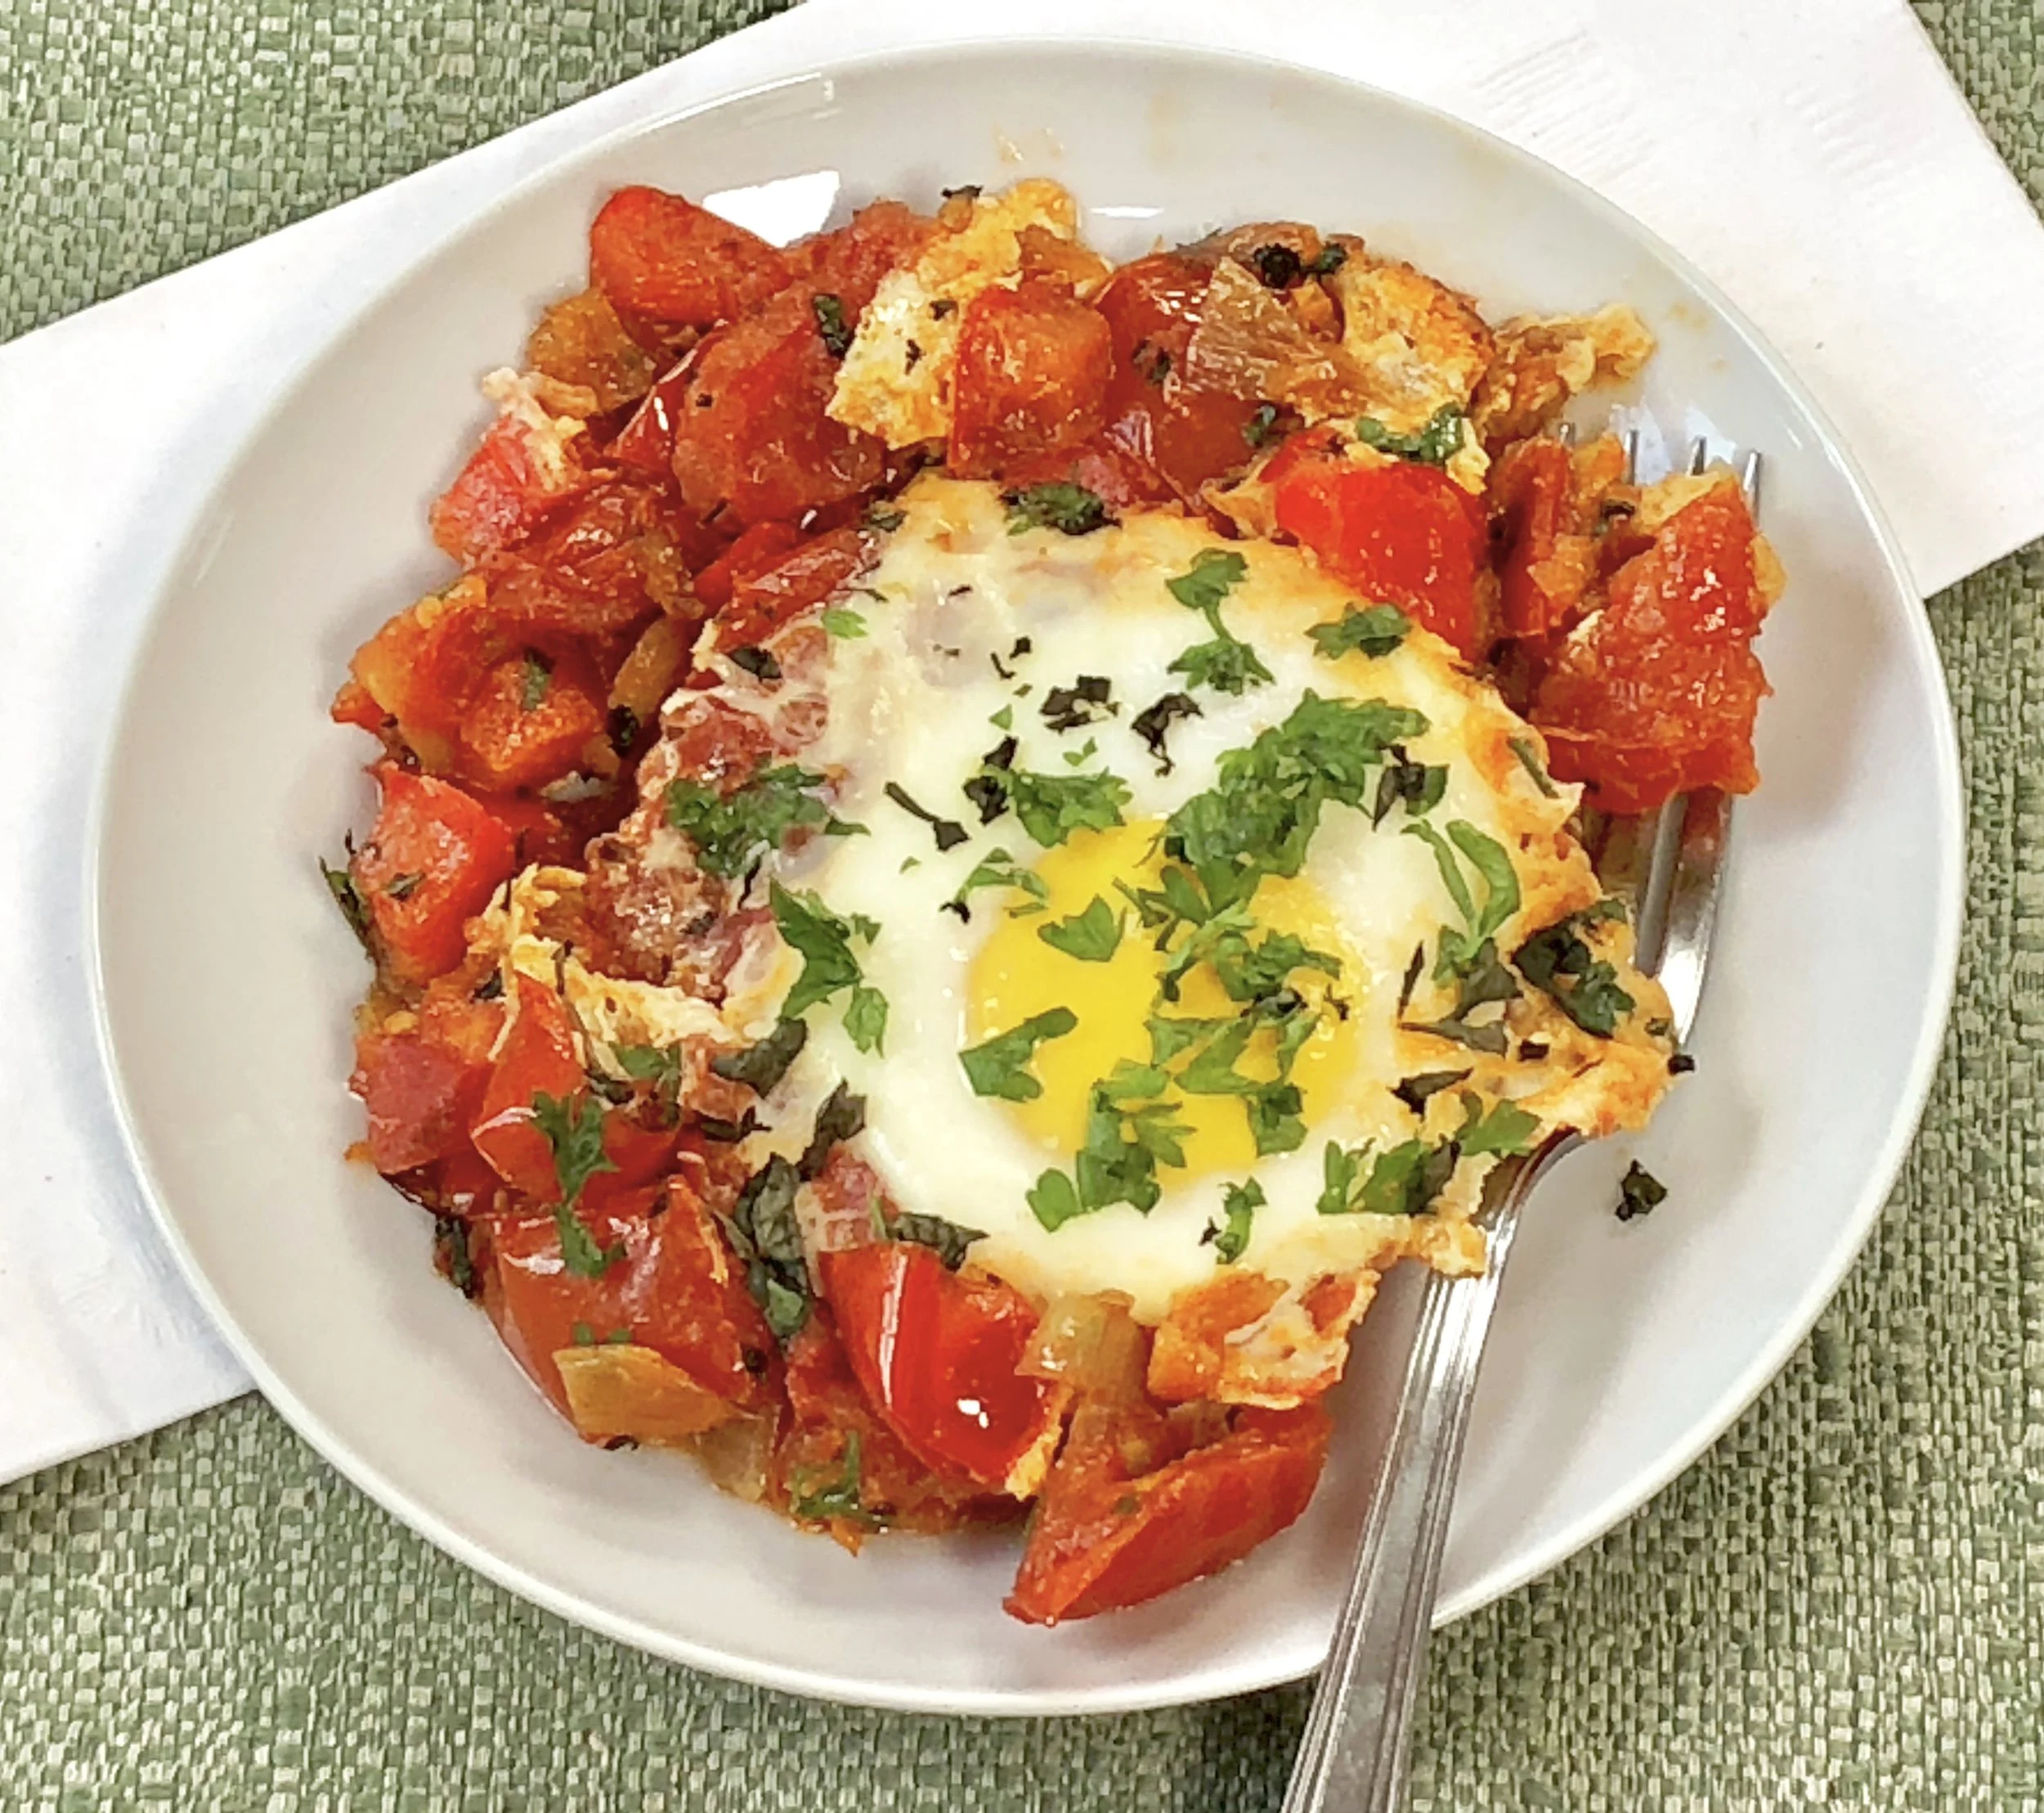
India-style Shakshuka

fullsizeoutput_abe6.jpeg
fullsizeoutput_ac19.jpeg

We always have sleepover guests — my cousins — for New Year’s Eve. The next morning it’s always the same brunch: smoked fish, herrings, whitefish salad, bagels and coffee.

Perfect.

Except this year, for a variety of reasons, we have to consider less-salty meals.

I decided on a complete change. Something delicious, different and needs no extra salt because the seasonings are so bountiful and flavorful (the recipe says salt to taste, which can be zero).

I’ve made this for dinner and brunch. Works either way. Add a hunk of bread (naan if possible).

May become a new tradition.

Happy New Year 2020.

India-style Shakshuka

  • 1/4 cup olive oil

  • 1 medium onion, chopped

  • 1 red bell pepper, deseeded and chopped

  • 1 small habanero, serrano or other chili pepper, deseeded and chopped

  • 1 large garlic clove, chopped

  • 2 teaspoons chopped fresh ginger

  • 8 plum tomatoes, coarsely chopped

  • 2 teaspoons curry powder

  • Salt to taste

  • 4-6 large eggs

  • 2 tablespoons chopped fresh mint

  • 1 tablespoon chopped fresh parsley

Heat the olive oil in a large sauté pan over medium heat. Add the onion, bell pepper and habanero peppers. Cook for 3-4 minutes or until softened slightly. Add the garlic and ginger and cook briefly. Add the tomatoes, curry powder and salt to taste. Stir, cover the pan, turn the heat to low and cook for about 10 minutes, stirring occasionally, or until vegetables are very soft and sauce-like. Crack the eggs into a small bowl one at a time then transfer each one next to the other over the vegetables. Cover the pan and cook for 4–5 minutes or until the eggs are set but yolks are still slightly runny. Sprinkle with mint and parsley. Serve each person an egg with some of the vegetables.

Makes 4-6 servings.


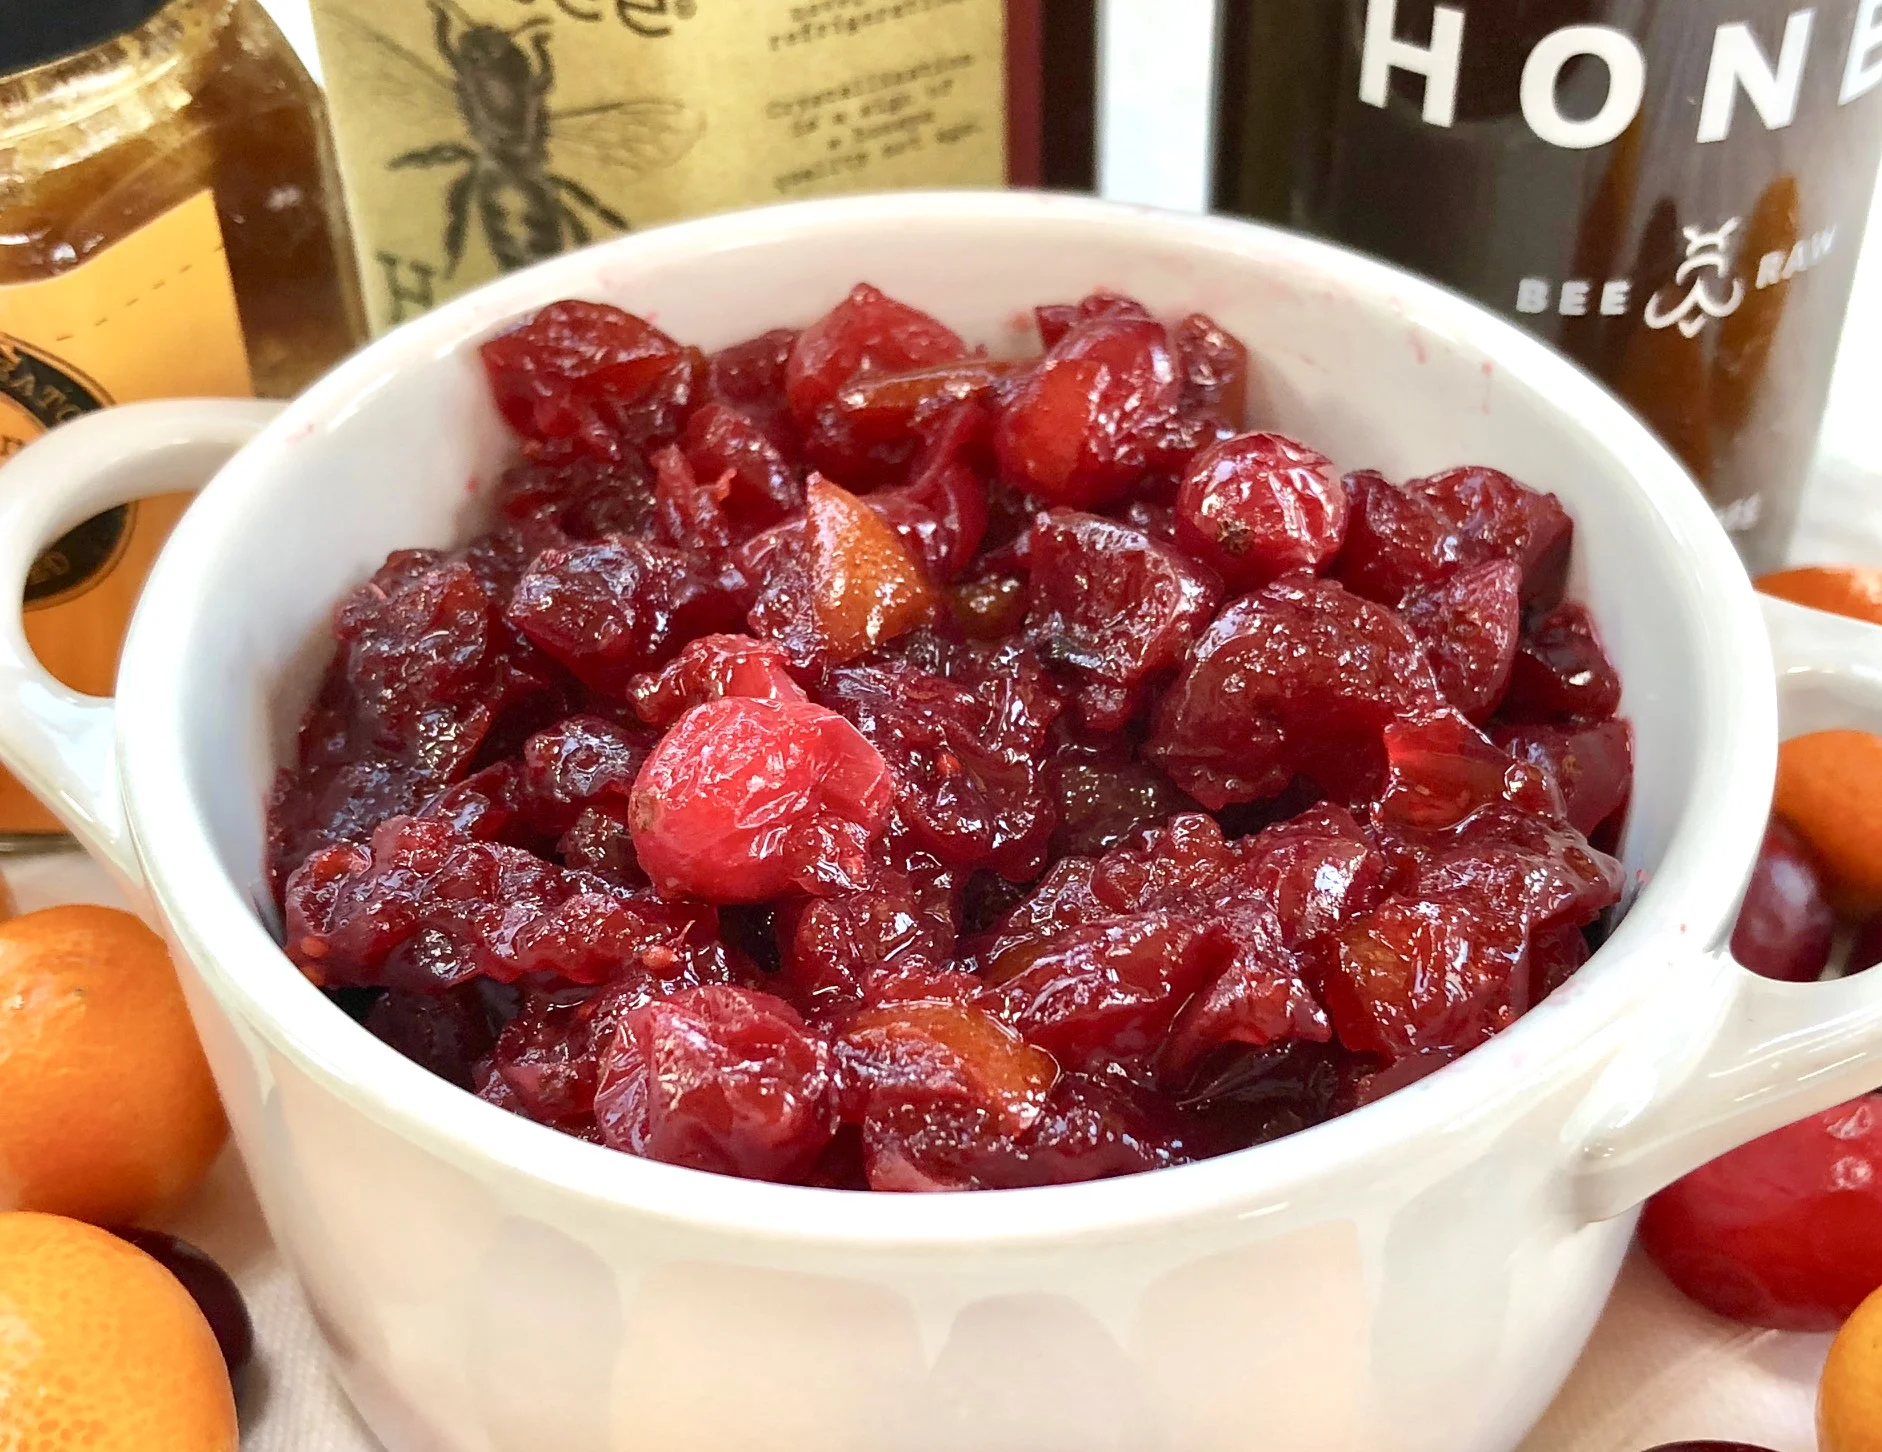
Cranberry Kumquat Conserve

fullsizeoutput_892d.jpeg

There are so many delicious “November foods.” Like sweet potatoes, pears, cranberries, persimmons and so on.

Not as many people know about kumquats though.

In case you don’t know what they are or haven’t used them, kumquats are a small citrus fruit. They look like oval mini-oranges.

They aren’t everybody’s taste. Kumquats are tart, so the flavor is something you love or hate immediately.

I love them. In fact, one of my favorite treats is candied (sugar coated) kumquats.

You can eat kumquats raw. Cut them into a salad — they’re especially good with greens or Brussels sprouts and a soft goat’s milk cheese.

But the pungent flavor mellows beautifully when cooked, so kumquats are especially wonderful in chutneys, relishes and preserves. If you need a pretty hors d’oeuvre that goes beyond ordinary for a party or New Year’s Eve guests, check out my mascarpone crisps with kumquat preserves.

The recipe here for cranberry conserve, is a really good option for Thanksgiving. This dish has several virtues:

1) it goes with turkey, so it’s perfect for Thanksgiving.

2) it’s quick and easy to prepare — about 30 minutes from start to finish.

3) it’s colorful, making it a festive addition to your holiday table.

4) it lasts for a week or so in the fridge, so you can make it ahead and also rely on leftovers.

5) best of all, it is really tasty.

Happy Thanksgiving.

Cranberry Kumquat Conserve

  • 3 cups fresh cranberries

  • 10-12 kumquats

  • 1/2 cup honey

  • 1/2 cup orange juice

Rinse the cranberries and place them in a saucepan. Cut the kumquats in half and remove the seeds. Chop the kumquats and add them to the cranberries. Add the honey and orange juice. Stir the ingredients and bring the liquid to a boil over high heat. Turn the heat to medium and simmer the ingredients for about 20 minutes, stirring occasionally, or until thick.

Makes about 2 cups

Bread Stuffing with Sour Cherries

edited.jpg

Every year I make at least two stuffings for Thanksgiving dinner. For old time’s sake one is usually my Mom's (Nana’s) barley-shape noodle "filling" or a sorghum-based version of that.

I just put one of those Nana ones in the freezer.

Once I made a fabulous Bread Stuffing with Figs and Hazelnuts. This year I want dinner to be completely nut-free though, so, maybe I’ll redo that one some other time.

I have prepared gluten-free stuffings for certain guests and once made one based on spelt bread.

A while ago a friend of mine gave me a jar of sour cherries, so I used some recently in an experiment to see if they would be tasty in a stuffing for a turkey dinner.

They were!

This recipe is versatile though. If you don’t want to buy a bottle of sour cherries, you can use grapes or fresh or dried cranberries.

Bread Stuffing with Sour Cherries

  • 3 tablespoons vegetable oil

  • 1 medium onion, chopped

  • 2 stalks celery, chopped

  • 2 medium apples, peeled, cored and chopped

  • 6 cups 1/2-inch diced bread

  • 1 cup sour cherries

  • 2 teaspoons grated orange peel

  • 1 teaspoon dried rosemary (1 tablespoon fresh, chopped rosemary)

  • 1 teaspoon dried thyme (1-1/2 teaspoons chopped, fresh thyme)

  • 1 cup chicken or vegetable stock

  • salt and freshly ground black pepper to taste

Preheat the oven to 350 degrees. Heat the vegetable oil in a sauté pan over medium heat. Add the onion, celery and apples and cook, stirring occasionally, for 3-4 minutes or until slightly softened. Add the bread cubes, cherries, orange peel, rosemary and thyme. Toss ingredients to distribute them evenly. Pour in the stock and sprinkle with salt and pepper. Toss the ingredients to moisten the bread. Spoon the stuffing into a casserole, cover the casserole and bake for 30 minutes. Remove the cover and bake for another 12-15 minutes.

Makes about 8 cups


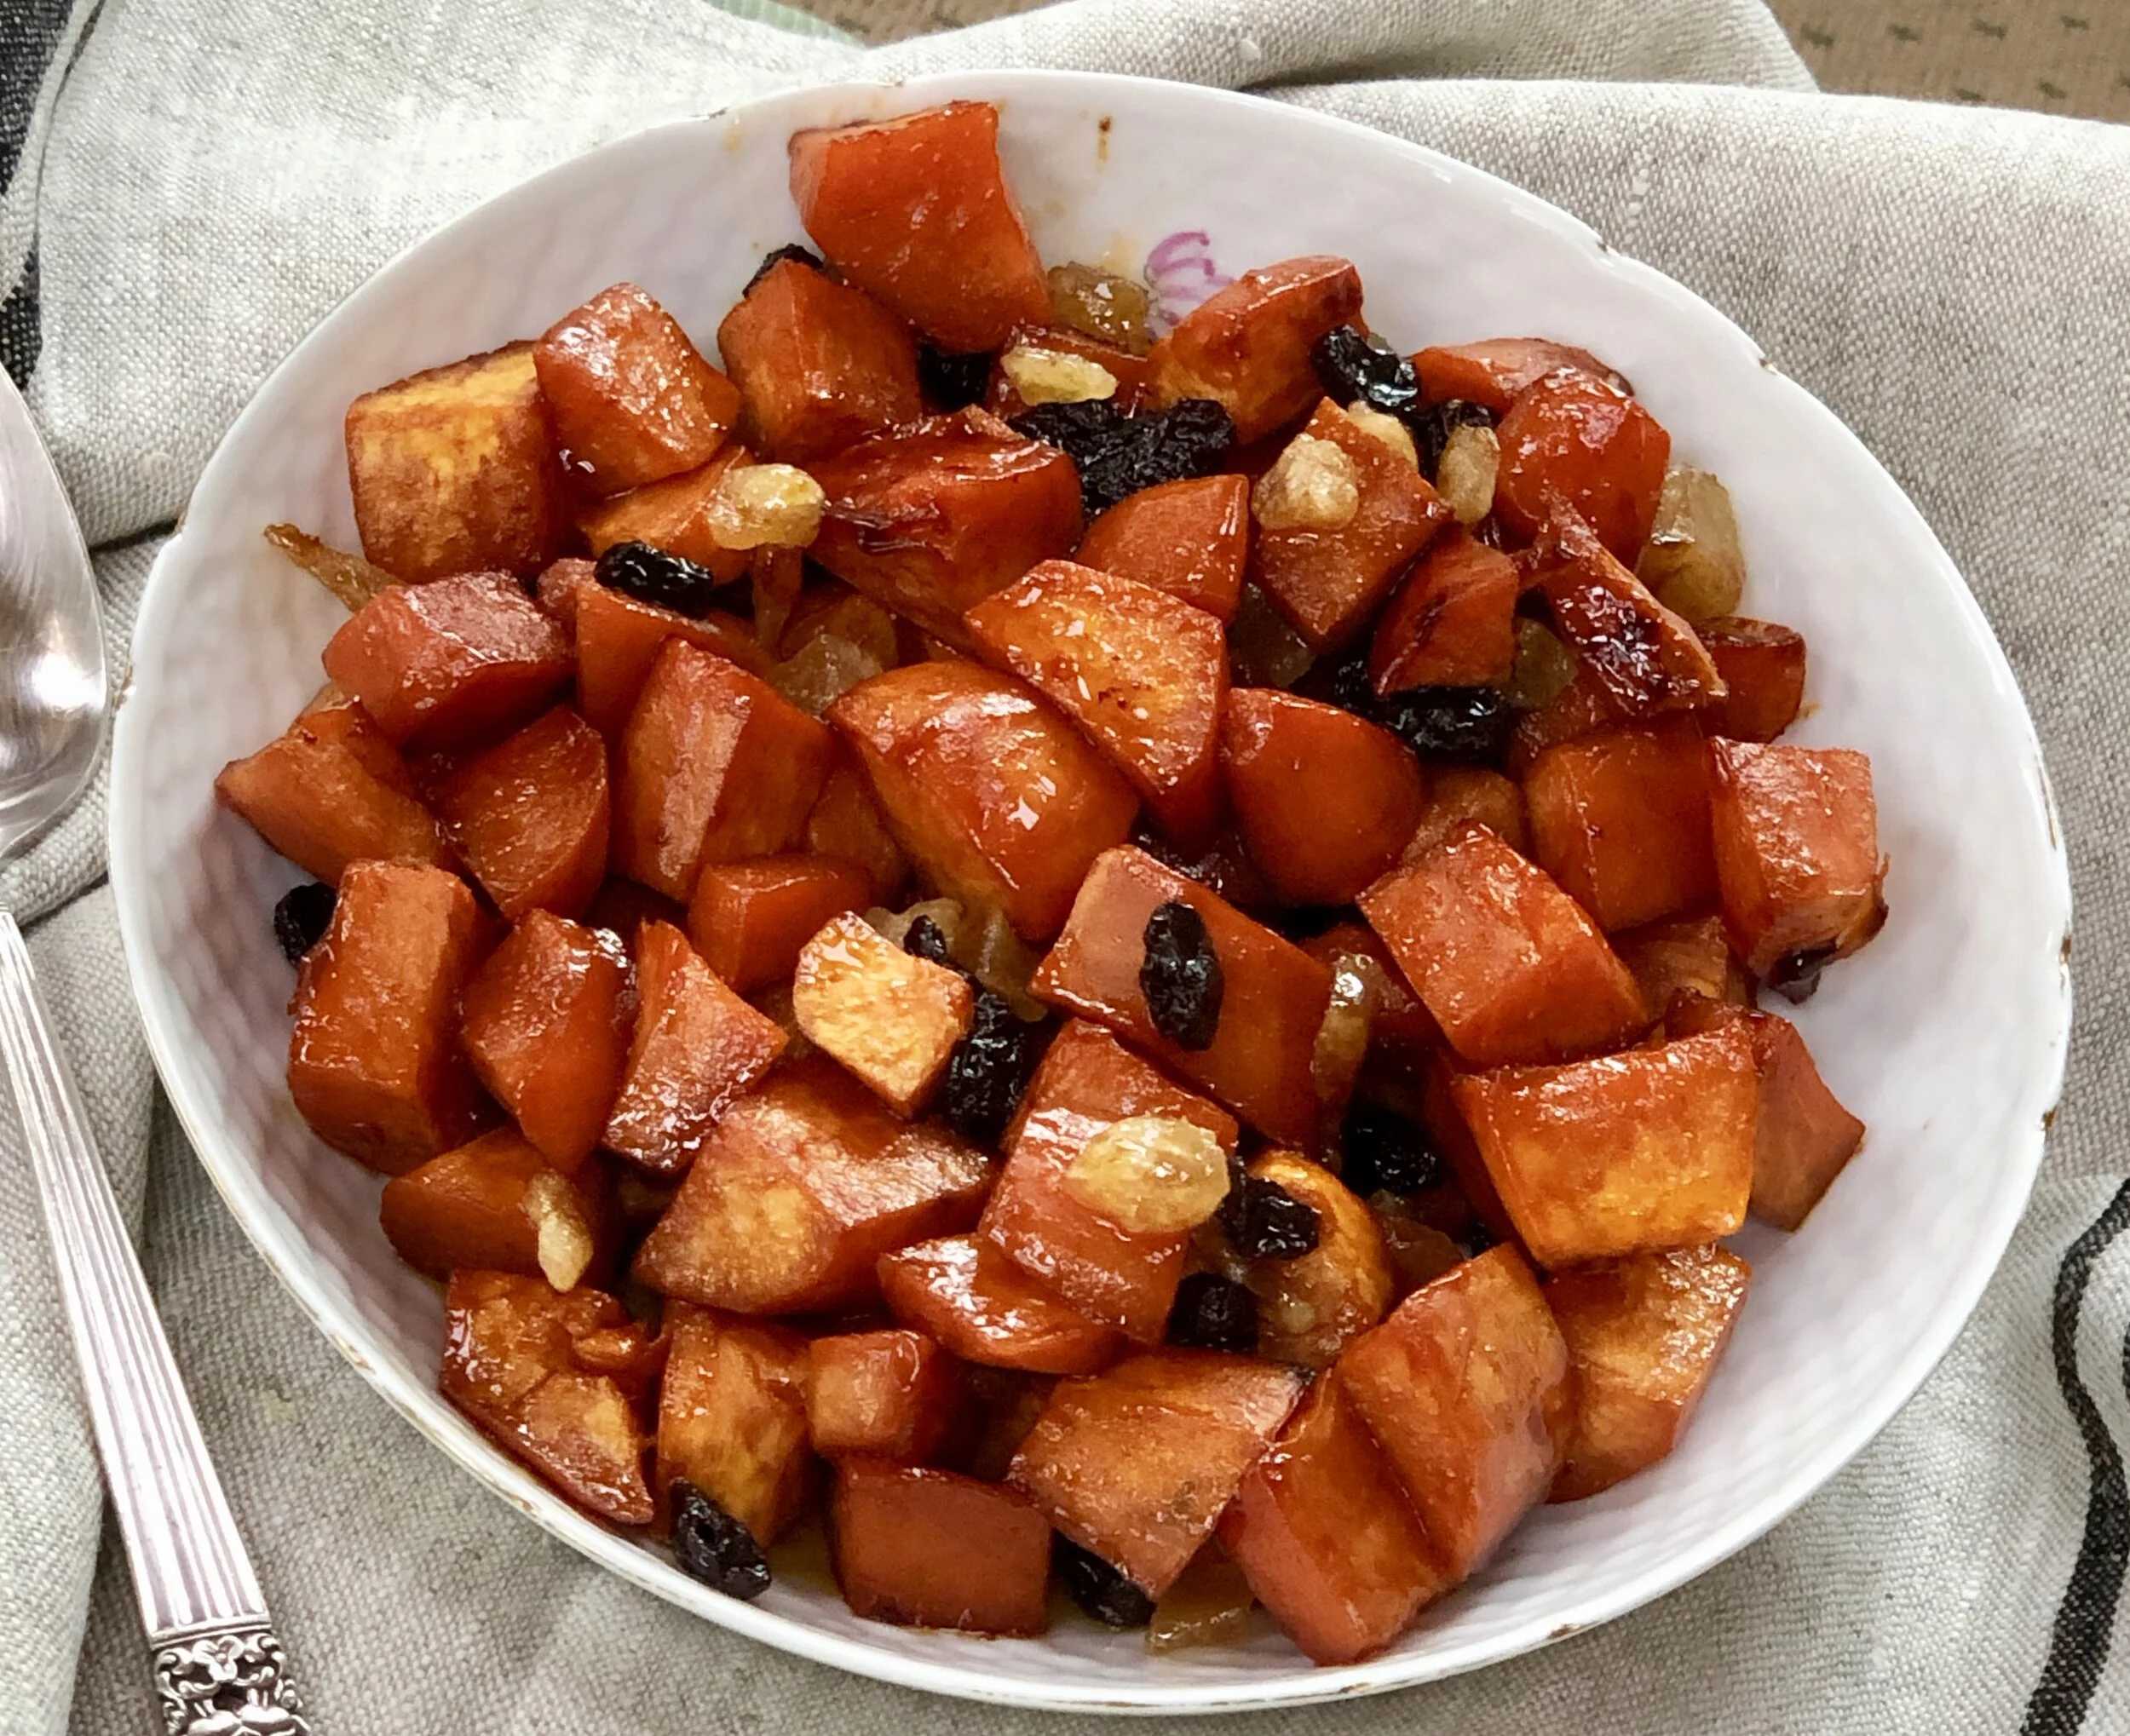
Sweet Potatoes with Raisins and Ginger

fullsizeoutput_b409.jpeg

Is it just me or does everyone else think that life goes from holiday to holiday?

Rosh Hashanah/Yom Kippur — Sukkot — weren’t they just a few days ago?

And now, Thanksgiving is coming. I already ordered a turkey. Already have my menu planned.

It includes this sweet potato dish which I served recently to much acclaim.

Bonus to this dish? You can prepare this ahead up to adding the raisins and ginger. How easy is that?

Sweet Potatoes with Raisins and Ginger

  • 3 medium sweet potatoes

  • 3 tablespoons vegetable oil

  • 3 tablespoons honey or maple syrup

  • cinnamon, salt

  • Cayenne pepper (or use Aleppo pepper), optional

  • 1/4 cup raisins

  • 1/4 cup chopped crystallized ginger

Preheat the oven to 425 degrees. Line a baking sheet with parchment paper. Peel the sweet potatoes, cut them into bite size pieces and place on the baking sheet. Heat the vegetable oil and honey together until warm and easy to combine; pour over the pieces and toss to coat them. Sprinkle lightly with cinnamon, salt and pepper if used. Roast for 14-15 minutes, turning the potatoes 2-3 times, or until softened. Add the raisins and crystallized ginger, toss and continue to bake for another 5-6 minutes or until the potatoes are crispy and tender..

Makes 4 servings

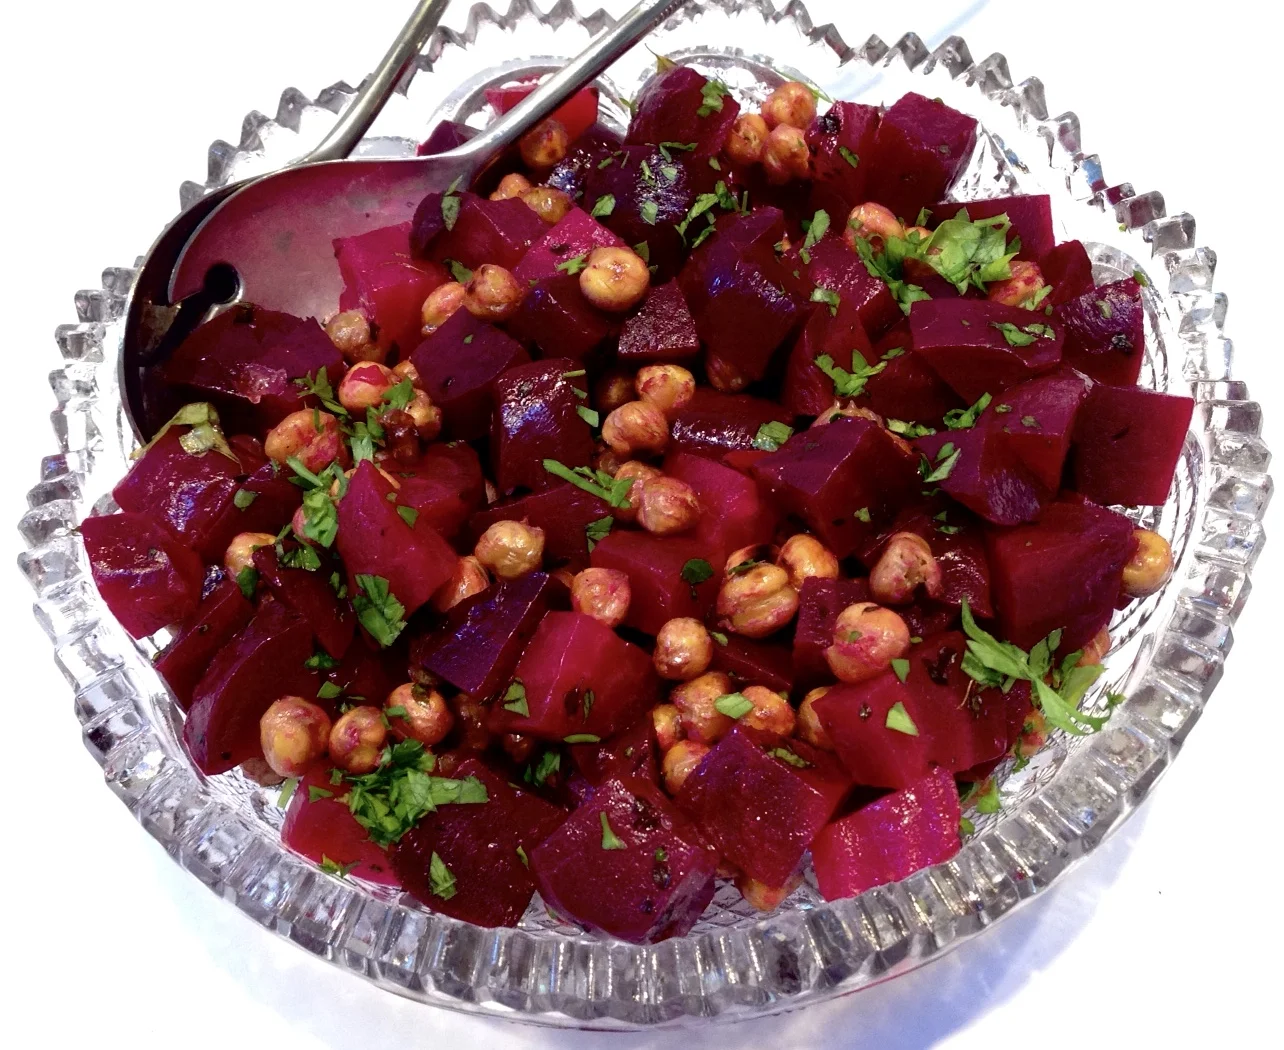
Beet and Chickpea Salad

fullsizeoutput_867c.jpeg

I realize beets are available throughout the year. We are a beet-loving family, so I buy them all the time. Throughout the year.

And yet, I still associate beets with autumn. In my memory, September, October, November — those months are the real “season” for harvesting beets. In fact, I remember them as an integral part of the meals during Jewish holidays.

Sukkot, the “harvest holiday” is a good time to include beets on the menu. Look for beets with the greens still attached — they are from a current harvest. They are sweeter and tastier. Lovely however you cook them, including this salad, which you can make ahead. Serve it at room temperature.

Beet and Chickpea Salad

  • 4 large beets

  • 1 15-ounce can chickpeas, drained and rinsed

  • 1 tablespoon olive oil

  • 2 teaspoons fresh thyme leaves

  • sea salt

  • 3 tablespoons olive oil

  • 3 tablespoons white wine vinegar

  • 2-3 tablespoons chopped fresh parsley

  • salt and freshly ground black pepper to taste

Preheat the oven to 450 degrees. Trim the beets, cutting away the greens, if any, and discarding any hard, fibrous parts of the stem. Wash and drain the greens and use them for other purposes. Scrub the beets, wrap them in aluminum foil and roast for 50-60 minutes or until they are tender. Peel the beets when they are cool enough to handle. Cut the beets into bite size pieces and place in a bowl. While the beets are cooking, place the chickpeas on a foil-lined baking sheet. Pour the one tablespoon olive oil on top and shake the pan to coat all the chickpeas. Sprinkle with thyme and sea salt to taste. Shake the pan again. Roast for 20 minutes, shaking the pan every 5 minutes or so, or until golden brown and crispy. Add the roasted chickpeas to the beets. Pour the remaining olive oil over the vegetables and toss, then pour in the white wine vinegar and toss again. Sprinkle with parsley and salt and pepper to taste. Let rest for 10-15 minutes before serving.

Makes 8 servings


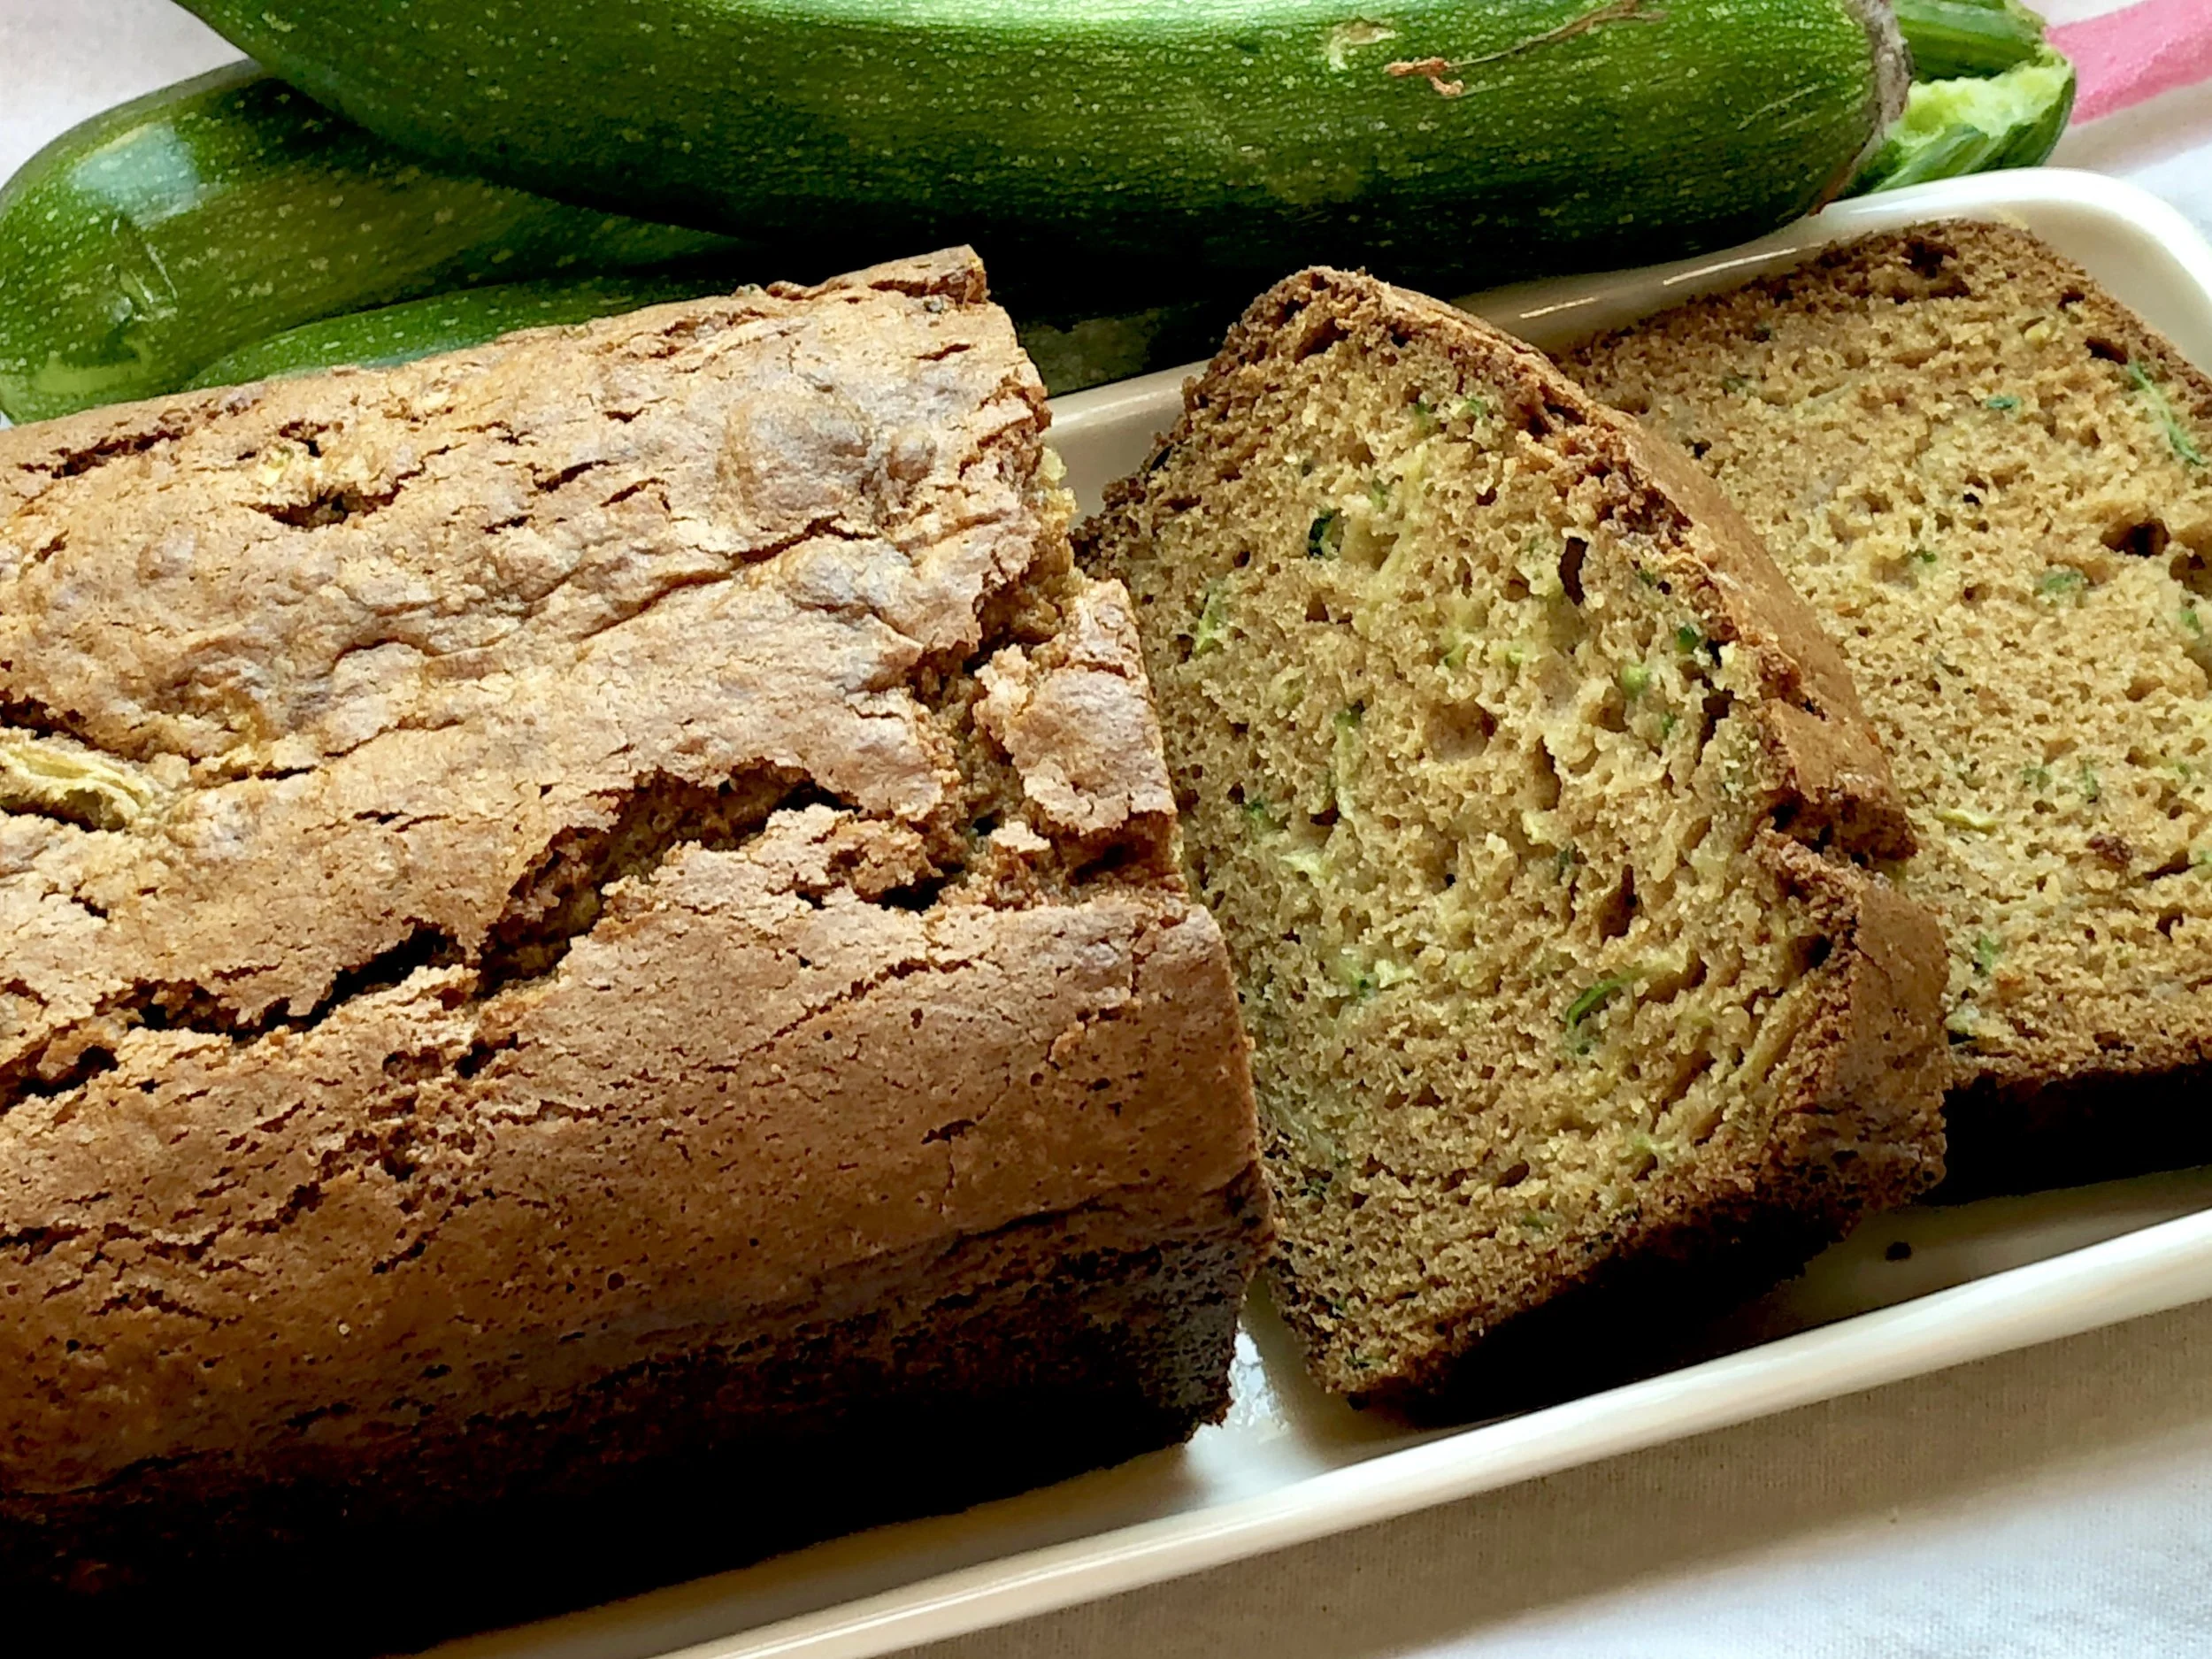
Zucchini Bread

fullsizeoutput_acf2.jpeg

When we were first married, Ed promised me 50 years. That was in 1969. We were young and 50 years seemed like a REALLY REALLY long time.

Grandparent stuff.

But here we are. A few months short of 50.

Wasn’t it yesterday that I fit into that long white dress?

We wanted to celebrate with two other couples, all close friends, who are also at 50.

But we didn’t want to have a big party. Not even an intimate dinner party for six. Although those are lovely, it seemed like the same-old, same-old. 50 years deserved something special.

So we decided to have a 150th Anniversary Afternoon Tea.

It was festive, fun and celebratory.

We started with champagne and tea sandwiches.

Then: scones, clotted cream and jams.

Finally, dessert: several kinds of cookies, Lemon Buttermilk Cake, Pumpkin Spice Cake and this: Zucchini Bread, (made with zucchinis from my garden!).

Just us 6. It was a good day.

We all talked about how amazing it is at how quickly 50 years go by.

Zucchini Bread

  • 2 cups all-purpose flour

  • 1/2 teaspoon cinnamon

  • 1/2 teaspoon nutmeg

  • 1-1/2 teaspoons baking soda

  • 3/4 teaspoon baking powder

  • 3/4 teaspoon salt

  • 3/4 cup brown sugar

  • 1/2 cup sugar

  • 2 large eggs

  • 1/2 cup applesauce

  • 1/4 cup vegetable oil

  • 1 teaspoon vanilla extract

  • 2 cups grated fresh zucchini

Preheat the oven to 350 degrees. Lightly grease a 9”x5”x3” loaf pan. Place the flour, cinnamon, nutmeg, baking soda, baking powder and salt in a bowl and whisk the ingredients until they are evenly distributed. Place the brown sugar, sugar, eggs, applesauce and vanilla extract in the bowl of an electric mixer (or use a hand mixer) and beat at medium speed for 2-3 minutes, until thoroughly blended. Add the flour mixture and stir just until blended. Fold in the zucchini. Spoon the batter into the prepared pan. Bake for 50-60 minutes or until golden brown and a cake tester inserted into the center comes out clean. Cool in the pan on a wire rack for 15 minutes. Invert the muffins onto the rack to cool completely.

Makes one loaf

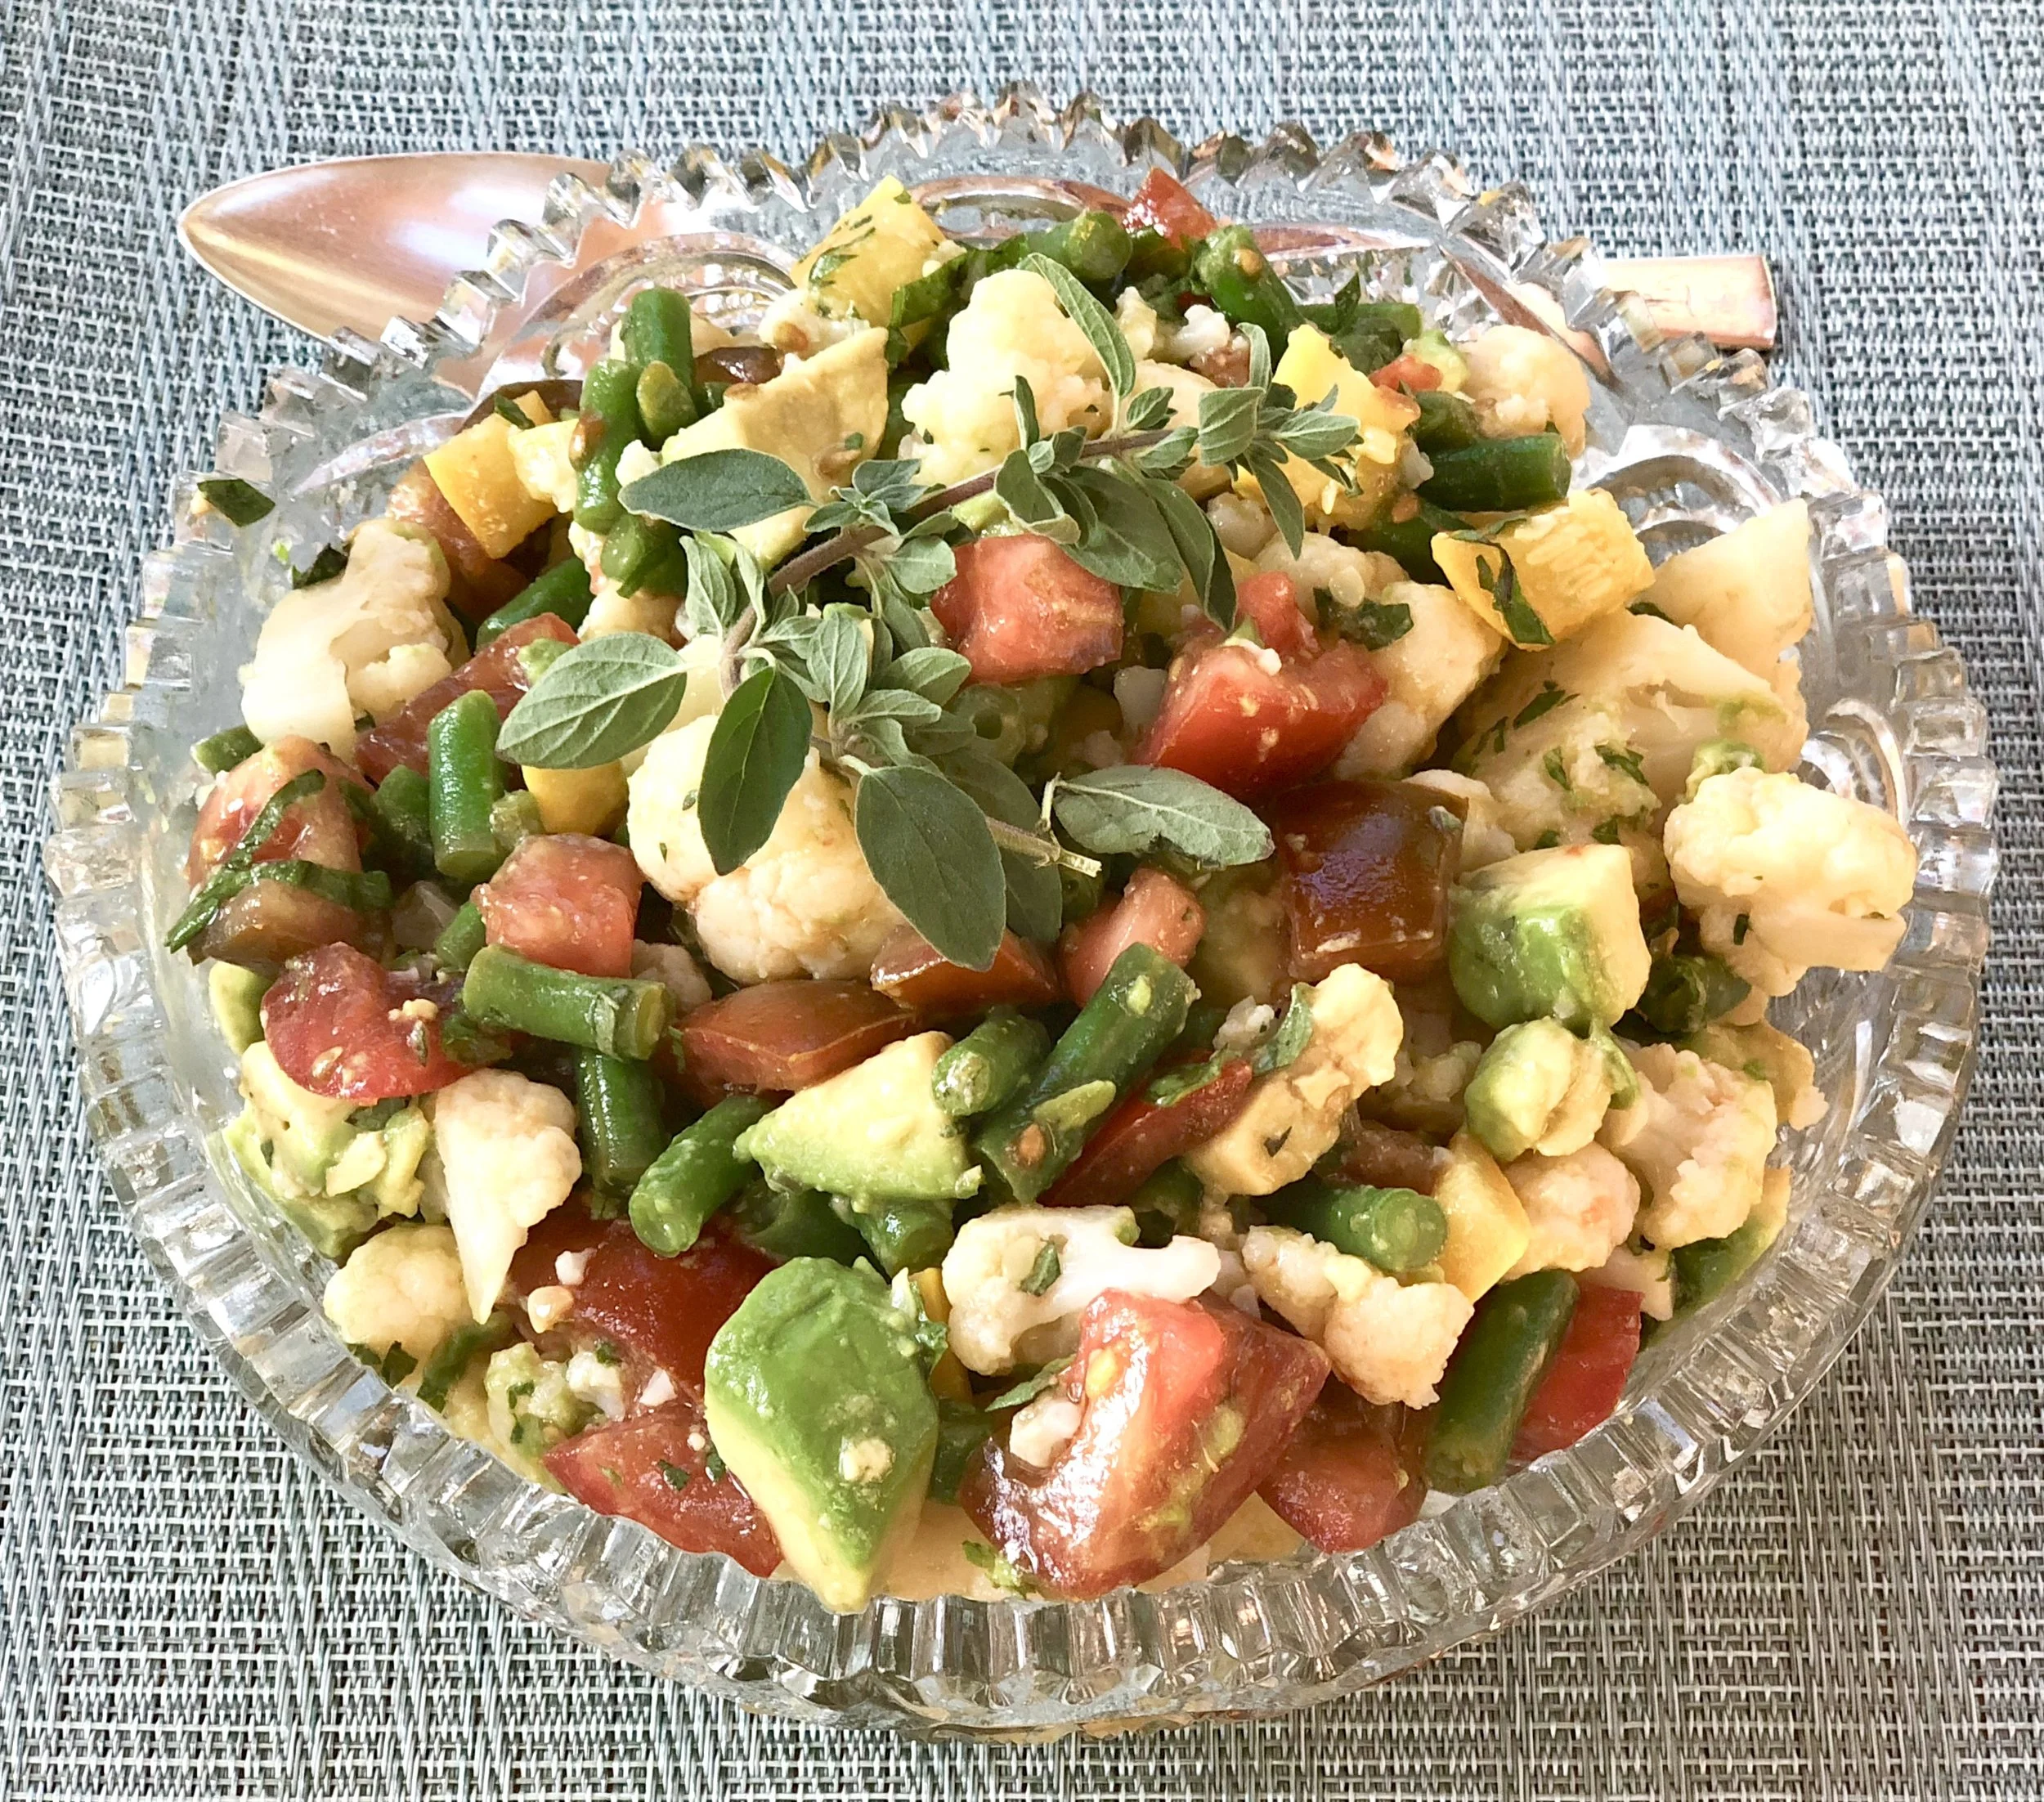
Vegetable Salad

fullsizeoutput_a6ee.jpeg

Light, refreshing food. That’s what we want during the summer.

Also, easy to make. And as quick as possible.

I made this vegetable salad using leftovers from the veggies we had over a couple of meals. Added some fresh tomatoes, an avocado and some herbs. Not only did I get to use up stuff from the fridge, the dish took less than 10 minutes to make.

It’s a side dish. But you can add some tofu, cheese or hard-cooked eggs and make it into a main course (or add leftover fish, meat or poultry).

Add crusty bread and it’s a sandwich filling.

Mix it into cooked penne or ziti and it becomes pasta primavera.

Use whatever vegetables you have in proportions suggested. There’s no magic here, no actual recipe that will fail if you don’t have one of the ingredients.

Vegetable Salad

  • 3 cups cooked cut up cauliflower

  • 1 cup cooked, cut up green beans

  • 1 cup cooked cut up yellow squash

  • 3-4 cut up small tomatoes

  • 1 avocado, cut into small chunks

  • 3 tablespoons chopped fresh basil

  • 2 teaspoons chopped fresh oregano

  • 2 tablespoons olive oil

  • 2-3 tablespoons fresh lemon juice (or use white wine vinegar)

  • salt and freshly ground black pepper to taste

Place the cauliflower, green beans, yellow squash, tomatoes, avocado, basil and oregano in a bowl and toss the ingredients to distribute them evenly. Pour the olive oil over the vegetables and toss again. Pour 2 tablespoons of the lemon juice over the vegetables and toss again. Taste for seasoning and add more lemon juice and salt and pepper to taste.

Makes 4-6 servings

Bulgur Wheat Varnishkes

fullsizeoutput_86ca.jpg

Tisha B’av isn’t one of the better-known Jewish holidays. I’ve heard people say “oh yeah, I think that’s when you can’t get married.” Or, “you can’t get a haircut or listen to music.”

All true, and much more, and that’s because, unlike holidays when we celebrate joyful occasions such as a new year or deliverance from Pharaoh, Tisha B’av is when observant Jews mourn the destruction of the First and Second Temples. In addition, we remember the numerous times throughout history that the Jewish people were subjected to pogroms, exile and a multitude of other catastrophes. These are days that we don’t celebrate; we grieve.

Mournful times deserve respect and reflection. During the nine days leading up to the actual holiday (which begins at sundown on August 10th) many families will refrain from the usual pleasure-filled events and activities that make up our lives.

That includes getting married or getting a haircut or listening to music.

It also includes refraining from eating certain foods.

Tisha B’av is a full fast day, but during the days leading up to it many families don’t eat meat. Fish, dairy, vegetarian — is on the menu, and especially eggs and lentils, which are considered “mourner’s food.”

It’s just as well frankly. Skipping heavy meat meals during the hot weather makes good sense. It’s a whole lot smarter to eat fish, dairy and vegetarian.

Whether or not you follow the culinary guidelines during the Nine Days, this dish will do!

Anytime.

It’s my particular riff on classic kasha varnishkes. Our family really doesn’t like kasha, so I make the dish using bulgur wheat. Not only does it taste better, it’s easier to prepare and easier on the digestion.

Bulgur wheat or kasha varnishkes is usually a side dish, but it becomes a full meal if you add a fried egg or two on top.

Bulgur Wheat Varnishkes

  • 6 tablespoons vegetable oil

  • 1 cup bulgur wheat

  • 1-3/4 cup water, vegetable stock (can use chicken stock)

  • 2 large onions, chopped

  • Salt and freshly ground black pepper to taste

  • 6 ounces bow-tie pasta

  • 6 fried eggs

Heat 3 tablespoons of the vegetable oil in a sauté pan over medium heat. Add the bulgur wheat and cook, stirring occasionally, for about 3-4 minutes or until lightly toasted. Pour in the water or stock, bring to a boil, lower the heat and cover the pan. Cook for about 20 minutes or until all the liquid has been absorbed. Heat the remaining 3 tablespoons vegetable oil in a sauté pan over medium heat. Add the onions, sprinkle with salt and pepper and cook for about 20 minutes, stirring often, or until the onions are soft and browned. Cook the pasta according to directions on the package. Combine the bulgur wheat, pasta and onions in a large bowl. Sprinkle with salt and pepper. Keep warm while you fry 6 eggs, sunnyside-up style.

Makes 6 servings


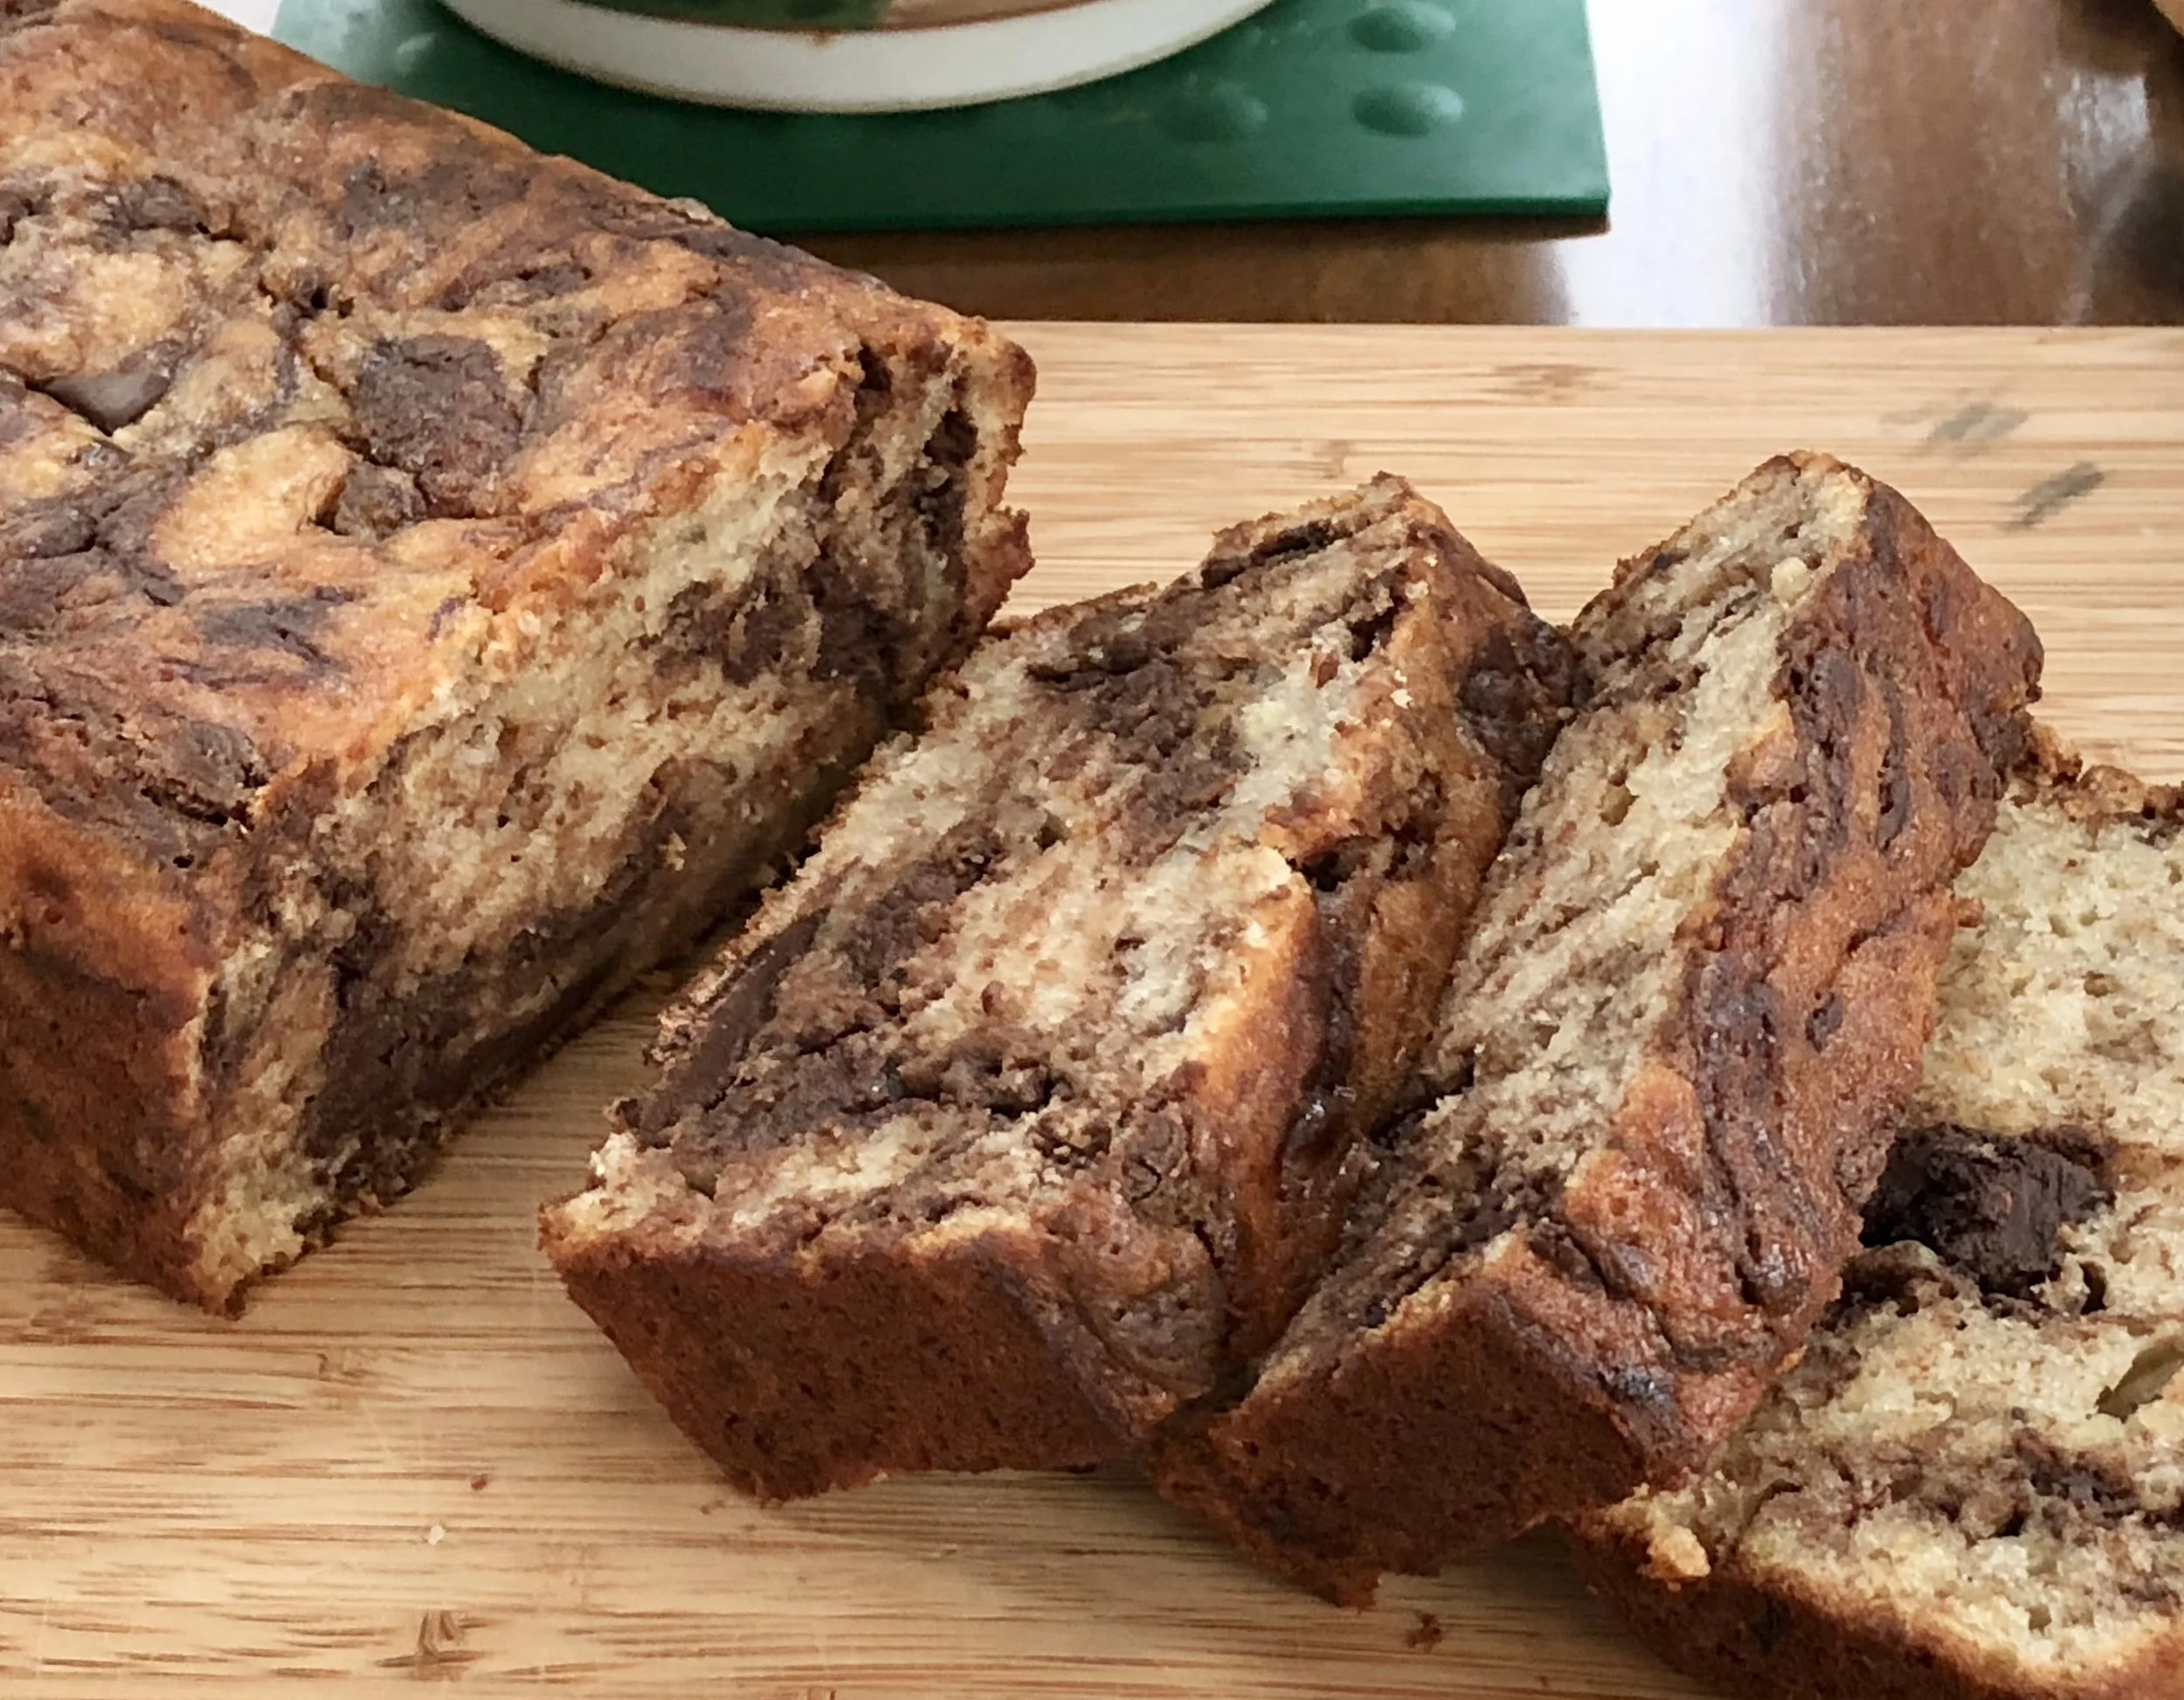
Banana Oat Marble Bread

fullsizeoutput_9fac.jpeg

So, okay, as usual — the family was here for Mother’s Day. I bought a ton of fruit. All gone.

EXCEPT for a few bananas.

And so: Banana Bread. This one with oats and chocolate. It’s moist and gently sweet. Could do as dessert or just with some coffee as a snack. A little nosh.

Freezable too.

Banana Oat Marble Bread

  • 6 ounces semisweet chocolate

  • 1-1/2 cups all-purpose flour

  • 1/2 cup quick oats

  • 1/2 teaspoon baking powder

  • 1/2 teaspoon cinnamon

  • 1/2 teaspoon salt

  • 3/4 cup sugar

  • 1/2 cup vegetable oil

  • 2 large eggs

  • 3 medium very ripe bananas

  • 1/4 cup fruit juice such as mango, orange or apple

  • 1 teaspoon vanilla extract

Preheat the oven to 350 degrees. Grease a 9”x5”x3” loaf pan.

Melt the chocolate and set it aside. Mix the flour, oats, baking powder, cinnamon and salt in a bowl and set it aside. Beat the sugar and vegetable oil with a handheld or electric mixer set at medium speed for 2-3 minutes or until the mixture is light and fluffy. Add the eggs one at a time, beating after each addition. Mash the bananas and add them to the sugar mixture. Beat thoroughly until the ingredients are well blended. Add the flour mixture and beat for 1-2 minutes to blend the ingredients thoroughly. Stir in the juice and vanilla extract. Pour the batter into the prepared pan. Spoon the melted chocolate on top and use a knife to swirl the chocolate into the banana batter. Bake for 1 hour or until a cake tester inserted into the center comes out clean. Cool the bread in the pan 15 minutes. Remove the bread from the pan and let it cool on a cake rack.

 Makes one bread serving 10-12