comfort food

Apple Pie is Therapy

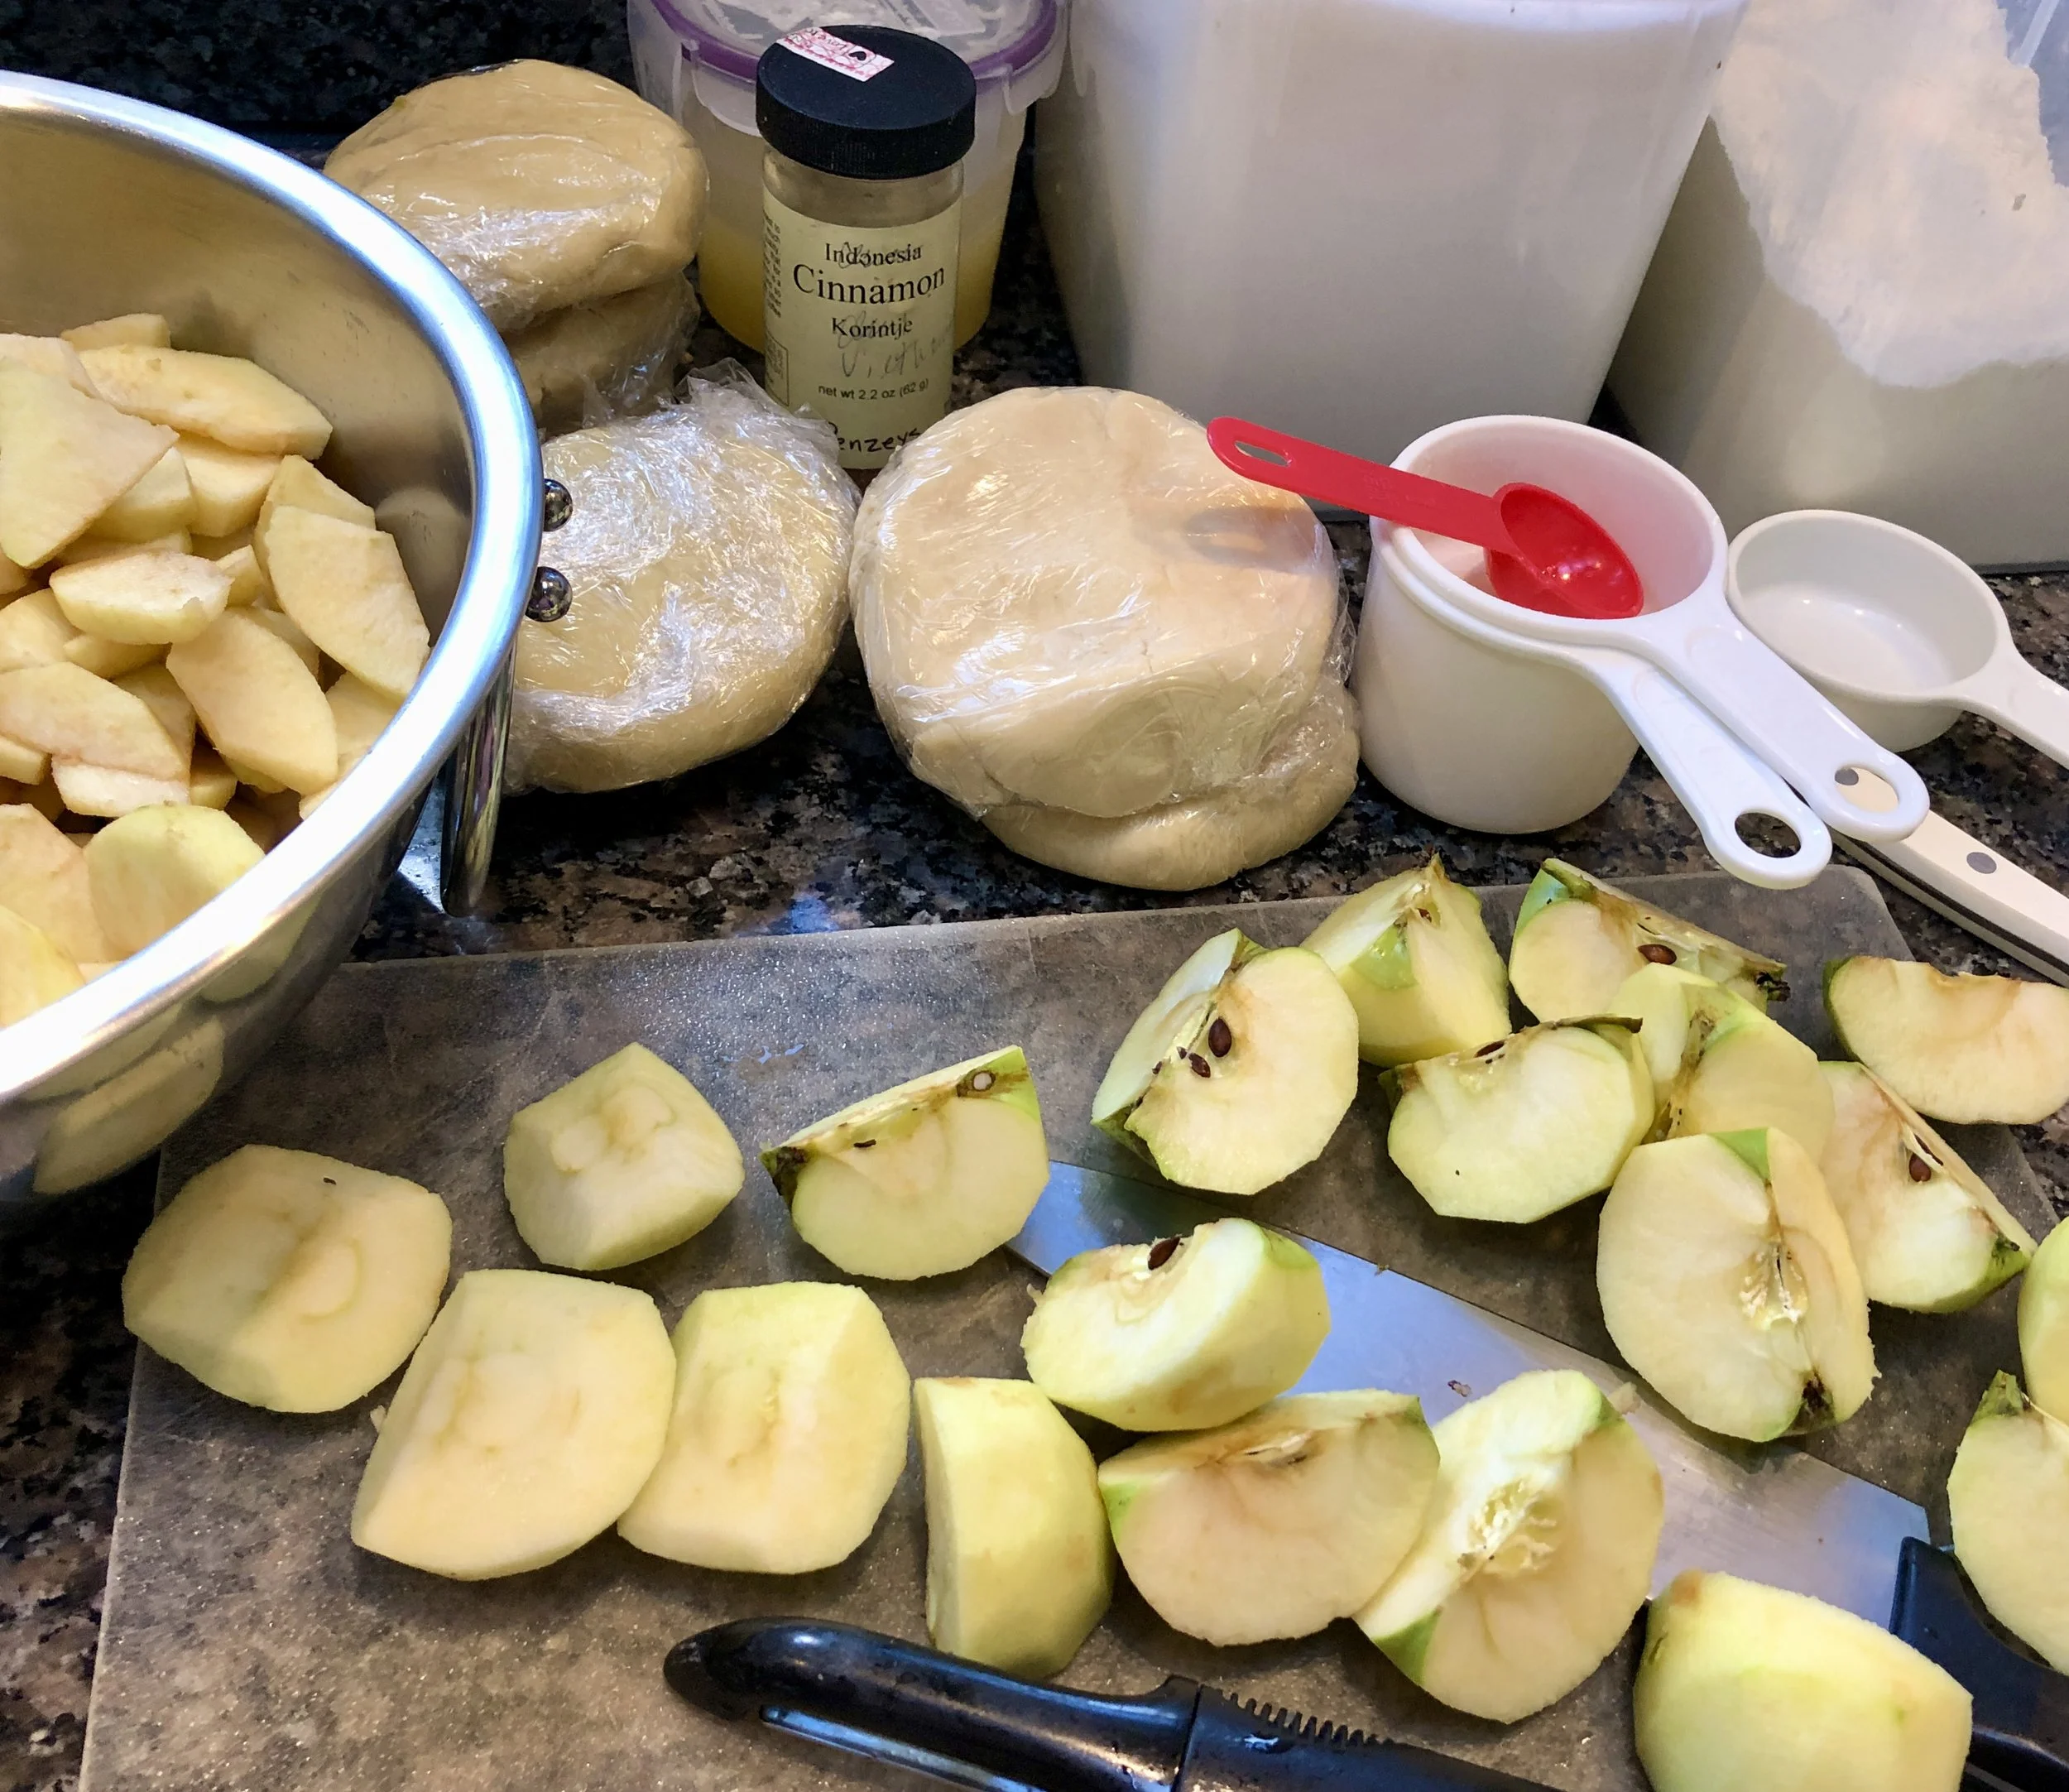
Peel, core and slice the apples for pie

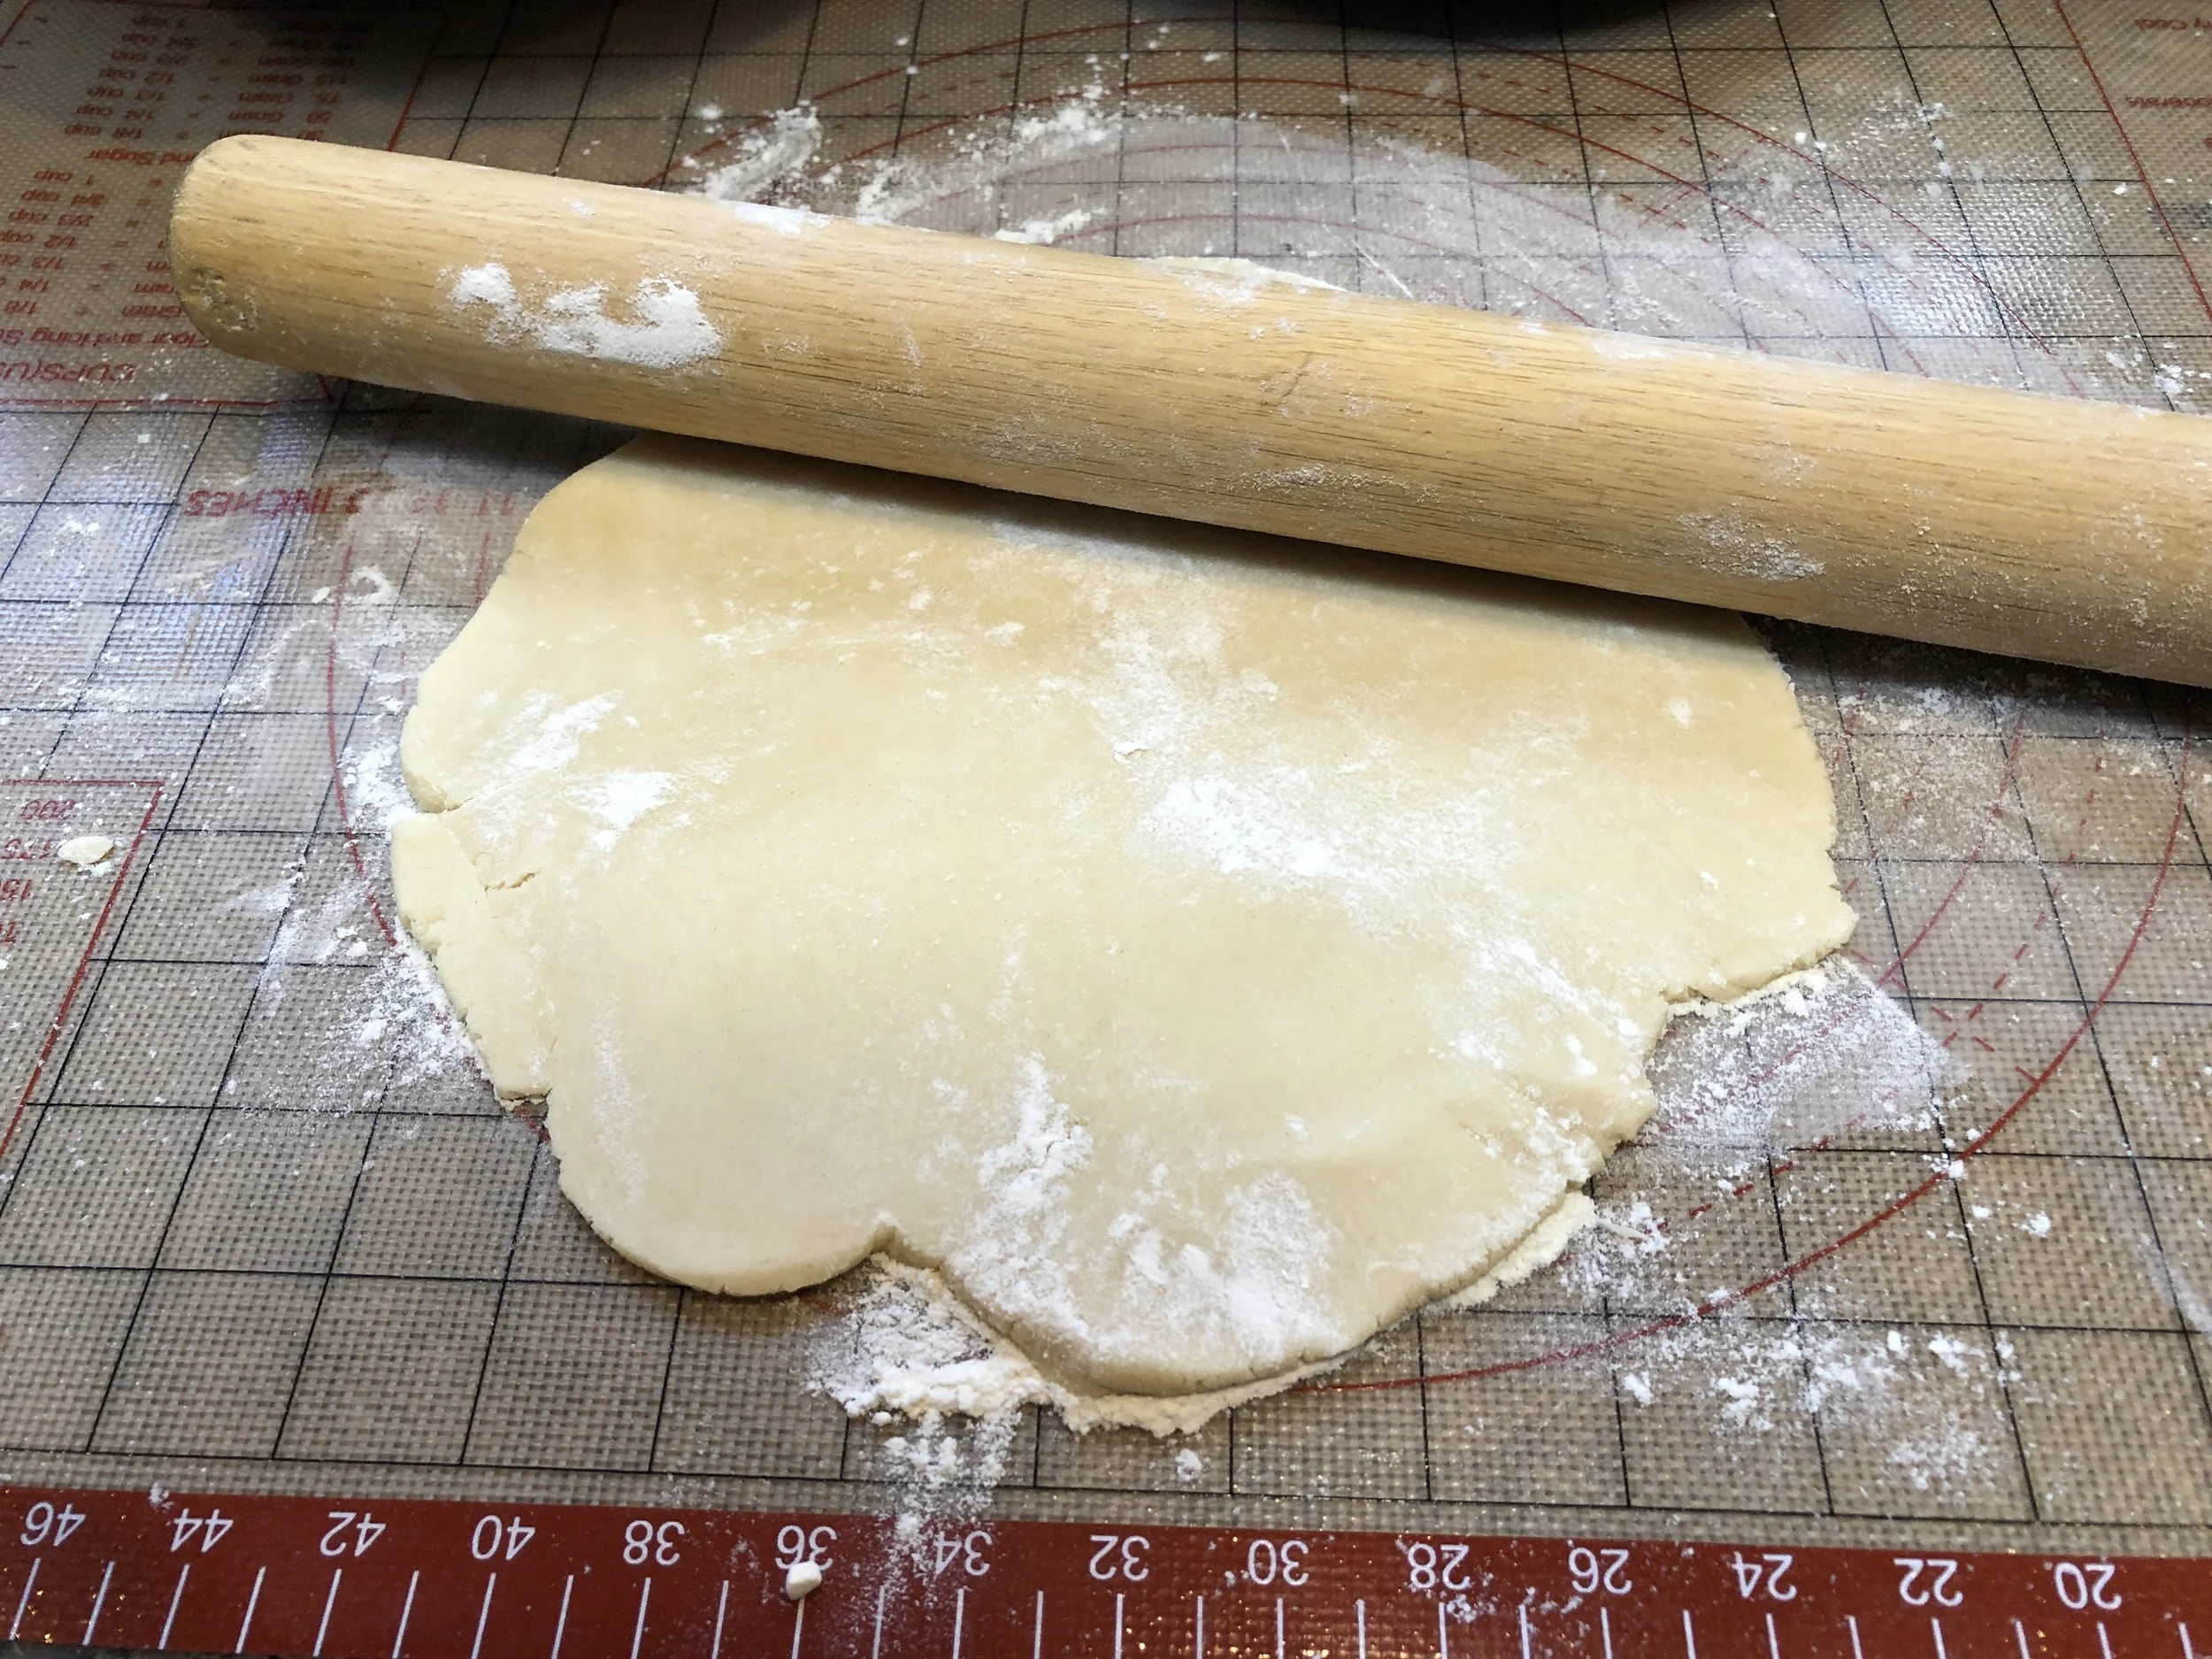
Roll the pie dough

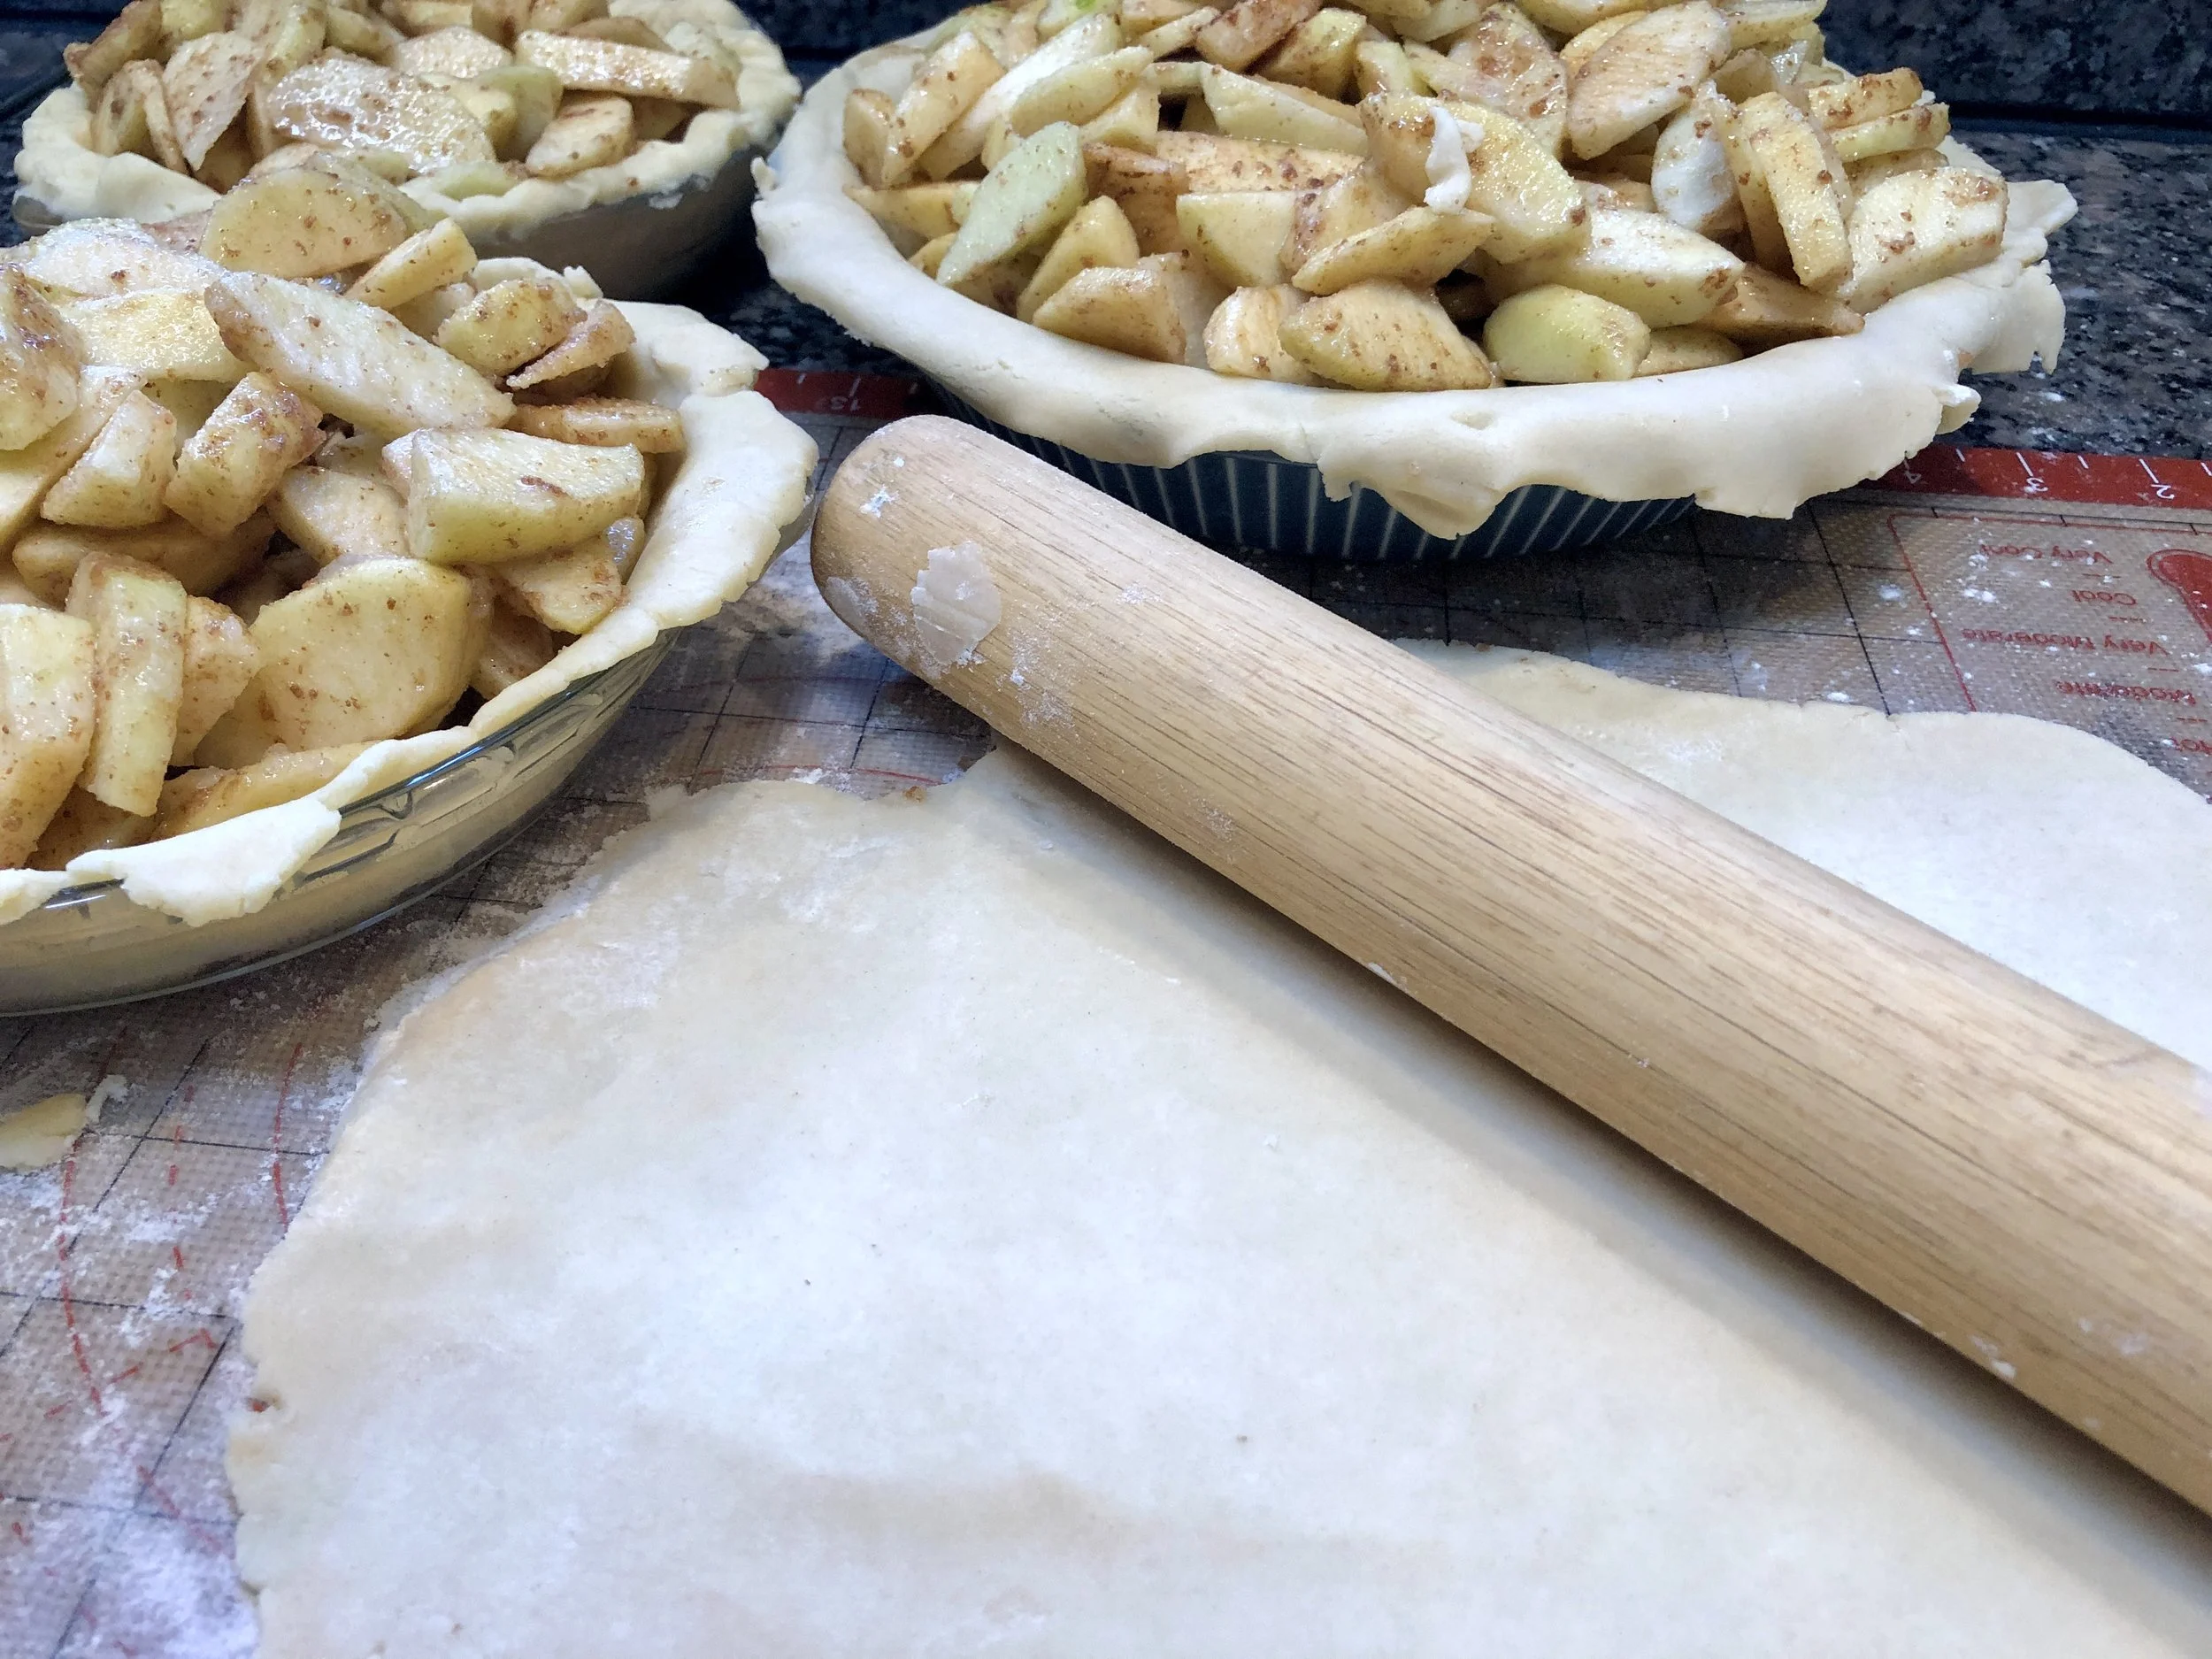
Fill bottom crust with fruit

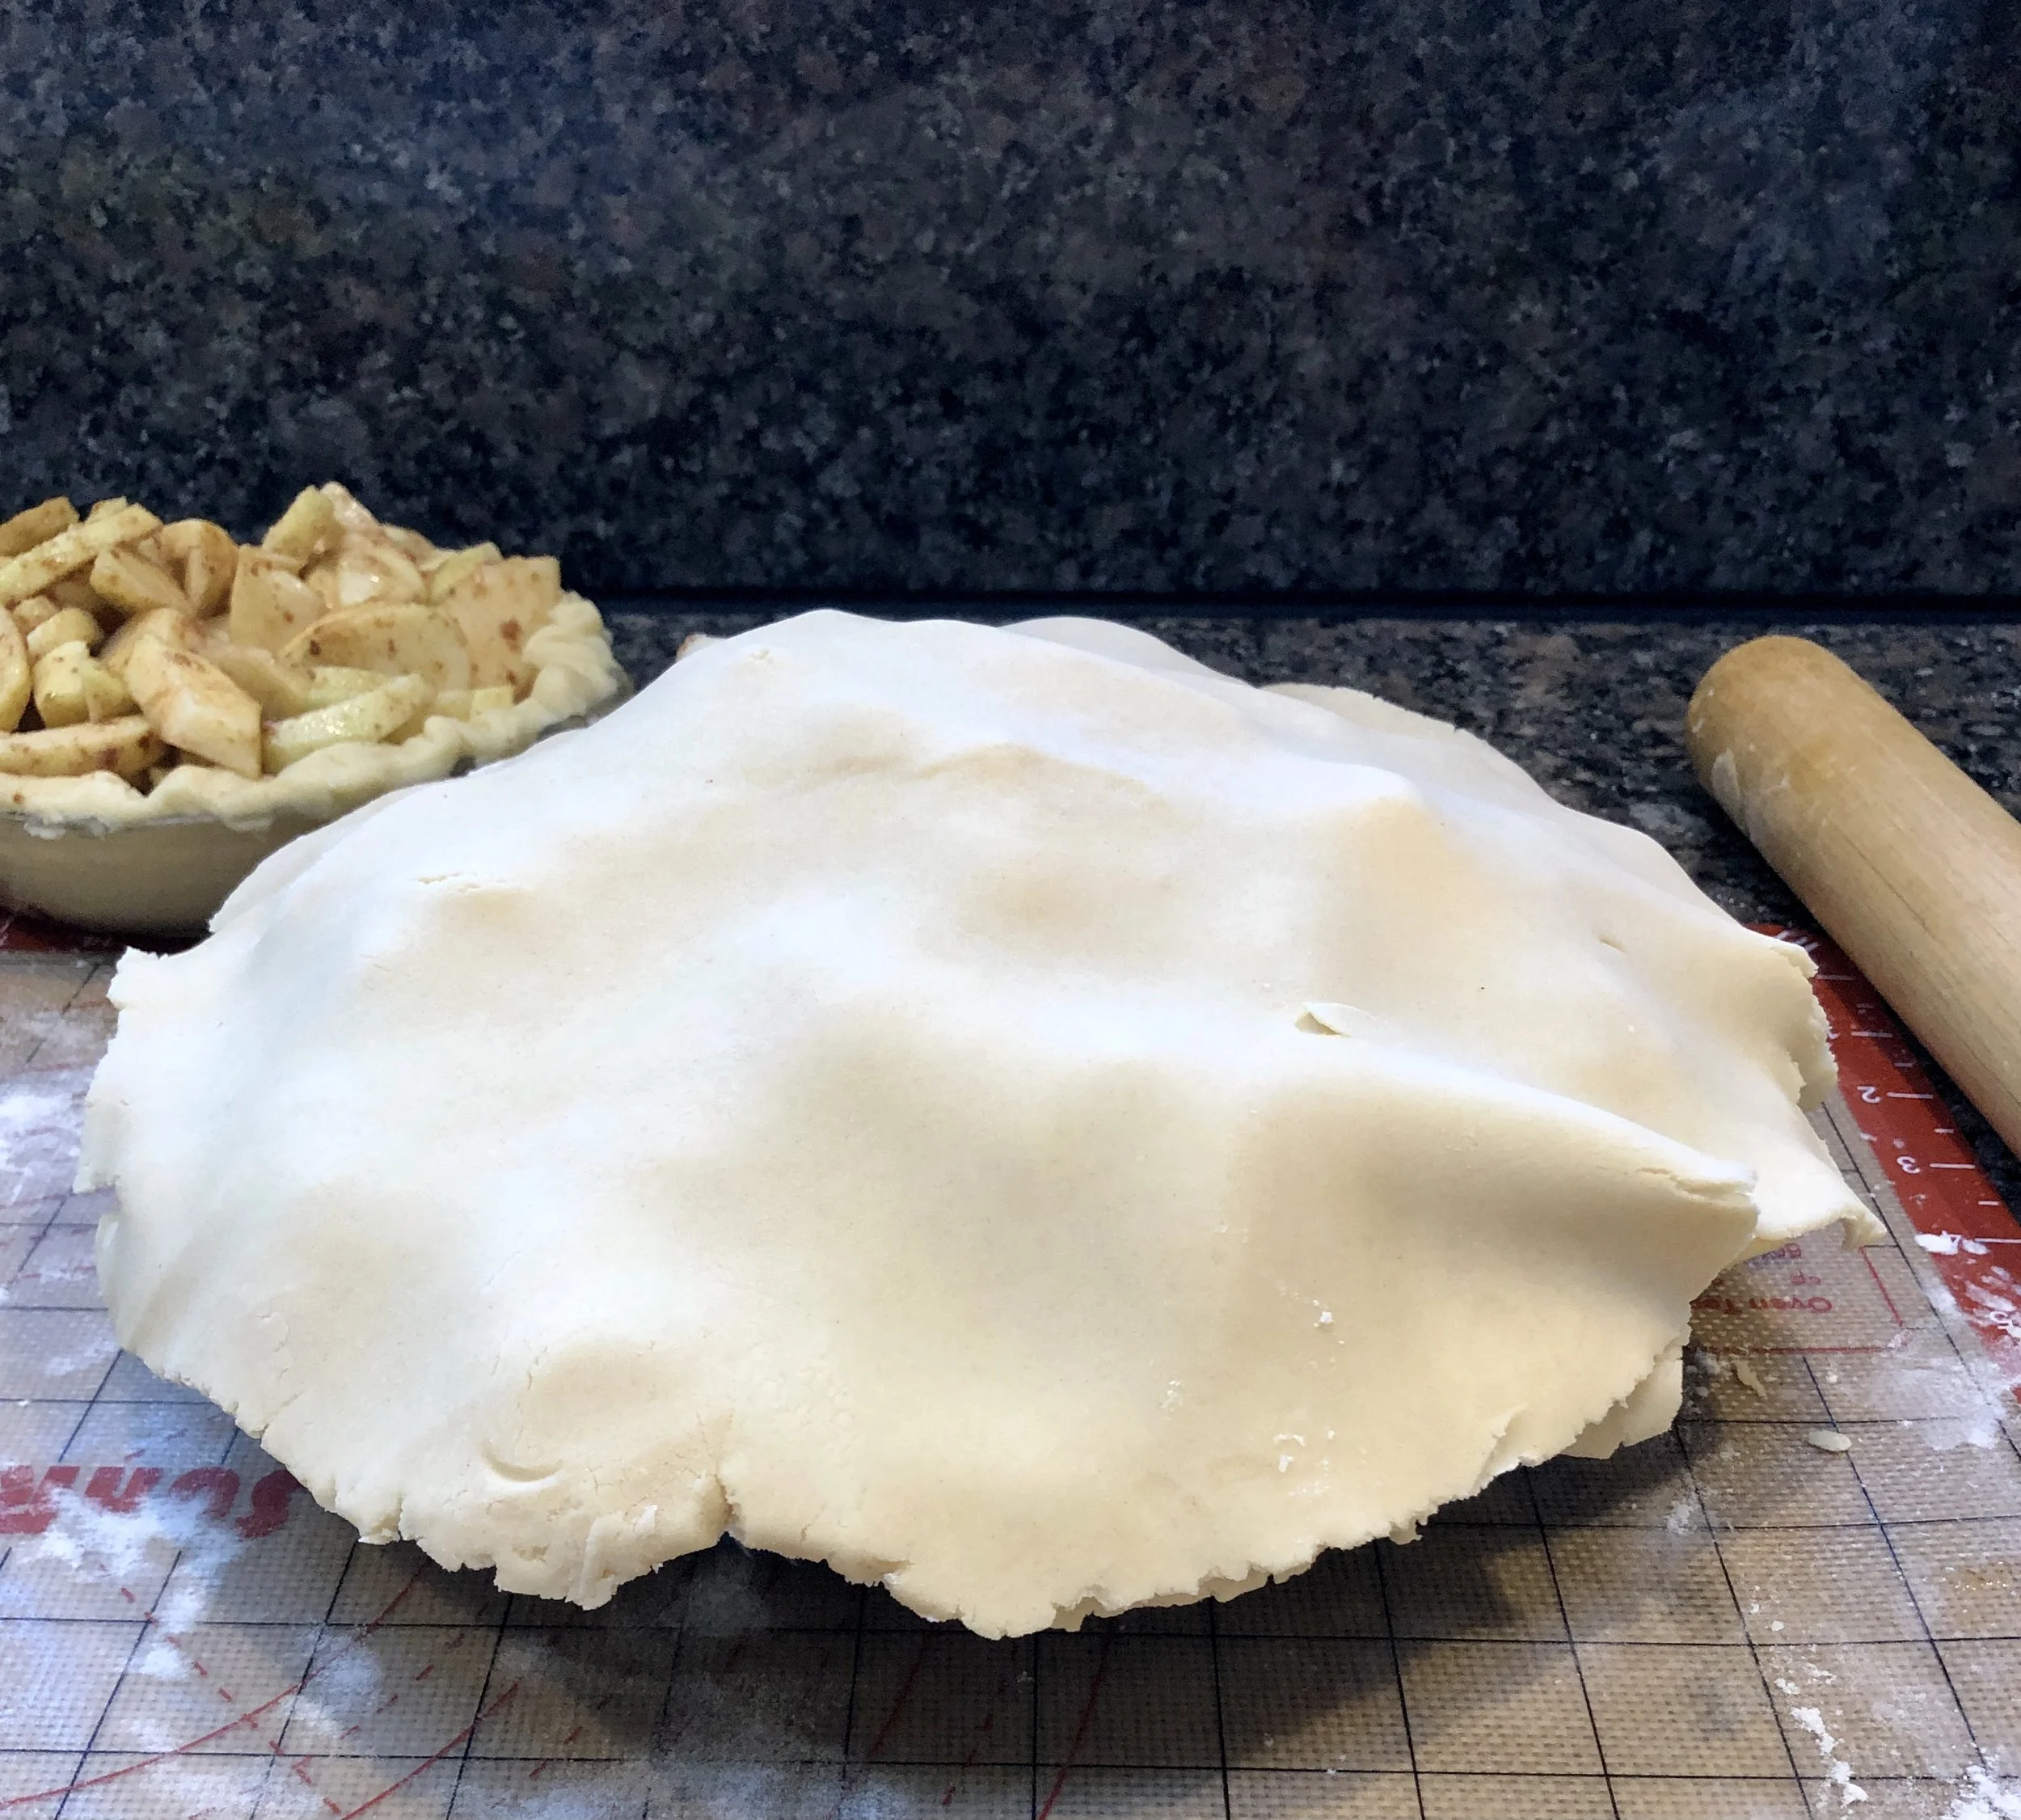
Place second crust on top of fruit

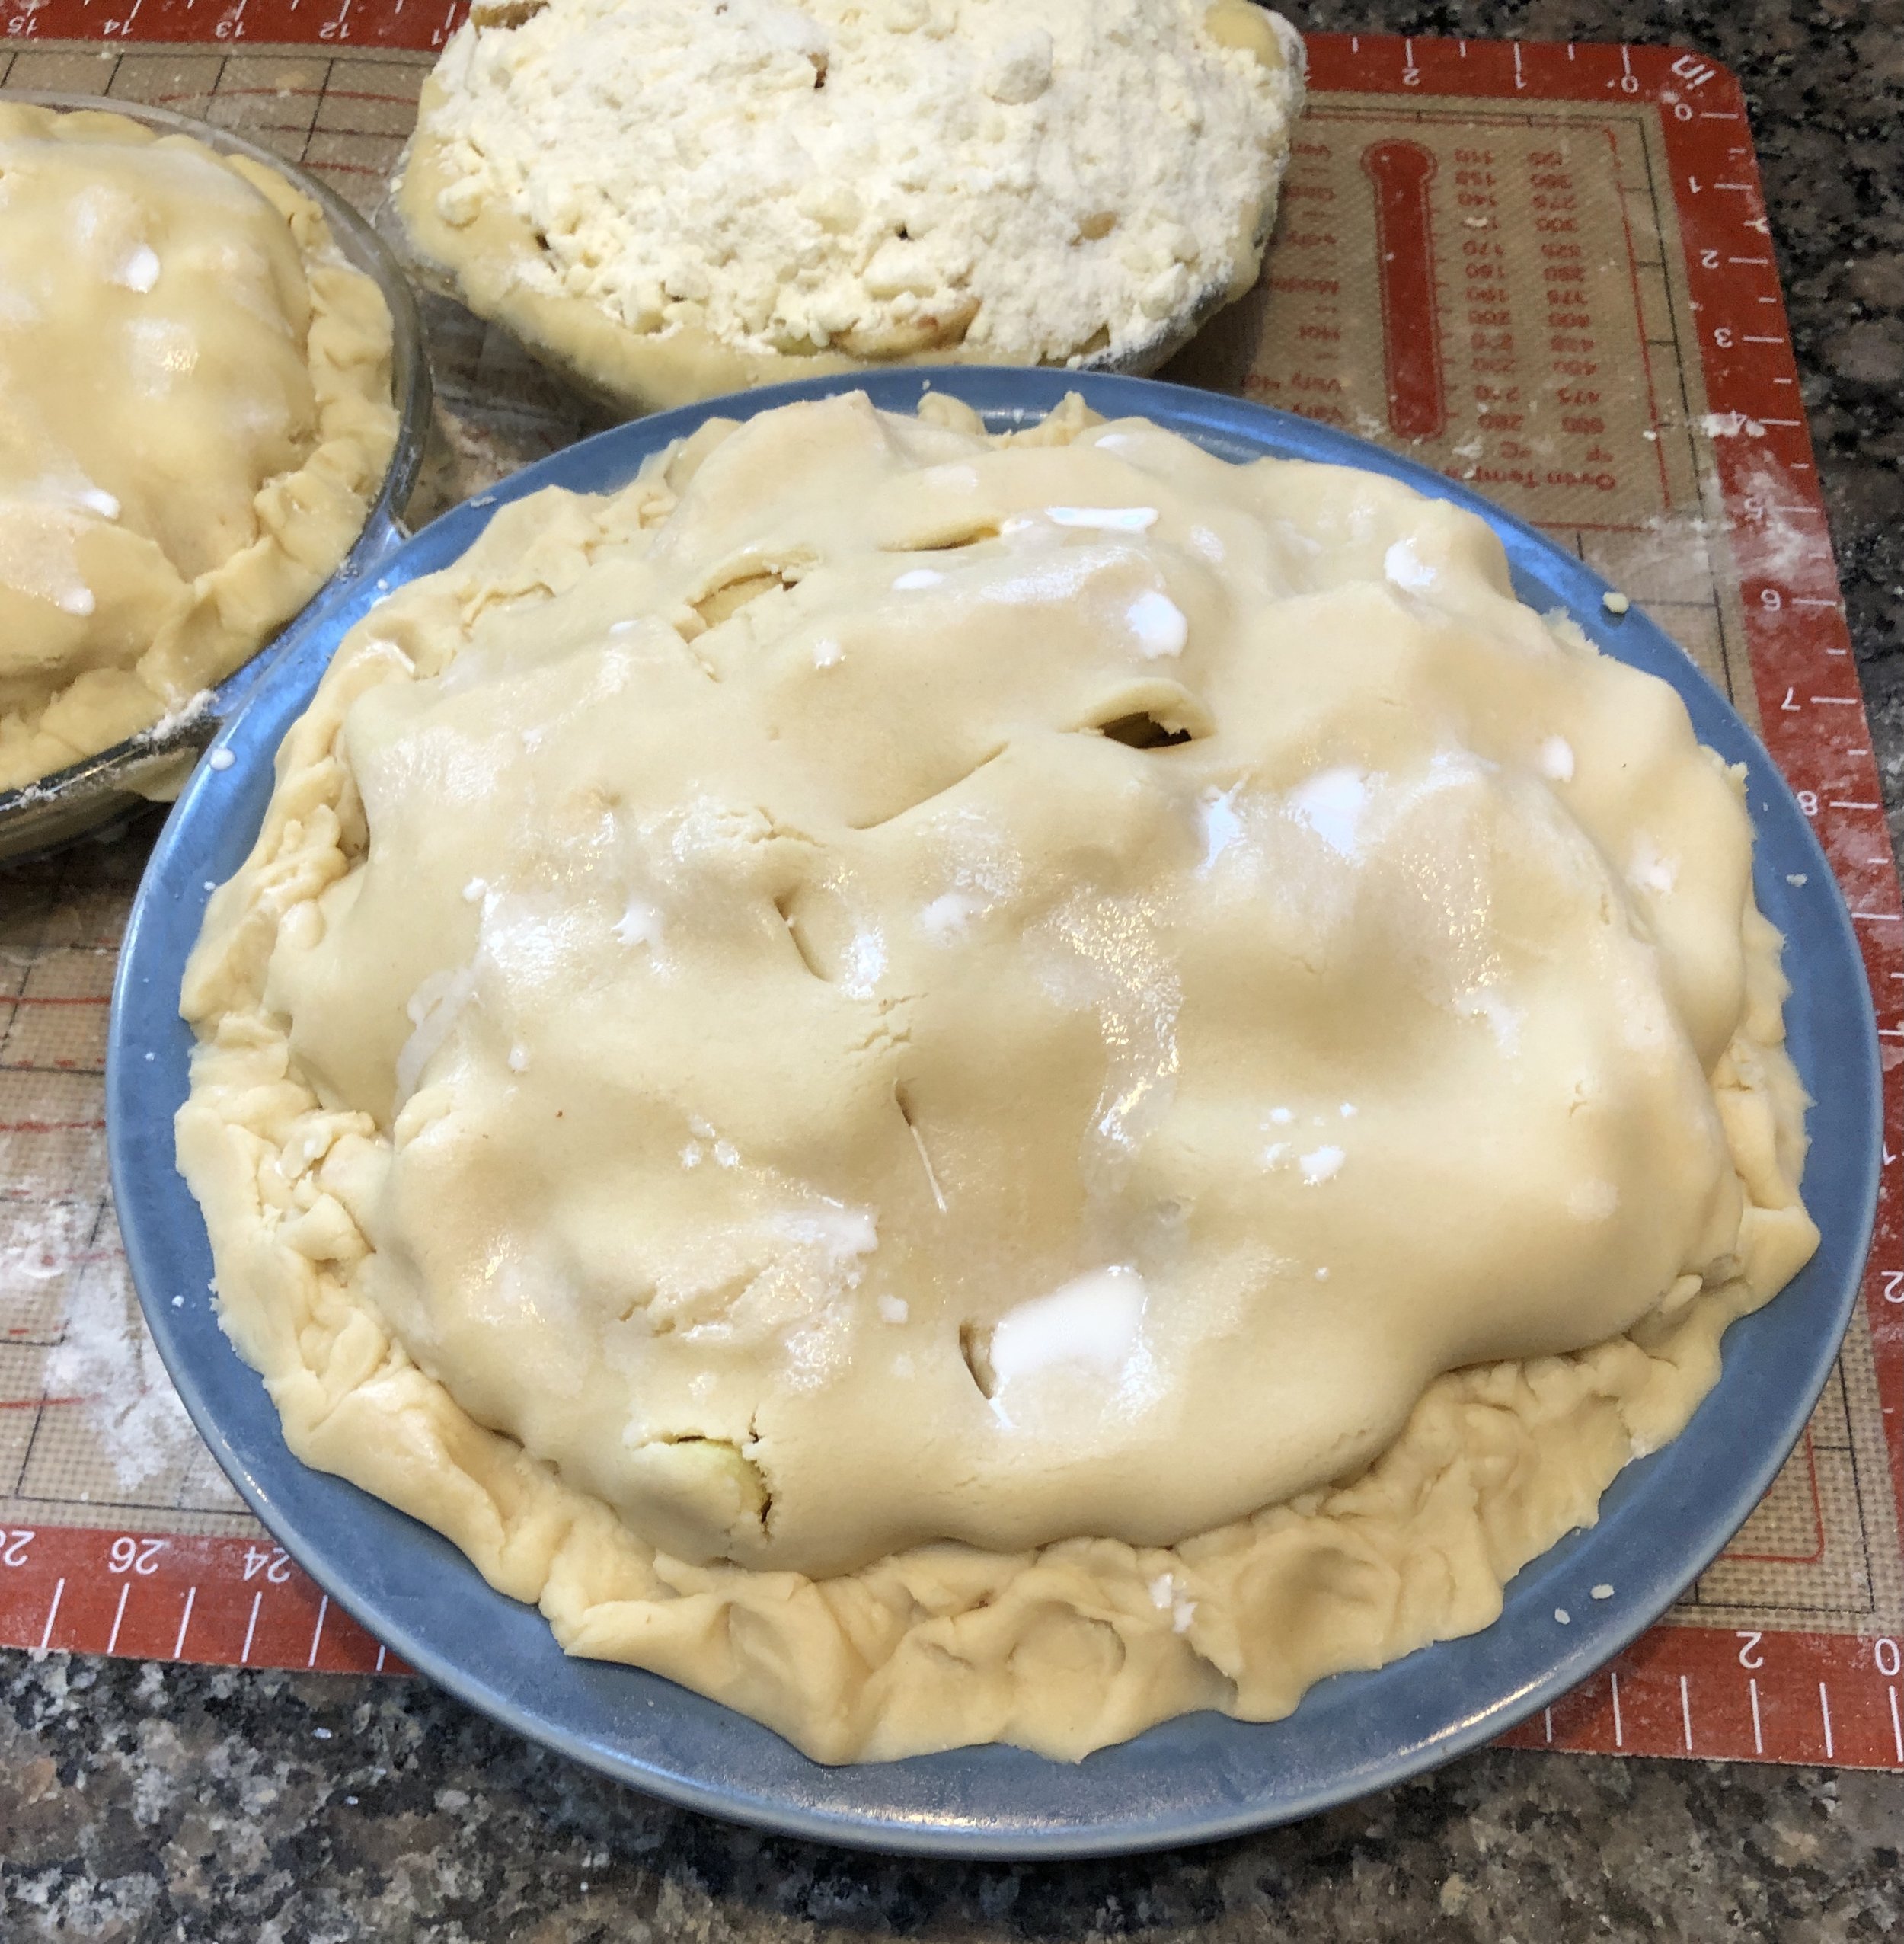
Add a dab of milk here and there to the top crust

For me, my October pie baking fest is like therapy. It’s always a good way to spend the day and work out frustrations, anger and sadness. The kind I am feeling these days because of the war and devastation in Israel.

It was difficult to find the kind of apples I like this year. Because there was an early frost, none of the orchards I usually go to had Rhode Island Greening apples, the best pie apples on earth. After some delays and some connections from someone who knew someone who knew someone else who knew someone who had an orchard in Rhode Island, I got a bushel of them!

I’m grateful and happy for that at least.

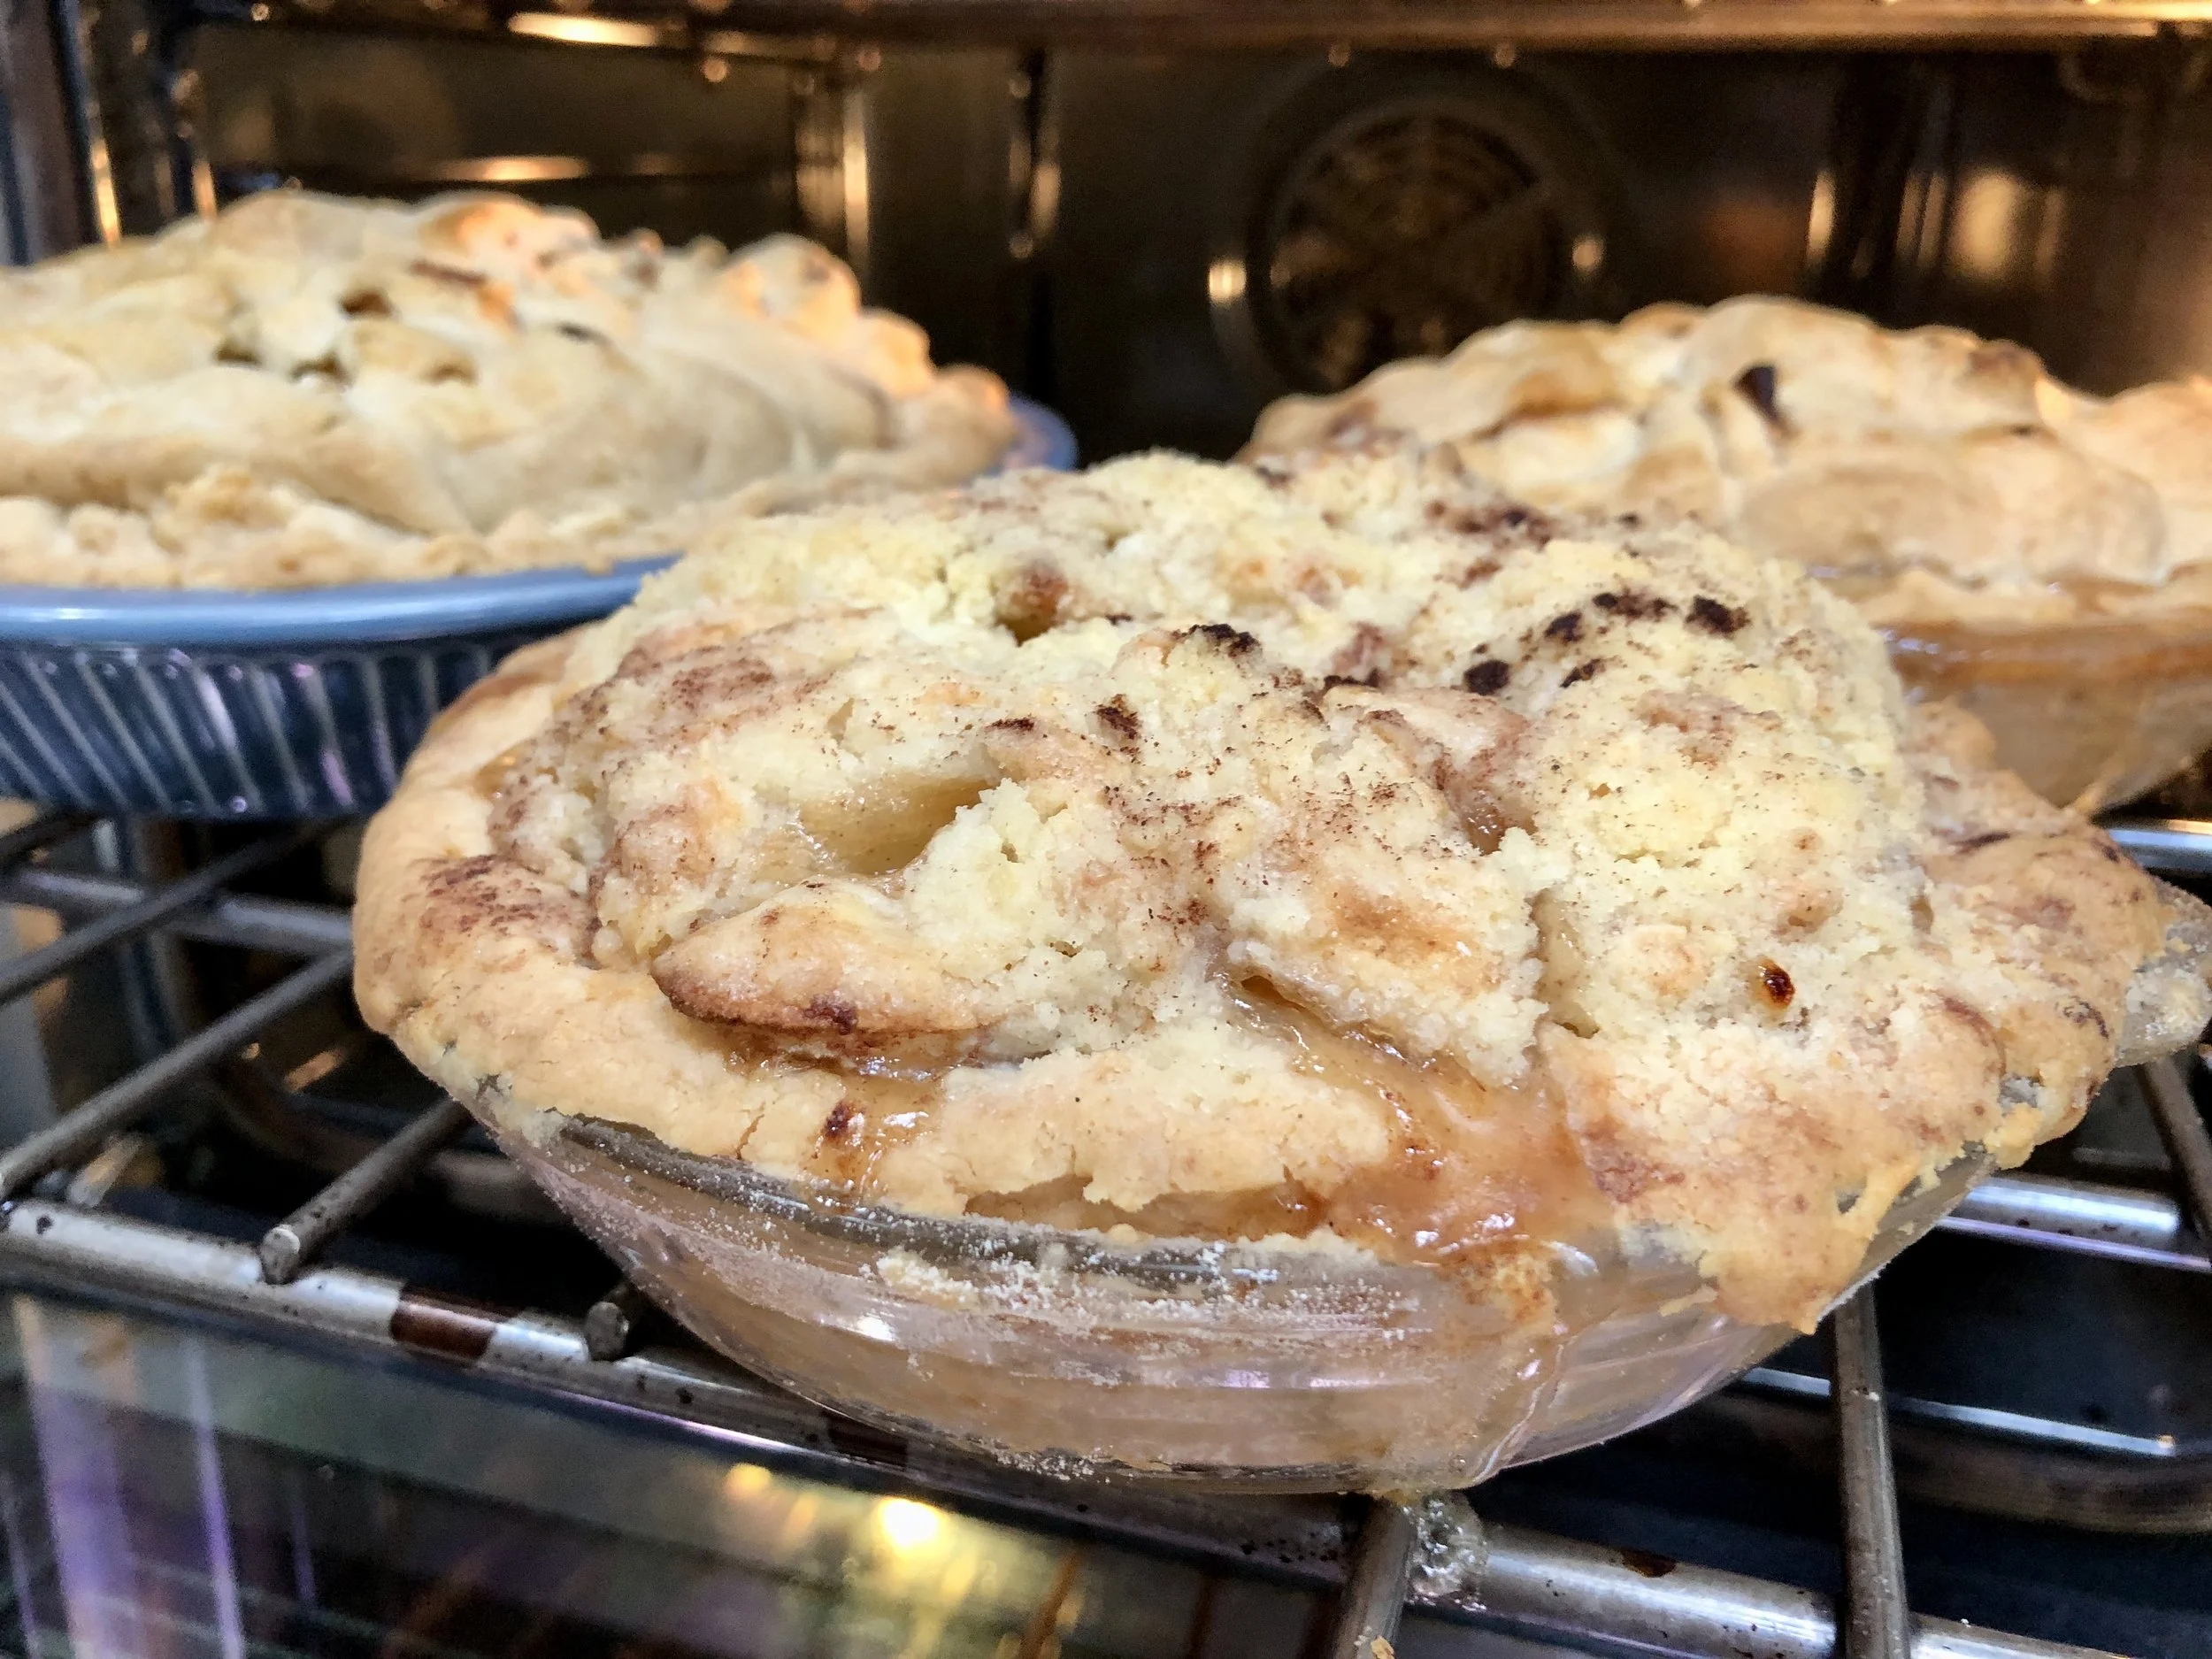
Here are some photos showing the steps to my pie baking: peel-core-slice; roll the dough; place the filling inside the bottom crust; cover the pies (one of mine had a streusel top); place second piece of rolled dough on top of fruit; add a dab or two of milk (makes the crust brown in spots) and bake.

Voila! PIE!

If you prefer a streusel top, look here.

Lily Vail’s (My Mom’s) Apple Pie

crust:

  • 2-1/2 cups all-purpose flour

  • 1 teaspoon sugar

  • 3/4 teaspoon salt

  • 1 teaspoon grated fresh lemon peel, optional

  • 1/2 cup cold butter

  • 1/3 cup cold vegetable shortening

  • 1/4 cup cold milk, juice, water or melted ice cream, approximately (add more as needed)

  • apple filling

To make the crust: Combine the flour, sugar, salt and lemon peel, if used, in a large bowl. Cut the butter and shortening into chunks and add the chunks to the flour mixture. Work the fat into the flour mixture until the ingredients resemble crumbs (use your hands, a pastry blender or the pulse feature of a food processor). Add the liquid, using only enough to gather pastry into a soft ball of dough (start with 1/4 cup). Cut the dough in half and flatten each half to make a disk shape. Wrap the dough in plastic wrap and let it stand at least 30 minutes.

Preheat the oven to 375F. Lightly flour a pastry board or clean work surface. With a rolling pin, roll one half of the dough on the floured surface into a circle about 1/8-inch thick, making sure the circle is larger than the pie pan by about 1 inch. Place the dough in a 9” or 10” pie pan. Pour the apple filling into the pastry-lined pan. Cut the butter into small pieces and place on top of the filling. Roll out the remaining dough and place it over the filling. Gently press the bottom and top crusts together along the flared edge of the pie pan. For a fluted rim, press your thumb and index finger against the outside of the rim, or crimp it with the tines of a fork or the blunt side of a knife. Cut steam vents in the top crust with the tip of a sharp knife or the tines of a fork. Bake the pie for about an hour or until golden brown.

Apple Filling:

3 pounds pie apples (Rhode Island Greenings, Granny Smith, Gravenstein, Northern Spy, Golden Delicious, Idared, Stayman, Winesap, Baldwin, Jonagold)

  • 1/2 cup sugar

  • 2 tablespoons lemon juice

  • 3/4 teaspoon ground cinnamon

  • 2 tablespoons all-purpose flour

  • 1 tablespoon butter

Peel and core the apples then cut them into slices. Place the slices in a bowl. Add the 1/2 cup sugar, lemon juice, cinnamon and flour and toss the ingredients to coat the apple slices evenly.
Pizza with Garden Fresh Tomatoes

I’d never tasted pizza with fresh baby arugula before a recent trip to Rome, where my granddaughter ordered one for us for lunch. EUREKA! I have found it! I’ve now made this several times and it has become my go-to pizza. Here’s how:

Pizza with Baby Arugula: preheat the oven to 450F. If you have a pizza stone, preheat for an hour. Roll out pizza dough on parchment paper to 12” then spoon about 3/4 cup ricotta cheese evenly over the surface. Leave about 1/2-inch perimeter. Top with tomato slices, then some shredded mozzarella cheese. Sprinkle with a few drops of olive oil. Slide the pizza on top of the pizza stone or use a baking sheet. Bake for 15-20 minutes or until the crust is golden brown and the cheese is bubbly and beginning to brown. While the pizza is baking, wash and dry some baby arugula, then toss with a small amount of olive oil. When the pizza is ready, top it with the arugula, slice and serve. Makes one pizza. #pizza #pizzalover #pizzawitharugula #arugulapizza #cheesepizza

Brisket Wings

I don’t wait for Superbowl to serve chicken-wings. They’re one of our favorite foods to eat and are a regular item for dinner.

I make wings in all sorts of ways, with all sorts of seasonings and all levels of sweetness and spiciness. I’ve made them Korean style and Jewish style and East India style.

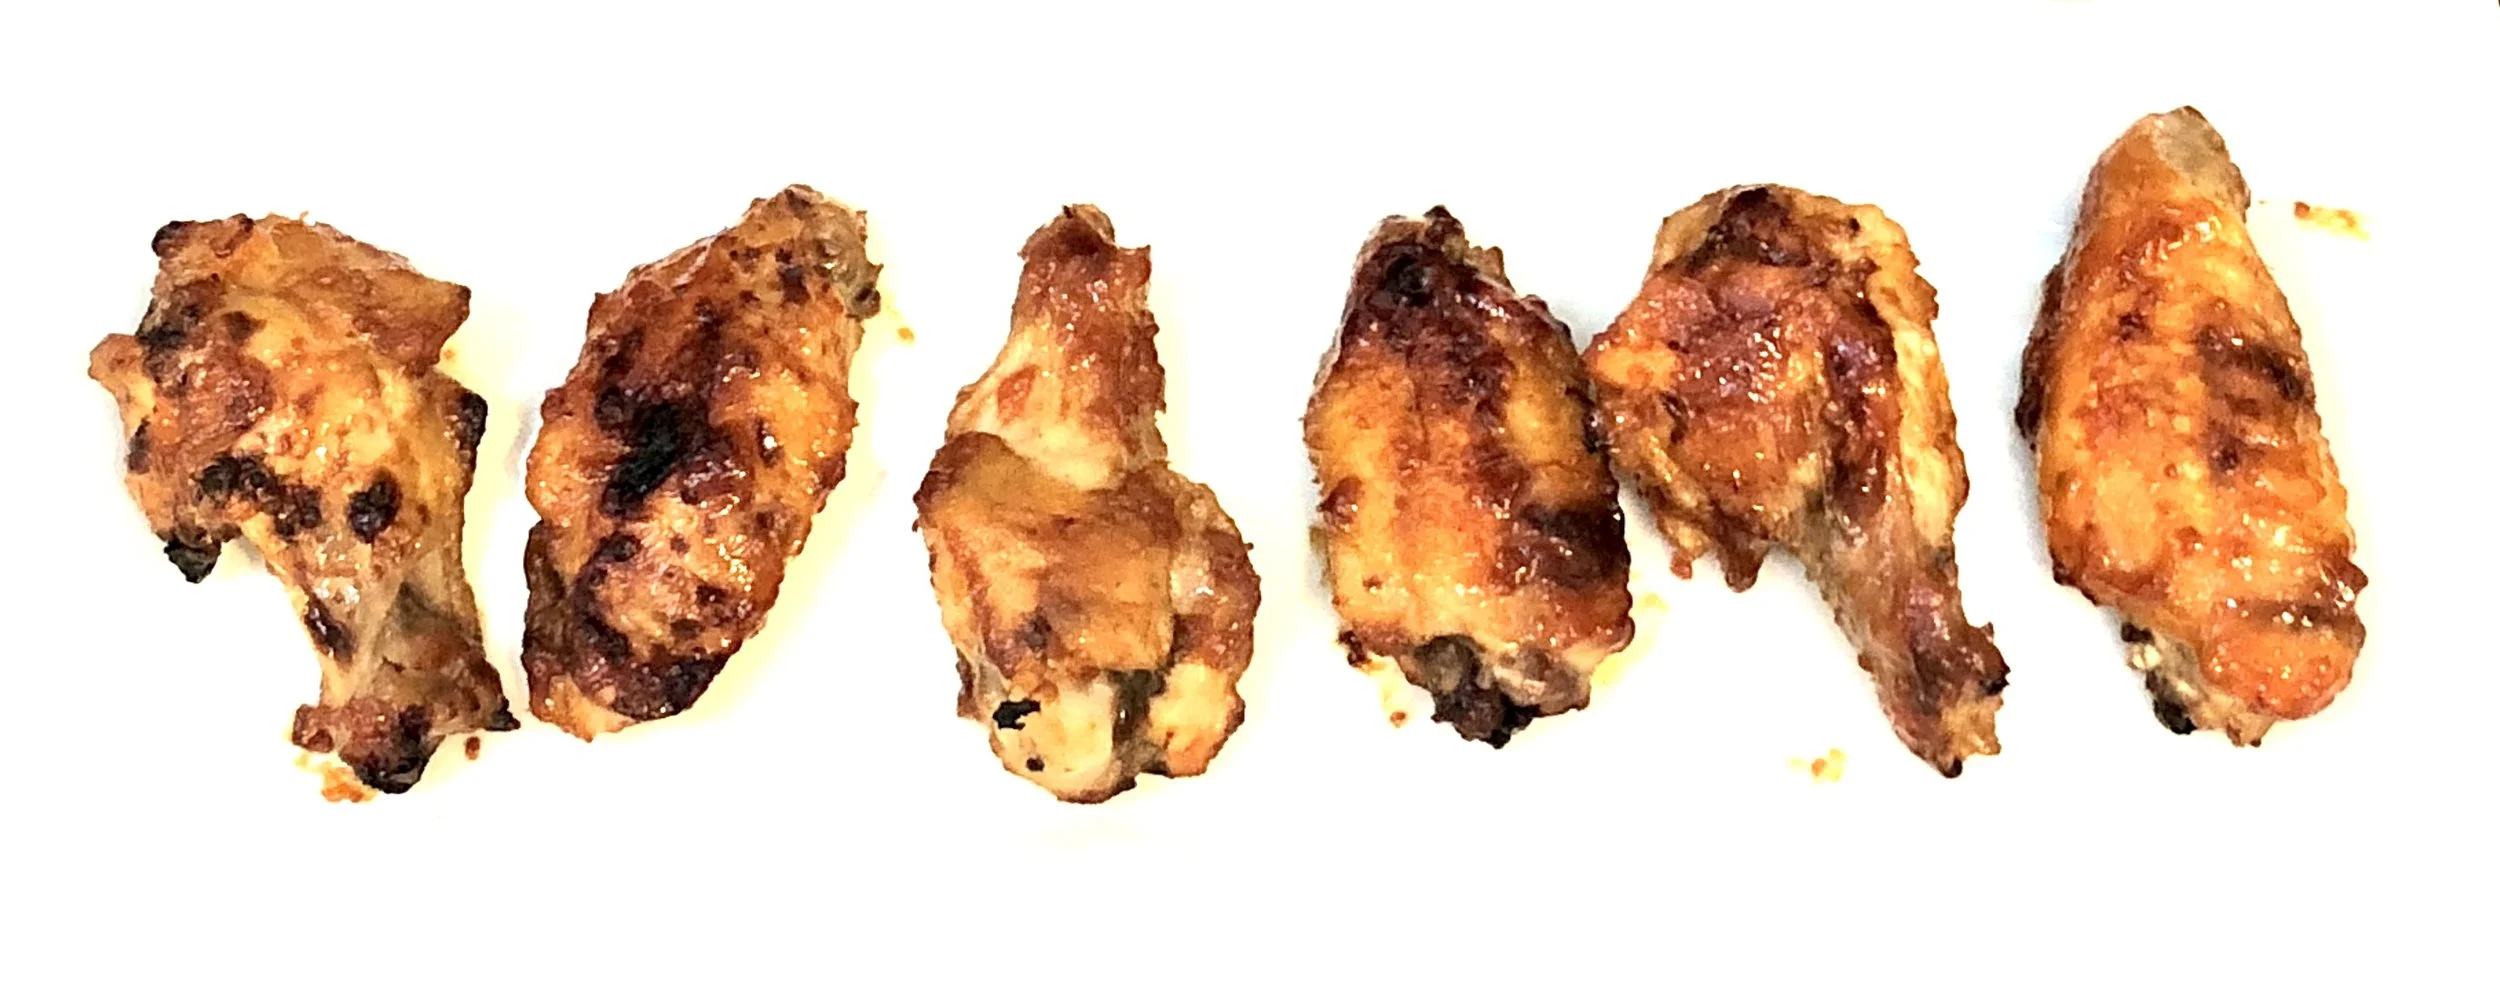
Recently I made some “brisket wings.”

What?

Here’s what I mean — I recently made brisket, which I slow-cook to tenderness and then light up our outside grill to cook it Texas-style. I use any one of a number of BBQ sauces I’ve developed over the years. BBQ sauce helps the meat come out with those fabulous crispy edges and burnt ends. (During colder months I use the oven broiler.)

I had some of the brisket sauce leftover so I decided to use it for some wings.

PERFECT!

This is a universal sauce! I have since even slathered some on top of some hamburgers, for extra burger goodness.

Here’s the recipe. I cooked the wings on a medium grill (lightly coat them with vegetable oil first), and then, after about 12-15 minutes, coat them with some sauce and cook them until crispy and done.

These wings would be terrific for Father’s Day!

BARBECUE SAUCE FOR BRISKET, WINGS AND MORE

  • 2 tablespoons olive oil

  • 1 medium onion, finely chopped

  • 1 medium clove garlic, chopped

  • 1 teaspoon finely chopped chili pepper

  • 2 cups ketchup

  • 1/2 cup orange marmalade

  • 1/2 cup cold brewed coffee

  • 1/4 cup honey

  • 1/2 cup Balsamic vinegar

  • 1/2 cup brown sugar

  • pinch of ground cloves

Pour the olive oil into a saucepan over medium heat. Add the onion and cook for about 2 minutes or until slightly softened. Add the garlic and chili pepper and cook briefly. Add the ketchup, marmalade, coffee, honey, Balsamic vinegar, brown sugar and cloves and stir to blend them. Bring the mixture to a boil, reduce heat to simmer. Cook uncovered, stirring frequently, for 12-15 minutes or until thick.

Makes about 2-1/2 cups

Potato Pancakes for all occasions

Is there anyone who doesn’t like potato pancakes?

Can’t be!

I make all sorts of versions: Ashkenazi Jewish, Irish, Peruvian, German ….. and more. I make some with raw, shredded potatoes and some with cooked, mashed potatoes ….. and more.

I love all of them.

Recently I tinkered with one of my recipes for Irish mashed potato pancakes, basically combining it with another fabulous Irish mashed potato dish called Colcannon, which includes chopped cabbage or kale.

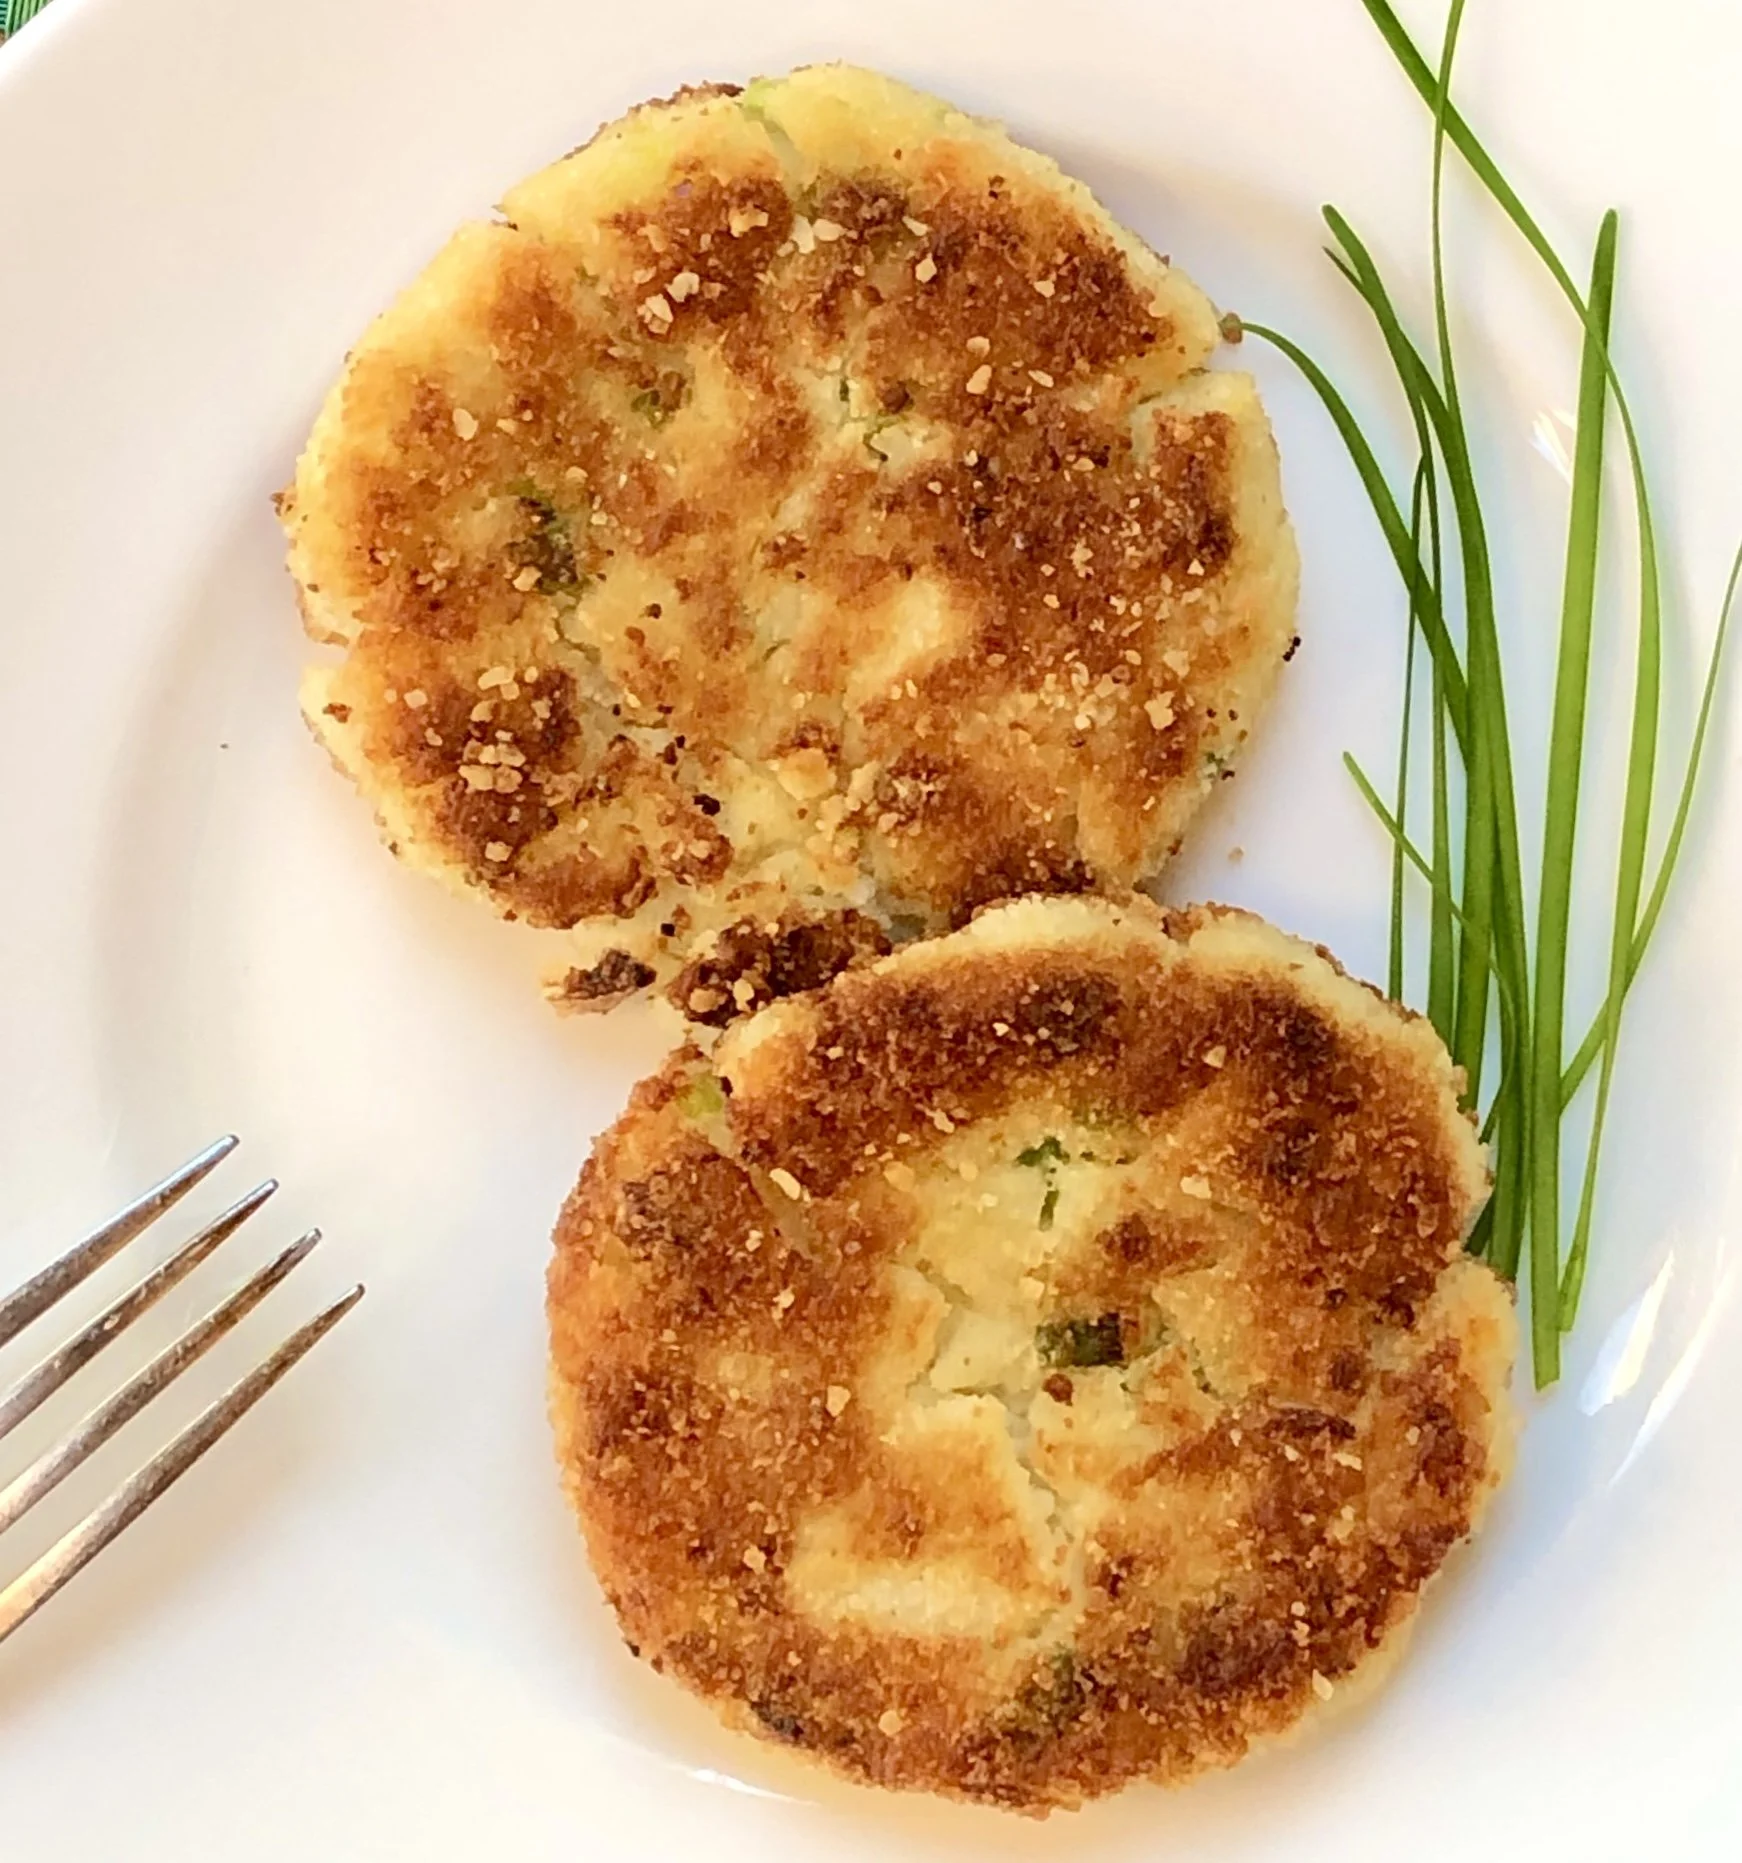
The result was these wonderful, crispy outside, meltingly tender inside Mashed Potato and Cabbage Pancakes.

I’ve made them with both cabbage and kale. I’ve coated them with panko, breadcrumbs and matzo meal.

They all work!

So — the recipe below, which is dairy-free and has a matzo meal crust, is a winner for St. Patrick’s Day, which is fun and gastronomically wonderful even if you’re not Irish, AND is a great side dish for Passover.

MASHED POTATO and Cabbage PANCAKES 

  • 2 large all-purpose or Yukon Gold potatoes, peeled and cut into chunks

  • 1/2 to 3/4 cup chopped cabbage or kale

  • 1 large egg

  • 3 chopped fresh scallions

  • 1/4 cup matzo meal (or bread crumbs)

  • Salt and freshly ground black pepper to taste

  • 1/2 cup matzo meal, approximately (or use bread crumbs or panko)

  • vegetable oil

Place the potatoes in a saucepan, cover with water and bring to a boil over high heat. When the water begins to boil, reduce the heat to a simmer and cook for about 12 minutes or until the potatoes are barely tender. Add the cabbage and cook for another 3-4 minutes. Drain and return the potato-cabbage mixture to the saucepan. Mash the vegetables with a fork or mashing tool. Stir in the egg, scallions and 1/4 cup matzo meal. Season to taste with salt and pepper. Make flat cakes, about 1/4-inch thick out of the potato mixture. Press each side of the cake into the remaining matzo meal, to coat each side. Refrigerate for at least 30 minutes. Heat about 1/4-inch vegetable oil in a cast iron skillet or heavy, heat retaining sautepan over moderately high heat. Fry for about 3 minutes per side or until the pancakes are golden brown and crispy. Drain on paper towels.

Makes about 12

Airfried Fried Chicken vs. Traditional Fried Chicken

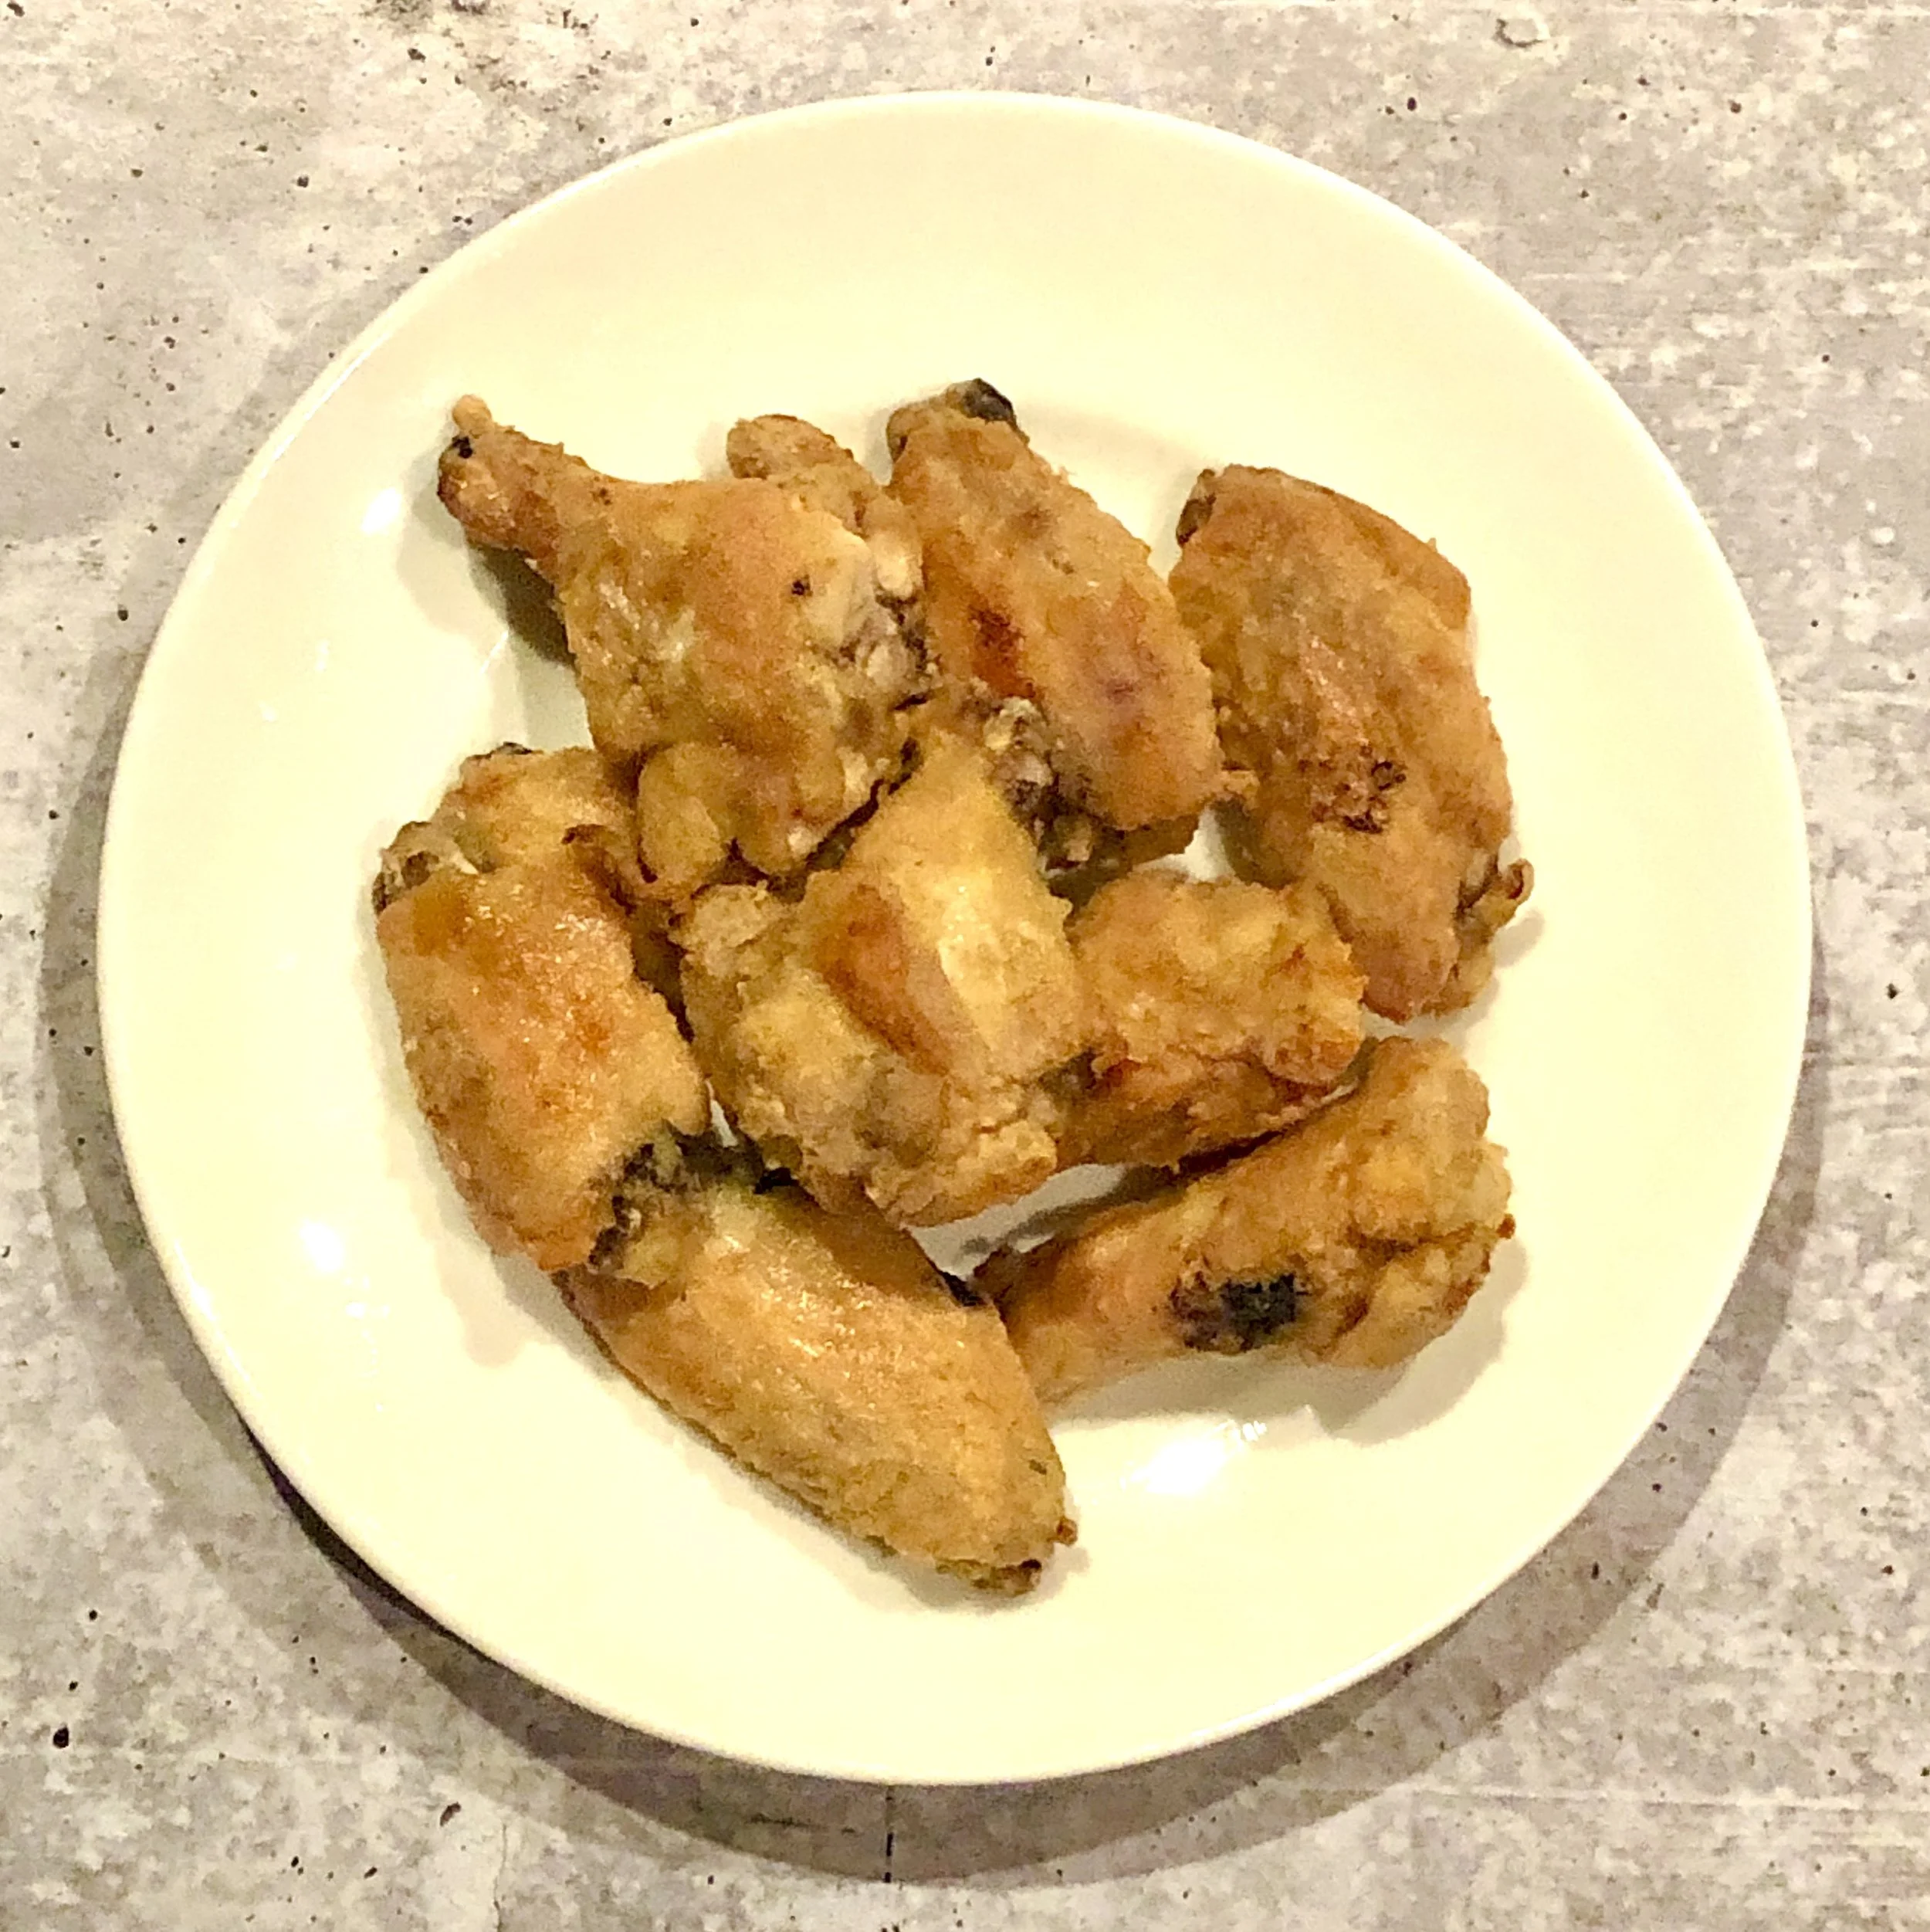
Airfried breaded chicken wings

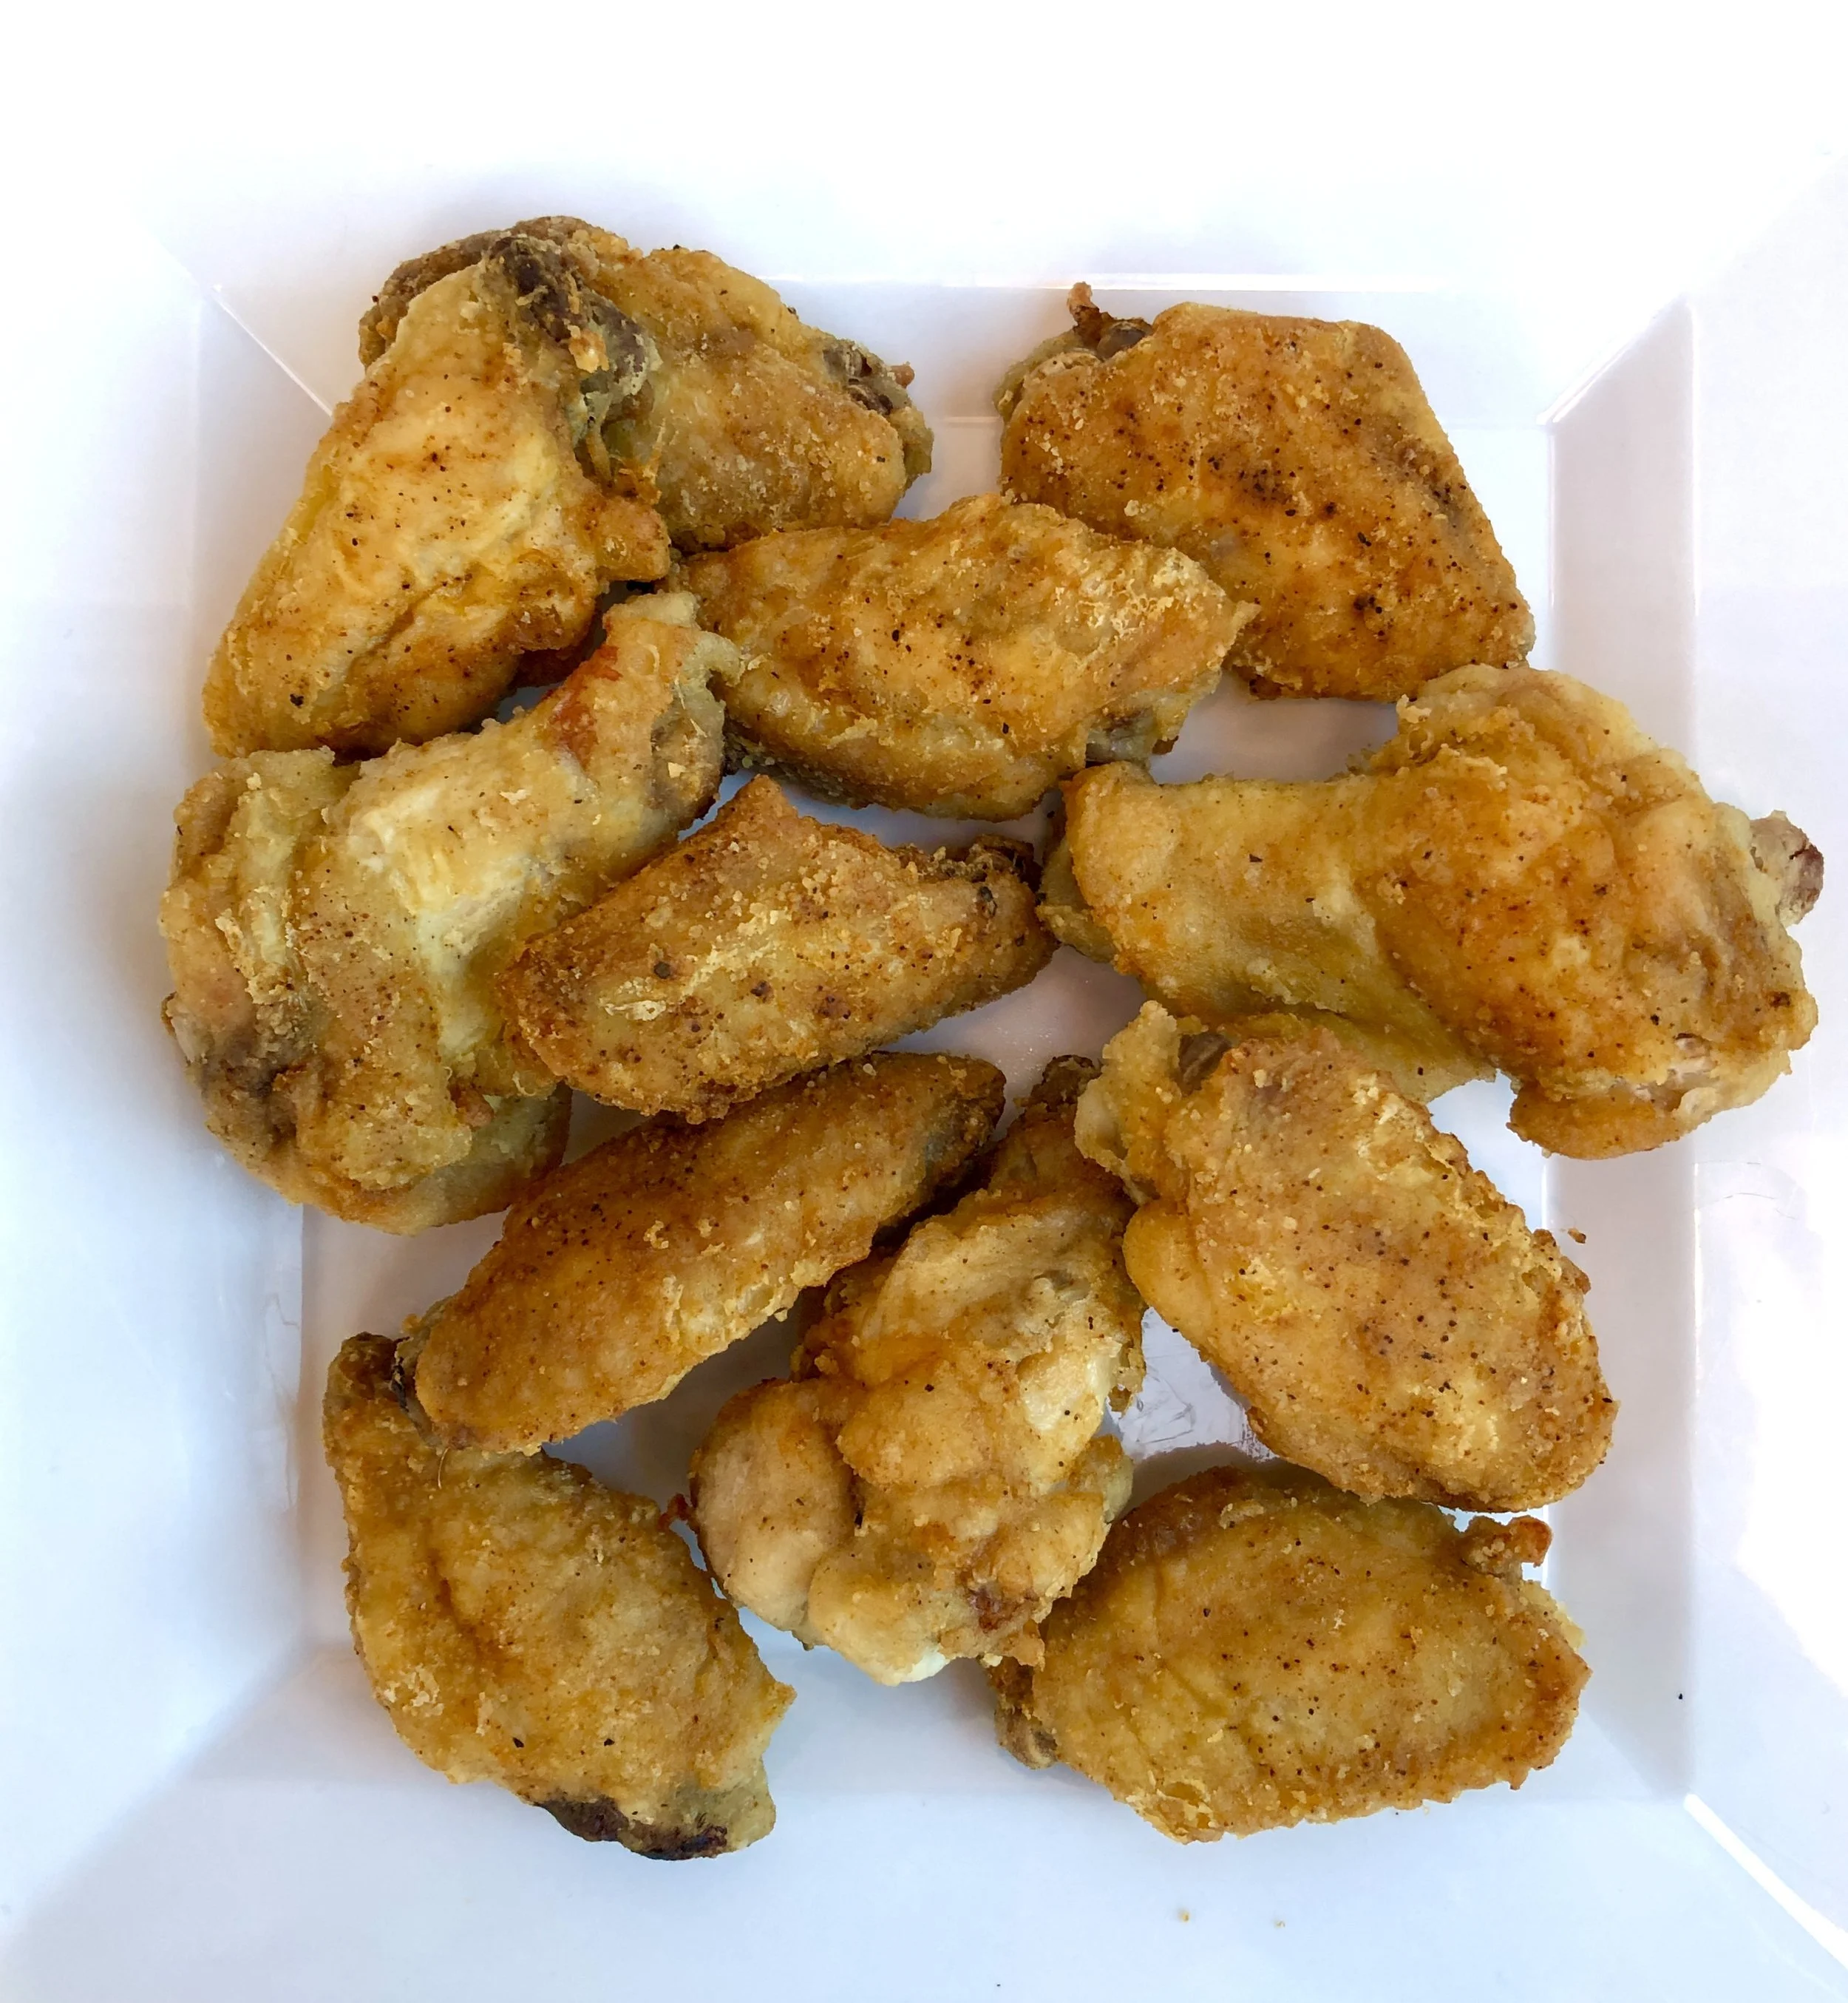
Traditional fried breaded chicken wings

I’ve continued to experiment with my air fryer and have had great success, particularly with vegetables.

I don’t love it for everything and I’ve written about that (latkes were an absolute disaster). Also, you can only do a small amount in an air fryer, so whereas cooking for two can be a plus, for a family, not so much.

Recently I made breaded fried chicken wings again and tested it out on 6 people. I served one recipe of old fashioned fried chicken (fried in soybean oil), and one recipe of airfried chicken.

The score was 3-3! Half the people liked the regular, half liked the airfried!

And so my friends, here is the recipe I used for each: you choose!

Please note: this experiment was for breaded chicken. I have a different recipe and procedure for roasted and airfried UNbreaded chicken wings.

Fried BREADED Chicken Wings

  • 12 chicken wings cut into sections

  • 2/3 cup all purpose flour

  • 3/4 teaspoon salt

  • 3/4 teaspoon paprika

  • 1/2 teaspoon garlic powder

  • 1/4 teaspoon black pepper

  • vegetable shortening or vegetable oil

Wash and dry the chicken sections. Combine the flour, salt, paprika, garlic powder and black pepper in a large dish. Coat the chicken pieces with the flour mixture. If possible, let the pieces airdry for at least 15 minutes. Heat enough shortening or vegetable oil in a deep cast iron or heavy skillet to reach halfway up the sides of the chicken. When the temperature reaches about 365 degrees (hot enough to sizzle a bread crumb quickly), add a few chicken pieces at a time — do not crowd the pan. Cook over medium heat, turning pieces occasionally, for about 10 minutes or until all pieces are well browned and cooked through. Drain the chicken on paper towels. 

To make this in an airfryer, coat the chicken with the flour mixture as above, then spray lightly with vegetable oil spray. Preheat the airfryer to 400 degrees. Place the wing parts in a single layer in the airfryer. Cook for 8 minutes, turn the pieces and cook for about 8 minutes or until nicely browned and crispy.

Makes 4 servings

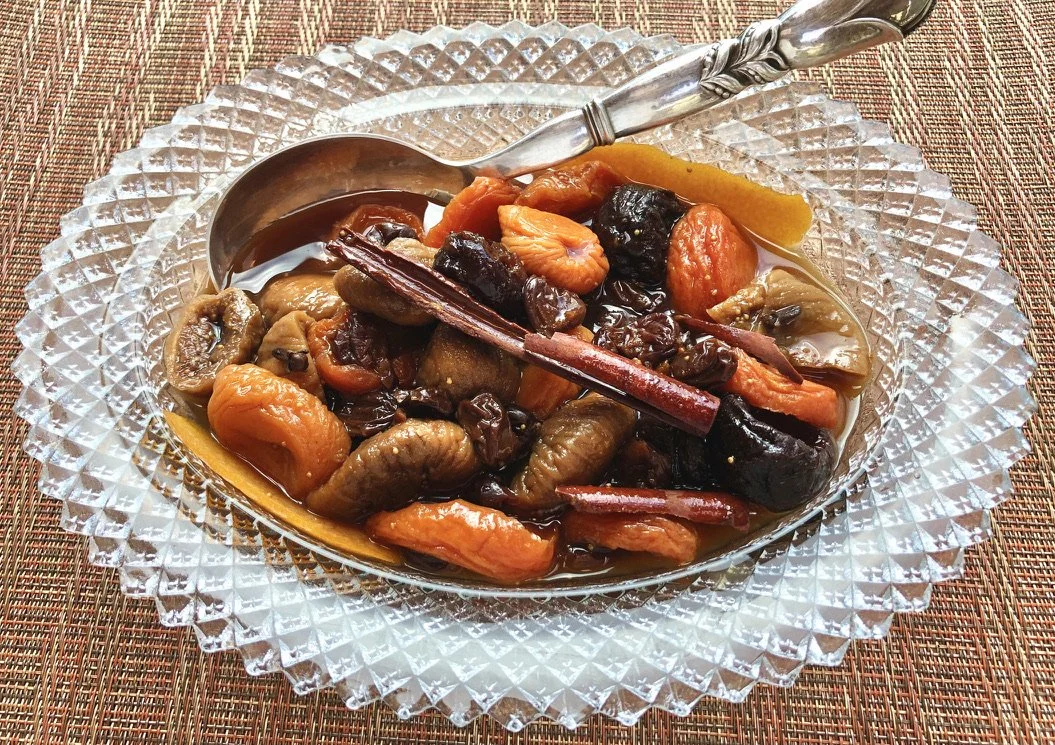
Stewed Dried Fruit

I know some people think it’s too old fashioned, but I have always loved — still love — dried fruit compote.

Last year I wrote about it for The Nosher (My Jewish Learning) and got lots of responses! It’s the kind of dish that some people absolutely hate (until they try some updated version) but people like me love not just for the flavor but also the memories this dish conjures up.

I grew up in an Ashkenazi Jewish family so dried fruit compote was a given! My grandmother, who made it basically with prunes and the occasional dried apricot, called it kumput. The young kids, me included, hated it.

Years later I rediscovered the dish after trying something similar (Khoshaf) in Egypt and I’ve been tinkering with the recipe ever since. This is my latest version; a tasty and fitting dish anytime, but especially for the lovely holiday of Tu B’shevat (New Year of the Trees), which comes at the beginning of a new season in Israel when trees bring forth their first fruits of the year (this year the holiday starts at sundown on February 5th).

We eat compote with yogurt for breakfast but I’ve also served it with mascarpone cheese for dessert. It’s really good anytime.

Dried Fruit Compote

  • 2 cups orange juice

  • 1-1/2 cups water

  • 1/4 cup honey

  • 1 3” cinnamon stick

  • 12 whole cloves

  • 2 pieces of orange peel, each about 2-inches long

  • 12 prunes

  • 8-10 whole dried figs, cut in half

  • 1 cup dried cherries, blueberries or cranberries

  • 1 cup dried apricot halves

Place the juice, water, honey, cinnamon stick, cloves and orange peel in a saucepan large enough to hold all the dried fruit. Bring to a boil over high heat. Turn the heat to medium-low and simmer for 15 minutes. Add the fruit and simmer another 18-20 minutes or until the fruit is soft. Let the fruit cool in the pan. The sauce will thicken as the fruit absorbs some of it. Discard the cinnamon stick (you won’t find the cloves). Serve with the poaching liquid.

Makes 8 servings

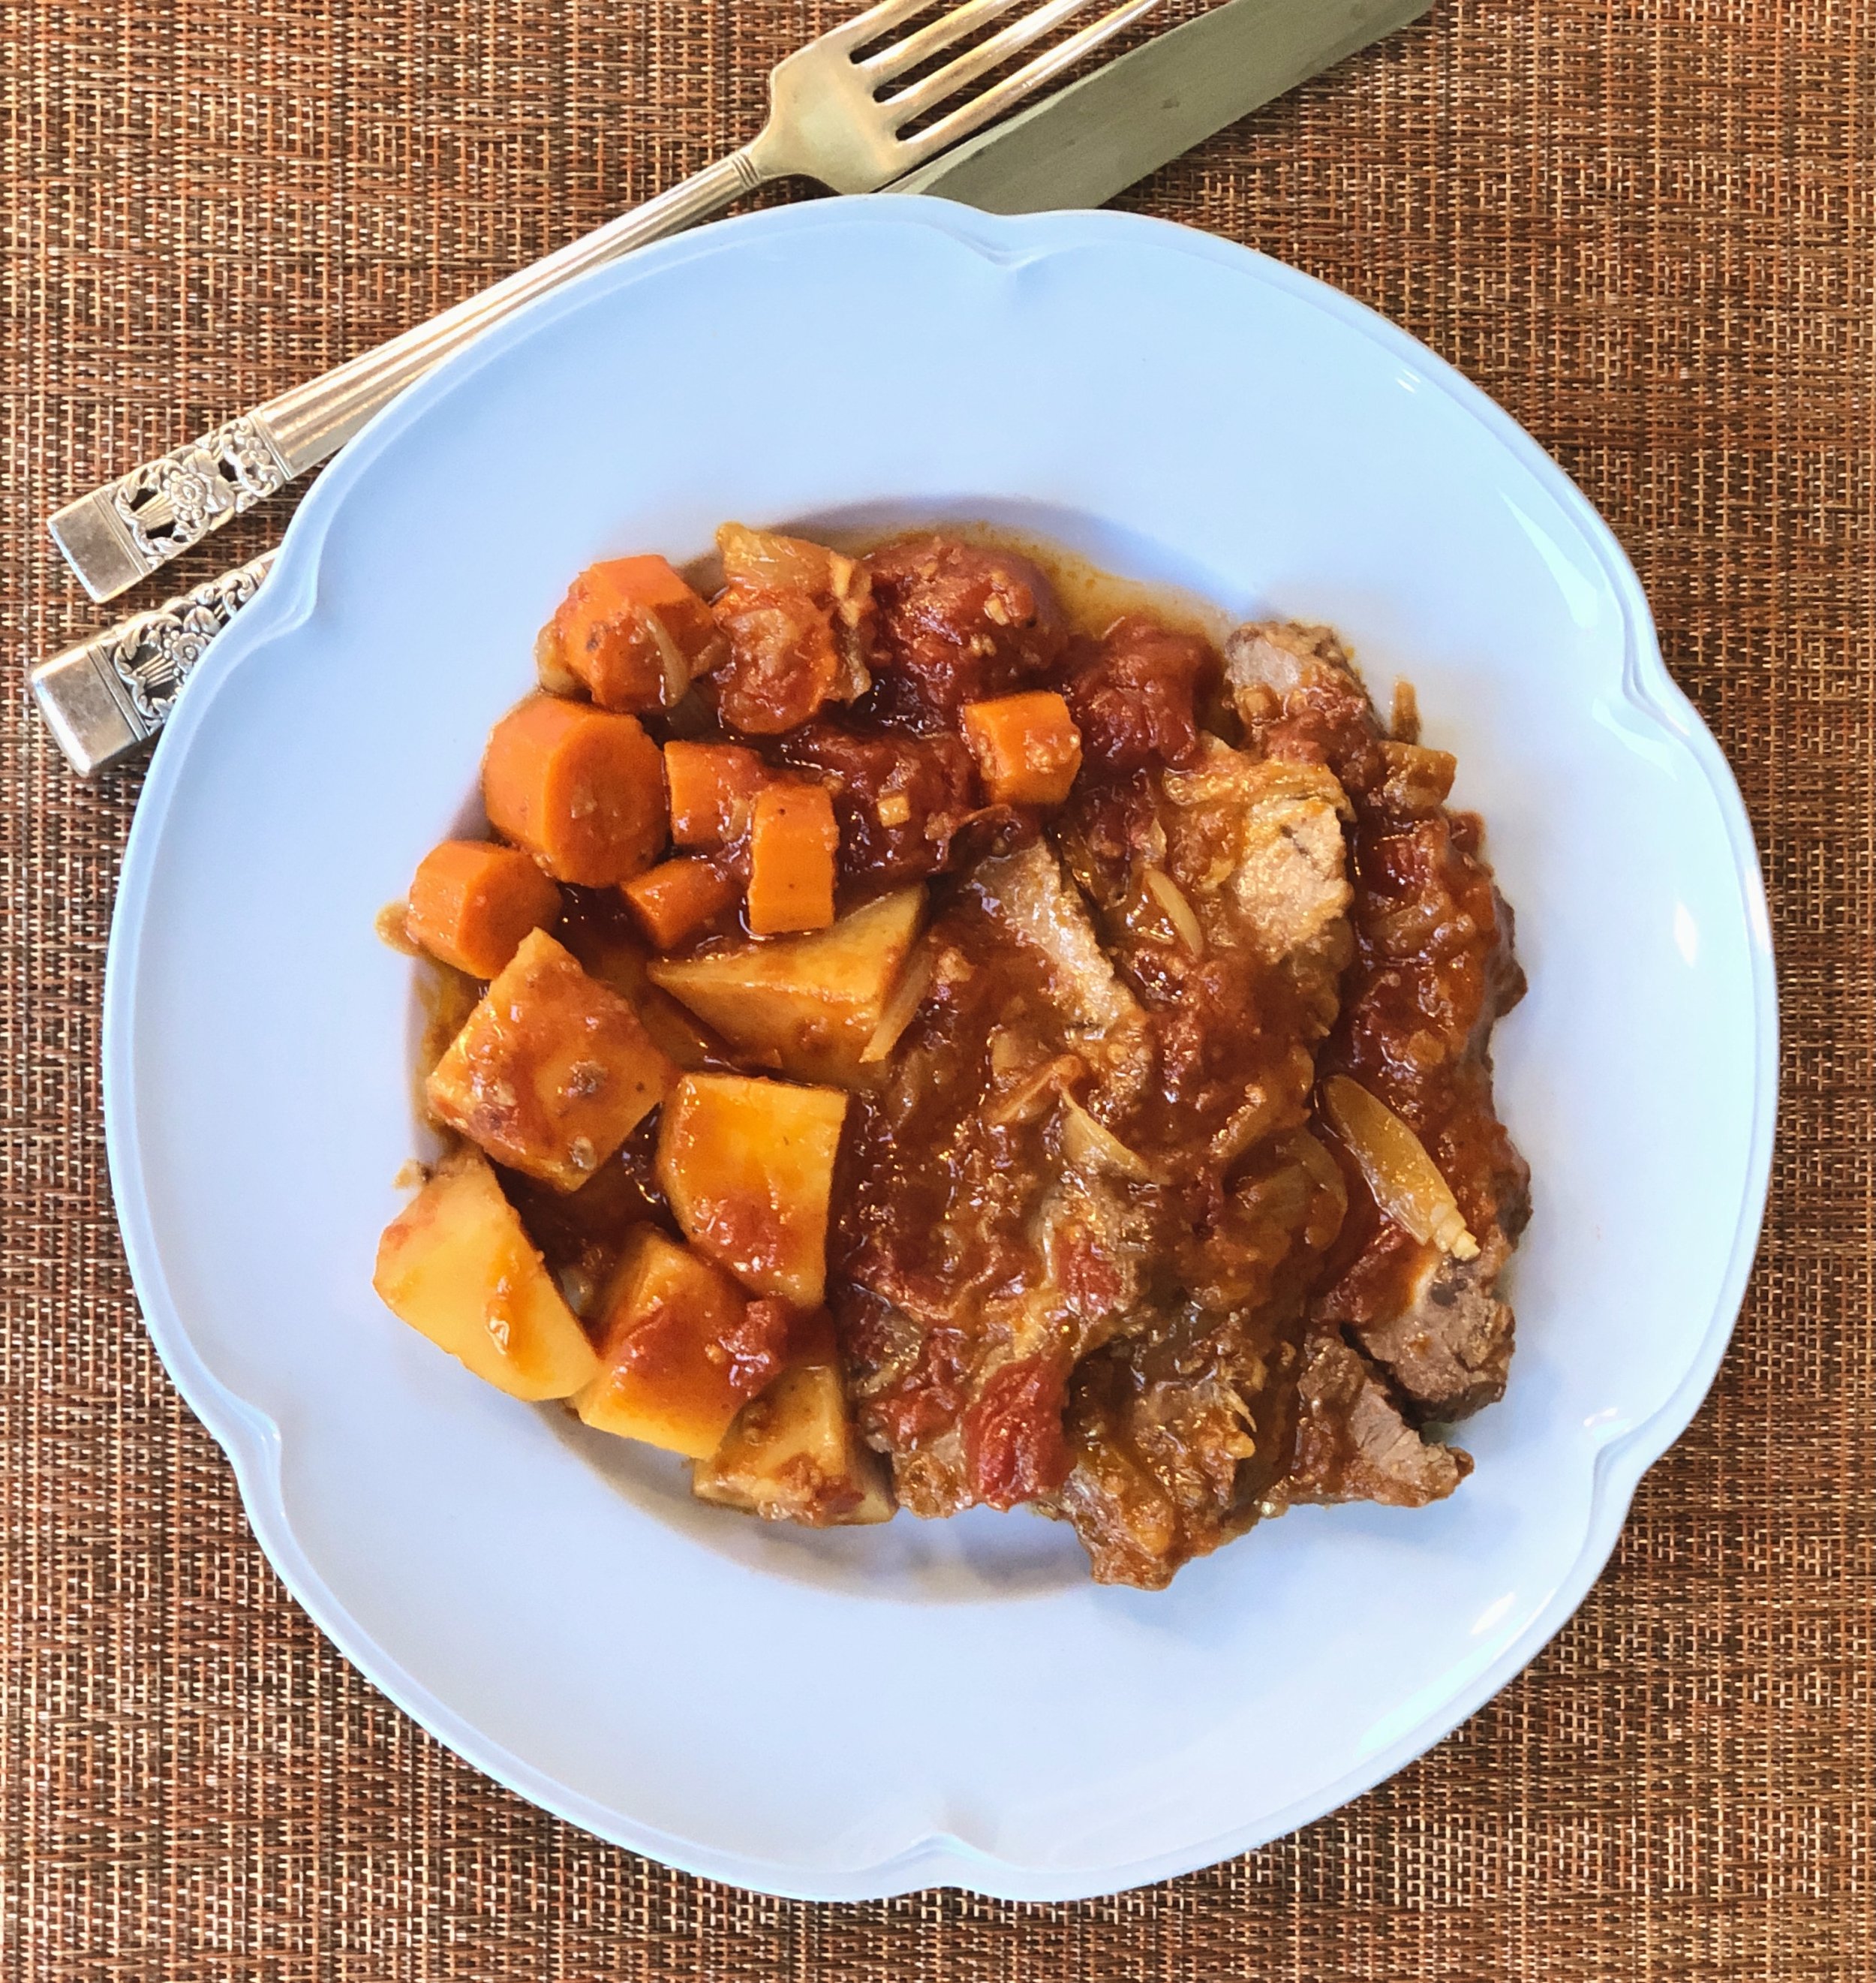
Sweet and Sour Pot Roast

There are two truths about pot roast.

First, it’s not glamorous or gorgeous.

Second, it is delicious and satisfying.

So, with that in mind, please remember that the photo may not be an artist’s dream, but the food in it is always devoured because the recipe is big winner. And, while pot roast is ideal when the weather is cold or dreary, it’s so satisfying that it will do in just about any weather.

Sweet and Sour Pot Roast

  • 3-4 tablespoons all purpose flour

  • salt and freshly ground black pepper to taste

  • 3 pound chuck roast

  • 4 tablespoons vegetable oil (I use avocado oil)

  • 2 medium onions, sliced

  • 2 large cloves garlic, chopped

  • 1 teaspoon finely chopped fresh ginger

  • 1 1-pound 12-ounce can tomatoes (including liquid)

  • 1/4 cup brown sugar

  • 3 tablespoons cider vinegar

  • 1 tablespoon Worcestershire sauce (I use vegetarian Worcestershire sauce)

  • 4-5 carrots, peeled and cut into chunks

  • 2-3 medium all-purpose potatoes, peeled and cut into chunks

In a dish, mix the flour with some salt and pepper. Dredge the beef in the flour to coat it on all sides. Pour 2 tablespoons vegetable oil in a Dutch oven over medium heat. Add the meat and cook, turning the meat occasionally, for 6-8 minutes, to brown the surface. Remove the meat and set it aside. Add the remaining vegetable oil to the pan. Add the onions, garlic and ginger and cook, stirring occasionally, for 2-3 minutes. Add the tomatoes (and liquid), brown sugar, cider vinegar and Worcestershire sauce. Stir to blend the ingredients. Return the meat to the pan. Add the carrots and potatoes. Cover the pan and place it in the oven. Turn the heat to 275F. Cook for about 3 hours or until the meat is tender.

Makes 6 servings

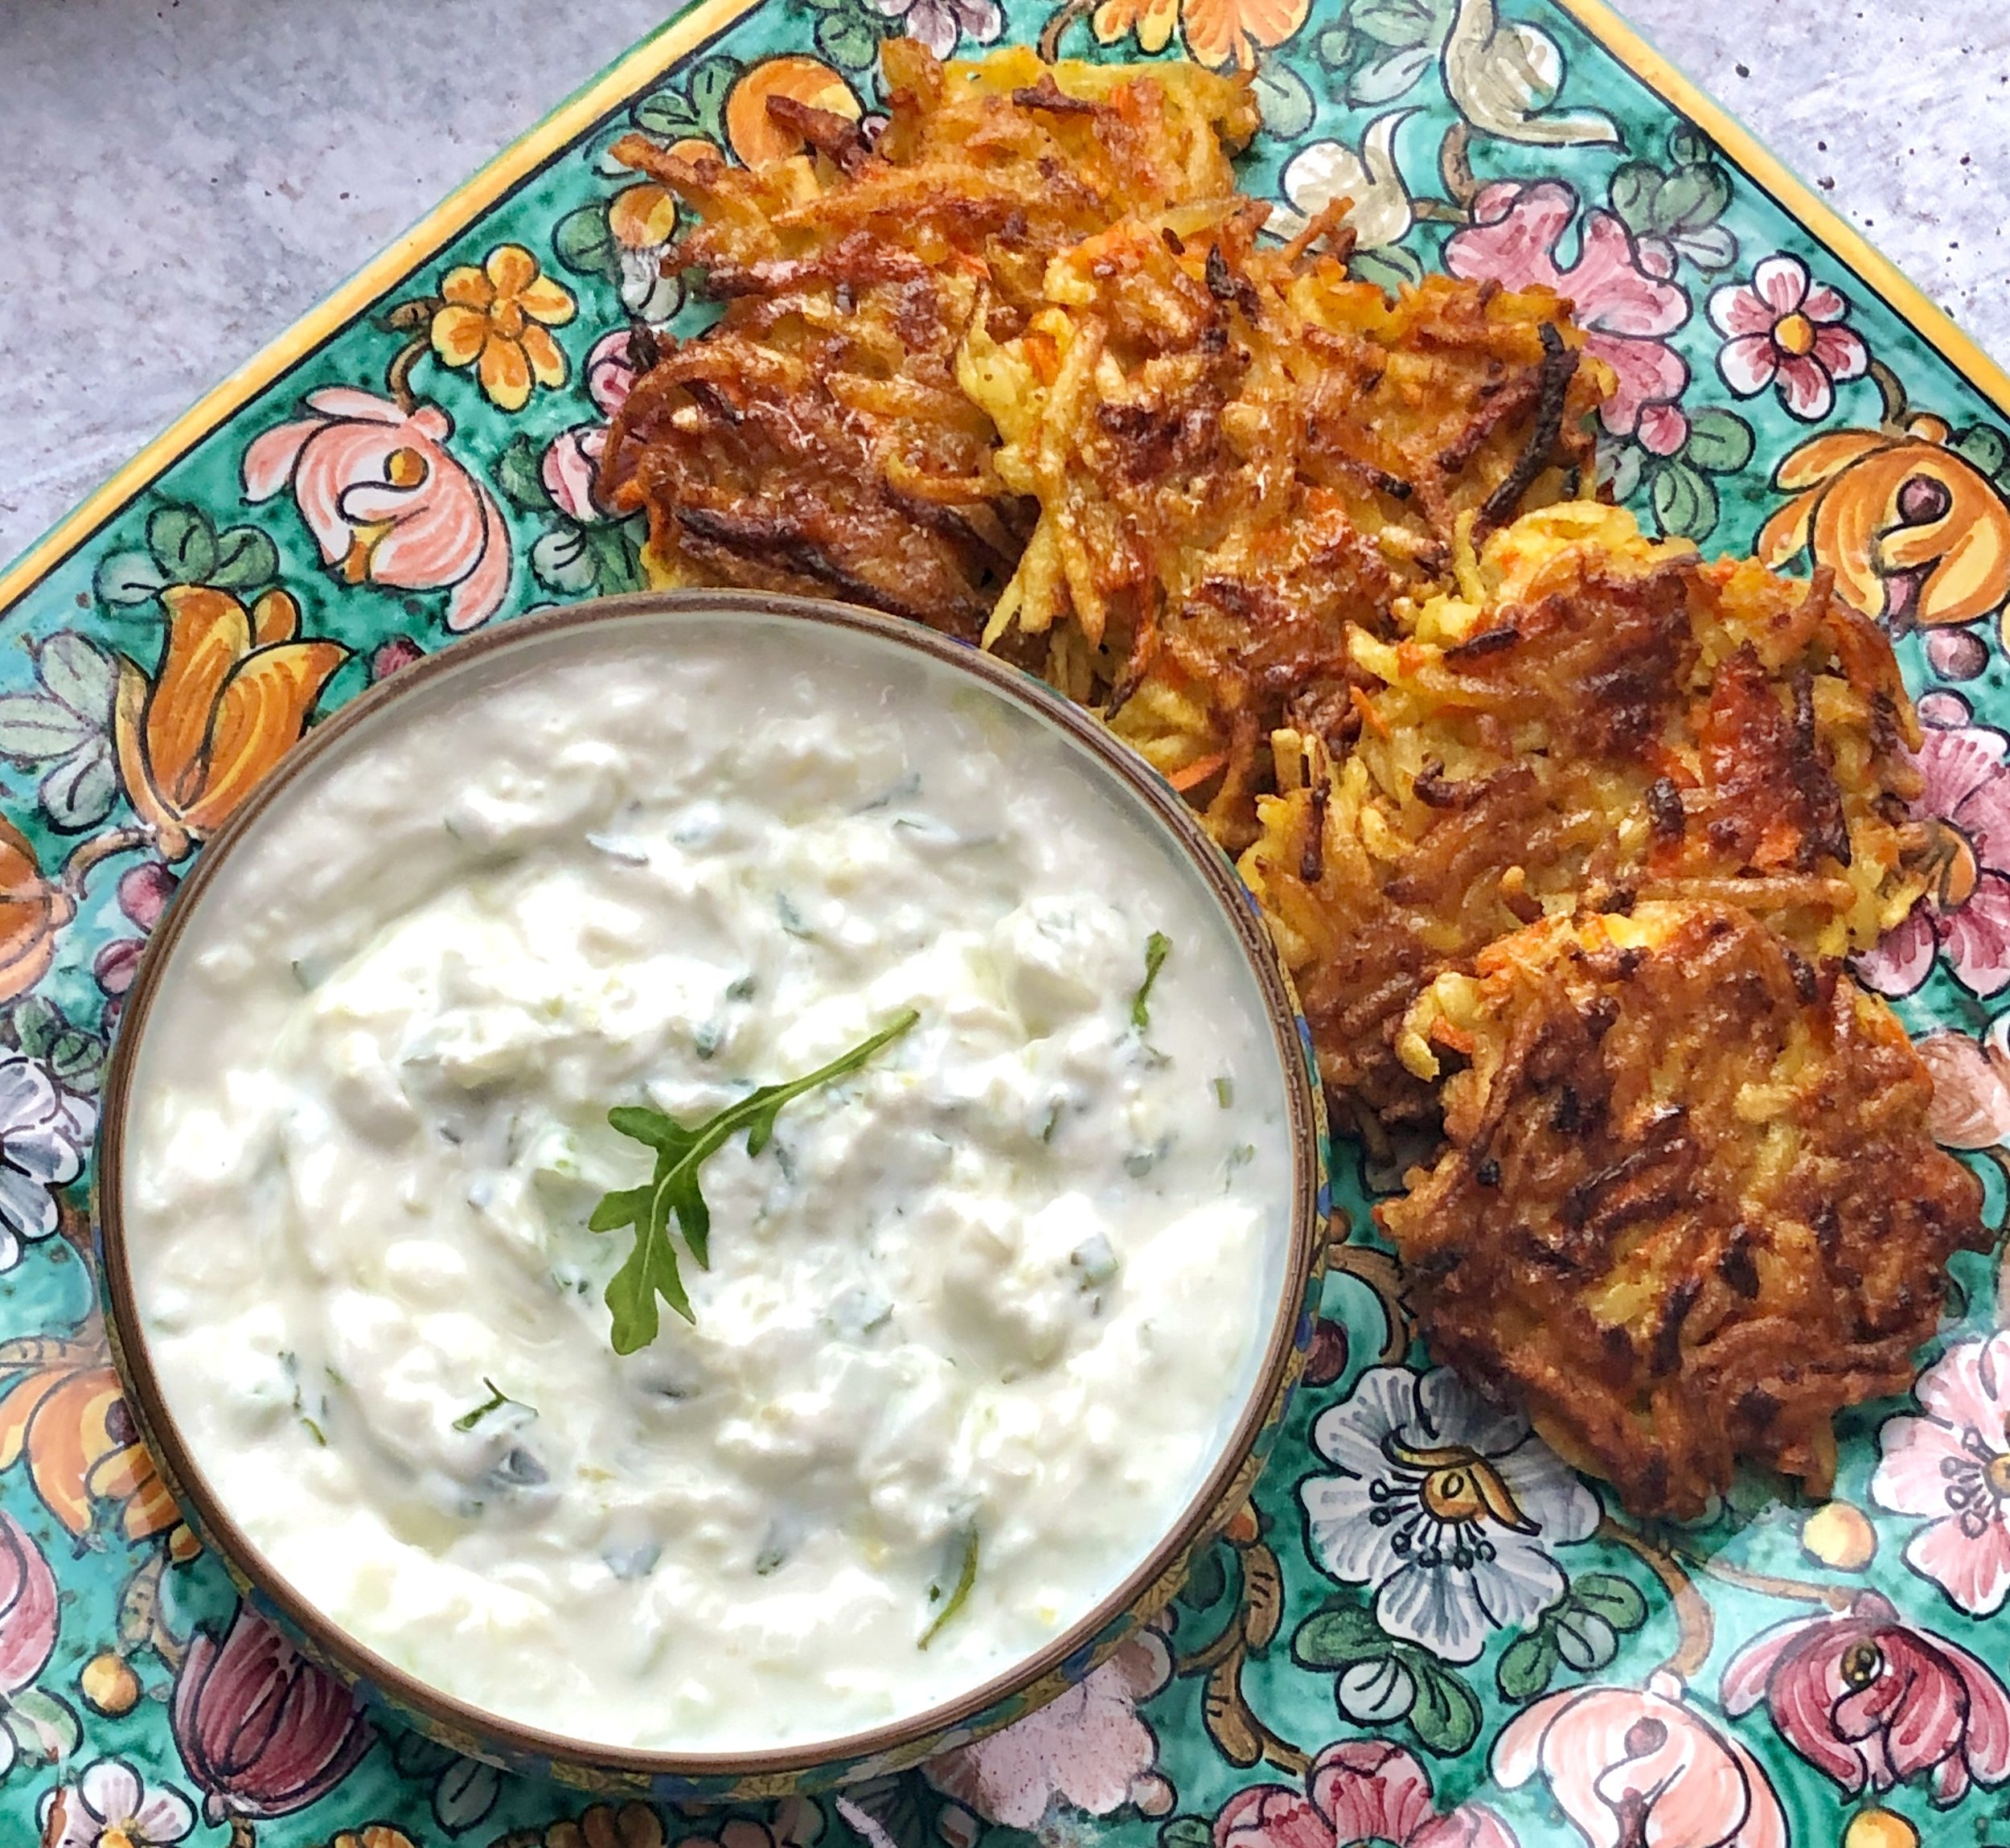
Potato-Carrot-Curry Latkes

Potato latkes for Hanukkah? Of course!

But I make other kinds of latkes too.

This year it’s going to be these potato-carrot latkes. They have just enough curry powder to add an intriguing but not too spicy seasoning. I’ve made them several times already and they’ve been getting rave reviews. I’ll also serve some for my new year’s hors d’oeuvres fest.

The sauce is a bit tangy and very refreshing, sort of like tzadiki (cacik). It’s a soft, rich, smooth and tasty counterpoint for the crispy fried latkes.

Potato-Carrot-Curry Latkes with Yogurt Sauce

  • 3 medium Russet type potatoes, peeled

  • 4 medium carrots, peeled

  • 1 large onion, cut into chunks

  • 2 large eggs

  • 1/4 cup potato starch, matzo meal or bread crumbs

  • 1 teaspoon salt or to taste

  • freshly ground black pepper to taste

  • 2 teaspoons curry powder

  • vegetable oil for frying

Yogurt Sauce

  • 1 cup plain Greek yogurt

  • 2-3 scallions, chopped

  • 1/4 cup grated cucumber

  • 2-3 teaspoons lemon juice


Shred the potatoes, carrots and onion in a food processor. Squeeze out as much of the liquid as possible (I put portions of the shreds in a kitchen towel and squeeze until they are practically dry). Place the shreds in a bowl. Immediately mix the eggs in (this helps keep the potatoes from browning). Add the potato starch, salt, pepper and curry powder. Heat about 1/4” vegetable oil in a heavy pan over medium-high heat. Shape latkes by hand, squeezing liquid out if there is any, and place them in the hot oil, leaving space between each one so that they brown well and become crispy (if they are too close they will “steam” and become soggy). Press down on the latkes to keep them evenly shaped. Fry for about 3 minutes per side or until the pancakes are golden brown and crispy. Drain on paper towels. Serve with the Yogurt Sauce.

To make the sauce, mix the yogurt, scallions, cucumber and lemon juice together until well mixed. Place in a serving bowl.

Makes 12-15

Turkey Bones Soup

Okay, okay, this is not gorgeous food.

But trust me, this is good soup. Good for the taste buds, good for the soul. And it’s a useful, delicious way to use the Thanksgiving turkey carcass.

Think of this as a special ugly duckling. I mean turkey.

Turkey bones Soup

  • turkey carcass, bones, etc, scraps

  • 2 carrots, peeled and sliced 1-inch thick

  • 2 stalks celery, peeled, leaves included if available, and sliced 1-inch thick

  • 1 medium onion, sliced

  • 1 parsnip, peeled and sliced 1-inch thick

  • 1 28-ounce can tomatoes plus the liquid

  • 10 cups water

  • salt and pepper

  • 2-3 tablespoons chopped fresh dill

  • 1 cup short macaroni such as elbows

  • 1 cup frozen peas

Place the turkey pieces, carrots, celery, onion, parsnip and tomatoes in a soup pot. Cover with the water, add salt, pepper and dill and bring the liquid to a boil over high heat. Lower the heat. and simmer for 3-1/2 hours. Add the macaroni and peas and cook for another 15 minutes.

Makes 8-10 servings

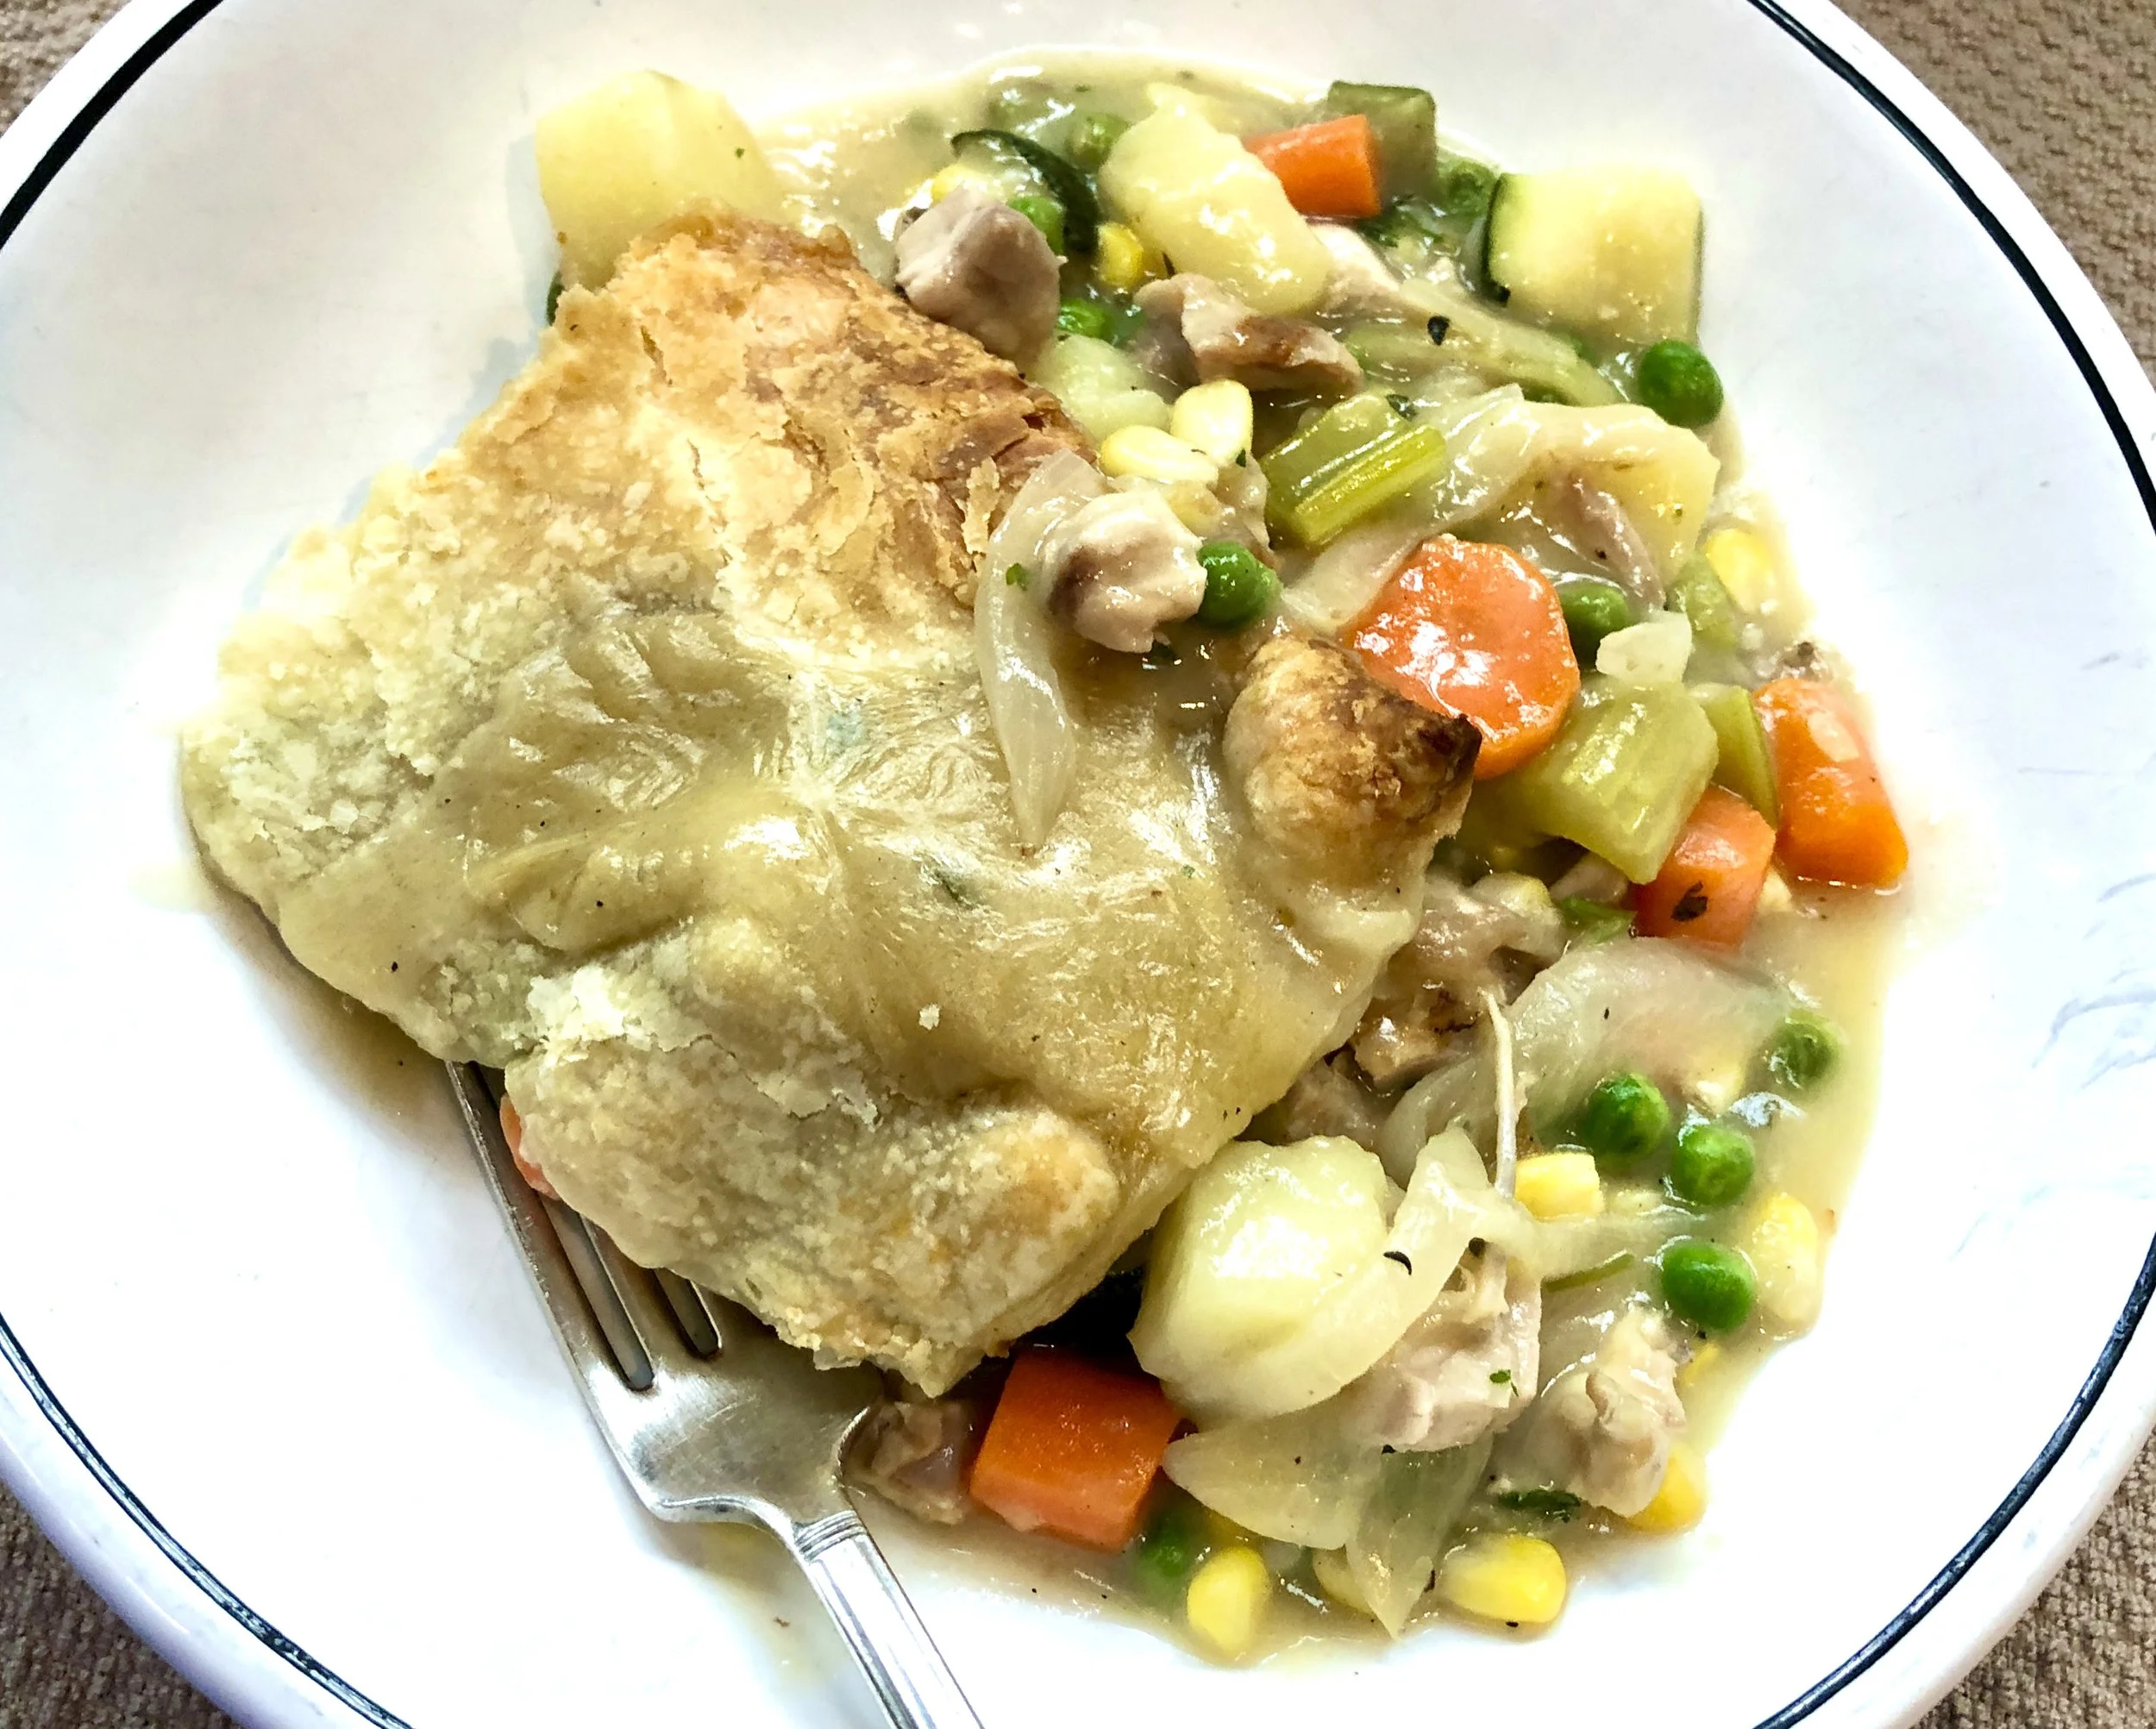
Pot Pie

Is it too early to think about Thanksgiving?

Not for me. For the first time in a few years — Covid!!!! — I am finally having my old, usual crew for dinner. My family plus my brother and sister-in-law, their kids and one grand.

HURRAH!!!

So, I am already planning the menu and doing what I can ahead.

With all those people at the feast there may not be any leftover turkey this year. But just in case — I’ll use the meat for pot pie.

I make pot pie a lot because with only Ed and me for dinner most nights, there are leftovers all the time and pot pie is one of Ed’s favorites.

The recipe below is more or less the one I use. I change the herb, depending on what I have (I’ve used dill, basil, marjoram) and of course the veggies change depending on what’s also leftover or what’s in the fridge produce bin. You need about 3-4 cups of veggies plus the potato and onion.

Sometimes I make this without the meat — just add some more vegetables.

Thanksgiving leftovers? For sure. But why wait? This versatile recipe is an all-year handy one. Bonus: you can freeze pot pie to serve when you want to just pop something in the oven for dinner. Place the dough on top and freeze. Then, thaw and bake.

Pot Pie

  • 2 tablespoons olive oil or vegetable oil

  • 1 medium onion, chopped

  • 1 medium Yukon Gold or other Eastern potato

  • 2 carrots, sliced 1/4-inch thick

  • 2 stalks celery, sliced 1/4-inch thick

  • 1 cup bite-size zucchini chunks

  • 1 cup corn kernels or peas

  • 3 cups bite-size chopped cooked chicken, turkey, beef or veal

  • 5 tablespoons all-purpose flour

  • 3 cups chicken stock

  • 2 tablespoons chopped fresh parsley

  • 2 teaspoons chopped thyme leaves

  • salt and freshly ground black pepper to taste

  • pie dough or thawed frozen puff pastry sheets

Preheat the oven to 400 degrees. Heat the vegetable oil in a large saucepan over medium heat. Add the onion and cook, stirring frequently, for 2-3 minutes or until softened. Add the potato, carrots and celery and cook, stirring occasionally, for 3 minutes. Add the zucchini, corn and chicken and stir to distribute the ingredients evenly. Sprinkle the flour over the ingredients and stir to mix it in completely. Cook for 1-2 minutes, stirring frequently to let the flour absorb into the other ingredients. Pour in the stock gradually, stirring constantly. Raise the heat and bring the liquid to a boil. Reduce the heat and simmer the ingredients, stirring frequently, for about 10 minutes or until the sauce has thickened. Stir in the parsley and thyme and sprinkle to taste with salt and pepper. Spoon the filling into a baking dish. Cover with the pie dough or puff pastry. Seal the edges to the dish. Cut 2-3 slits in the crust to allow steam to escape. Bake for about 35 minutes or until the crust is crispy and golden brown.

Makes 4 servings