dairy

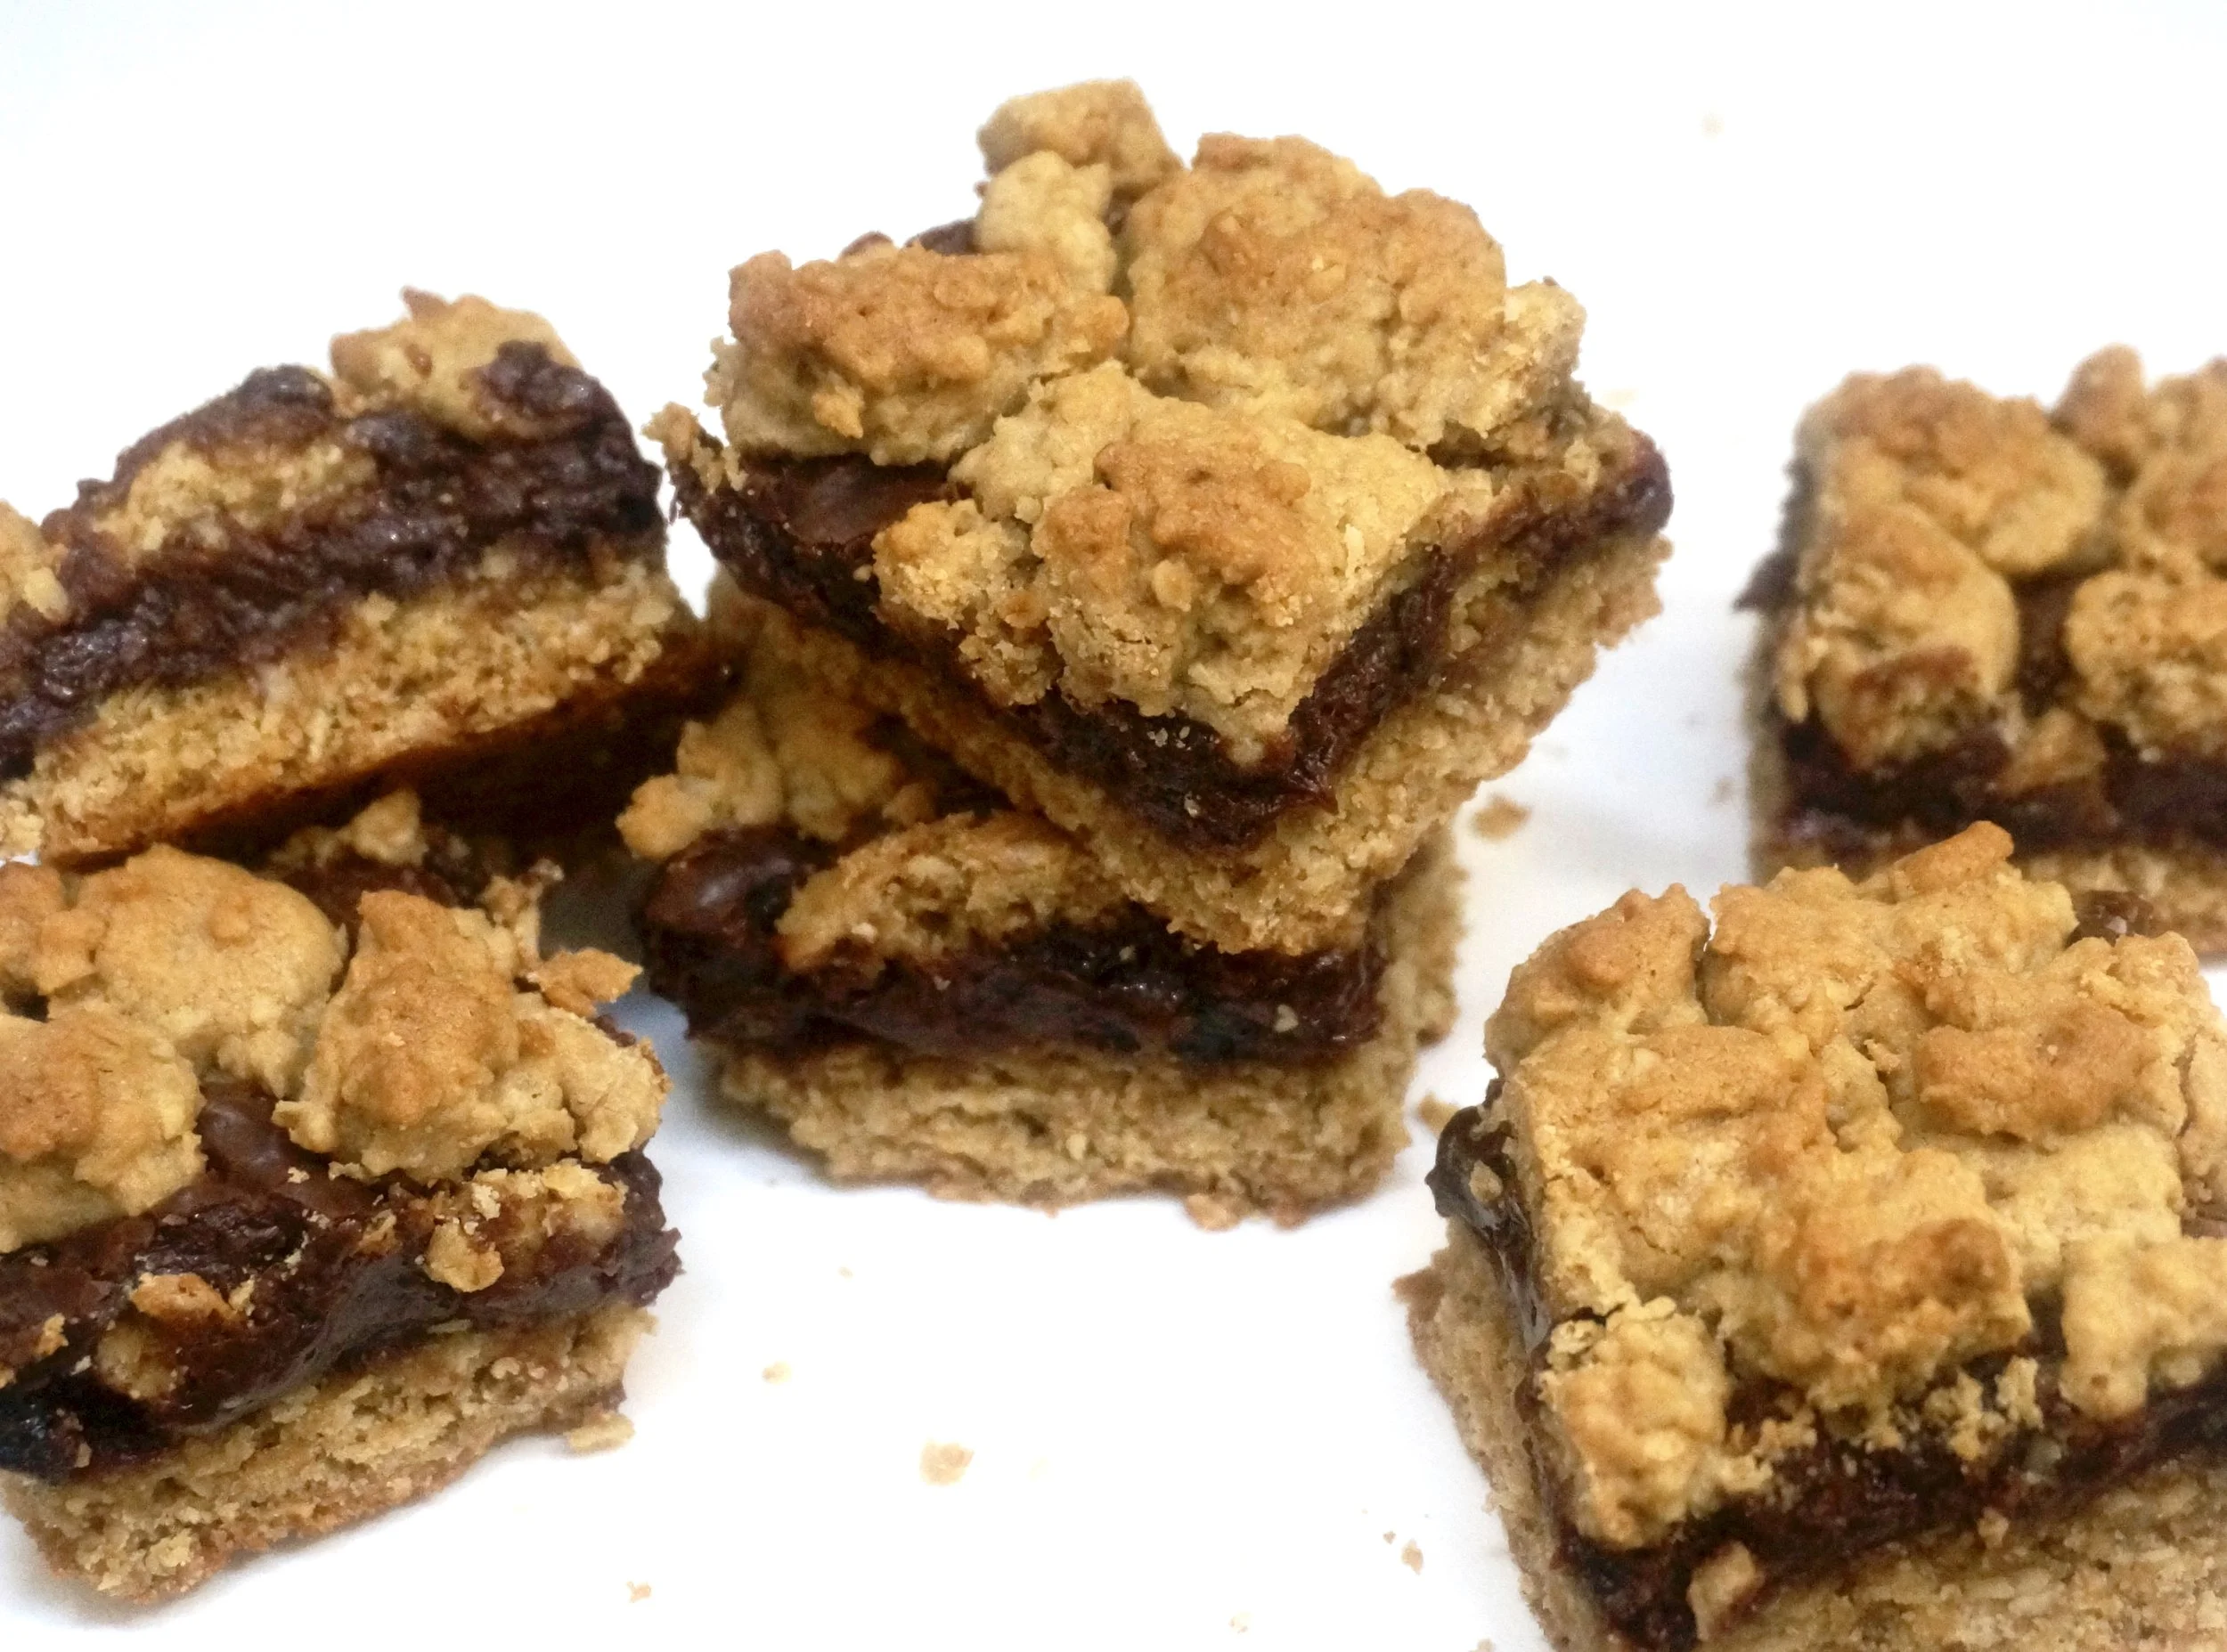
Chocolate Oat Bars

fullsizeoutput_ae23.jpeg

Back in the day — when I was a kid, that is — my brother and I walked home from school at 3:00 and knew it was our responsibility to practice the piano (our teacher required an hour a day), do our homework and get dinner ready.

Ours was a working Mom; she taught us how to set the table; she prepared the food and we put it in the oven at the appropriate time.

She was responsible for making sure there were cookies and milk when we got home — to feast on before said chores and stuff.

Sometimes she left us store-bought cookies. I have memories of fig bars, Hydrox and shortbread.

But mostly she baked. Butter cookies. Peanut butter cookies. Oatmeal-Raisin.

By the time I had my own children, life was very different. They took a school bus home and walked down the hill to our house. I was a working Mom, but my job as a food writer meant I worked at home.

I didn’t usually give them cookies and milk. Food styles had changed, so snacktime meant granola bars or those peanut-butter filled cheese crackers (I bought those because I mistakenly thought they were healthy). Sometimes a frozen burrito.

Looking back — I really like the milk and cookies thing. I miss those days. I miss the milk and cookies. Especially the dunking of cookies in the milk and then trying to bite off a soft milk-drenched piece before it fell into the bottom of the glass.

Cookies really are much better than frozen burritos and peanut-butter filled cheese crackers.

So, for all the parents of all the kids who are coming home from school now that the new term has begun — here are some cookies to consider for snacktime after school, before the piano practice or homework or whatever they have to do before the day is done.

Chocolate-Oat Bars

Cookie layers:

  • 1 cup butter

  • 2 cups packed brown sugar

  • 2 large eggs

  • 2 teaspoons vanilla extract

  • 3 cups quick-cooking oats

  • 2-1/2 cups all-purpose flour

  • 1 teaspoon salt

  • 1 teaspoon baking soda

  • 1/2 teaspoon ground cinnamon

chocolate layer:

  • 1 can (14 ounces) sweetened condensed milk

  • 12 ounces semisweet chocolate, chopped

  • 2 tablespoons butter

  • 1/4 teaspoon salt

  • 2 teaspoons vanilla extract

  • 1 cup raisins

Preheat the oven to 350 degrees. Grease a 15-inch x 1-inch jelly roll pan.

To make the cookie layers: beat 1 cup of the butter with the brown sugar in the bowl of an electric mixer set at medium for 2-3 minutes or until smooth and well blended. Add the eggs and 2 teaspoons vanilla extract and blend them in thoroughly. Add the oats, flour, salt, baking soda and cinnamon. Beat for 1-2 minutes or until the ingredients are evenly distributed. Press about two-thirds of the mixture into the prepared pan.

To make the chocolate layer, place the condensed milk, chocolate, butter and salt in a saucepan over low heat and cook, stirring frequently, for about 2-3 minutes or until the chocolate has melted. Remove the pan from the heat, stir in the vanilla extract and raisins. Spread this mixture evenly over the cookie layer. Sprinkle with the remaining cookie crumb mixture. Bake for 20-24 minutes or until lightly browned. Let cool and cut into squares.

 Makes about 48


Blue Salad (with green): Berries and Cheese

I love blueberries and I love blue cheese, so I figured they might go together well.

They did!

In this light, refreshing summer salad.

Nice for a full lunch — add a crust of bread. Or as a first course for dinner.

I bought the blueberries and the cheese. But the greens? Right from my garden! What a joy!

Blue Salad (with green)

  • 1 head leaf lettuce or 6 cups mixed greens

  • 1 cup blueberries

  • 1 cup crumbled blue cheese

  • 3 tablespoons chopped chives or scallion tops

  • 1/3 cup olive oil (or use avocado oil)

  • 3-4 tablespoons Balsamic vinegar

  • 1/4 cup chopped toasted almonds, optional

Tear the lettuce into smaller pieces and place them in a salad bowl. Add the blueberries, cheese and chives and toss the ingredients. Pour in the olive oil and toss the ingredients again. Add 3 tablespoons of the Balsamic vinegar, toss and taste, add more Balsamic vinegar to taste. Serve and garnish with the toasted almonds if desired.

Makes 4-6 servings

Blueberry Yogurt Torte

fullsizeoutput_9584.jpeg

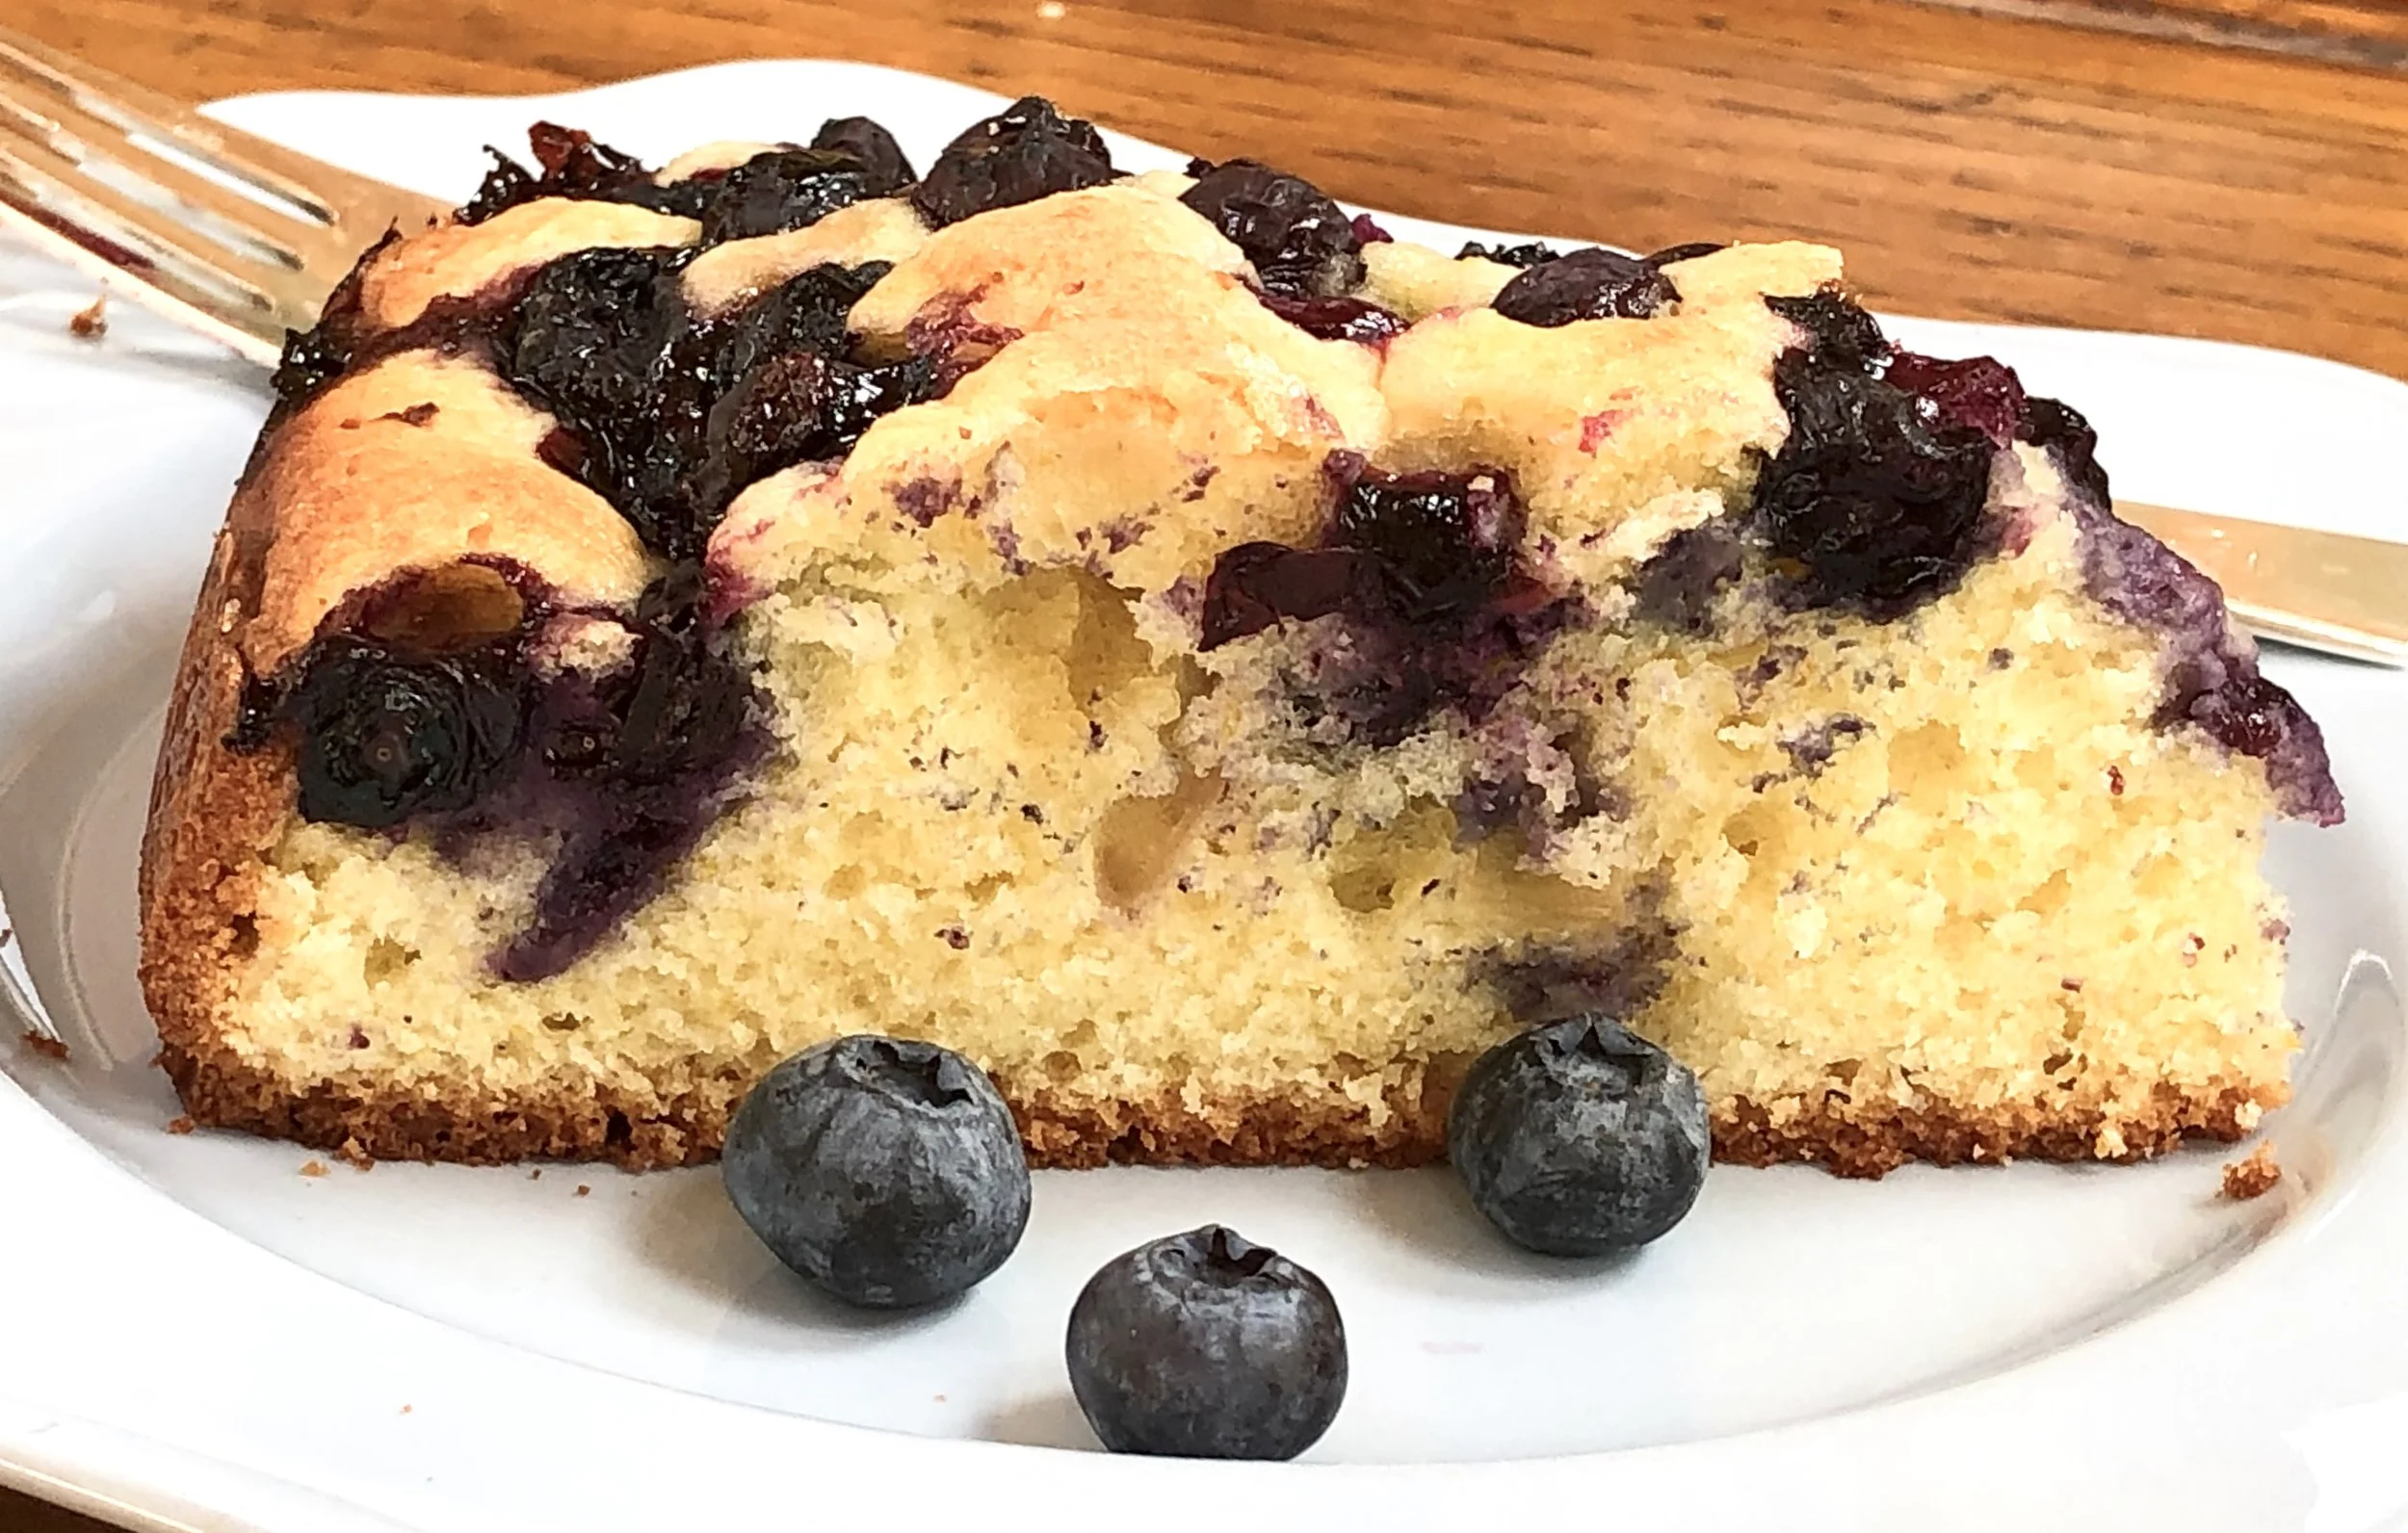
You know that famous Plum Torte so many of us bake for Rosh Hashanah? I decided to use it for a light, summery coffee cake.

Sort of. I replaced the plums (not yet available anyway) with fresh seasonal blueberries.

I gave it a bit of enrichment by adding some yogurt (dairy sour cream would be fine too) and a splash of orange (by way of peel) because the citrus pairs so well with blueberries.

Voila! A terrific, easy, more-appropriate-for-summer dessert. July 4th? Sure. Picnic? Sure. Any time at all.

Blueberry Yogurt Torte

  • 1/2 cup unsalted butter

  • 1/2 cup plus one teaspoon sugar

  • 1-1/2 cups all-purpose flour

  • 2 teaspoons grated orange peel

  • 1/2 teaspoon salt

  • 1 teaspoon baking powder

  • 1/4 teaspoon baking soda

  • 2 large eggs

  • 1/2 cup unflavored yogurt

  • 1 pint blueberries

  • lemon juice (about one tablespoon)

Preheat the oven to 350 degrees. Lightly grease a 9-inch springform pan. In the bowl of an electric mixer, beat the butter and 1/2 cup sugar on medium speed for 3-4 minutes or until creamy and well blended. Mix the flour, orange peel, salt, baking powder and baking soda and mix briefly to blend ingredients. Add the flour mixture to the butter mixture and beat for a minute or two at medium speed until a thick batter has formed. Add the eggs and yogurt and beat at medium speed for 2-3 minutes or until smooth and creamy. Spoon the batter into the prepared springform pan. Arrange the berries on top of the cake, pressing them slightly into the batter. Sprinkle the lemon juice over the top of the cake. Sprinkle with the remaining teaspoon of sugar. Bake for 50-55 minutes or until browned, set and crispy. Let cool.

Makes 8 servings

Coffee Ice Cream with Hawaij Spices

fullsizeoutput_a116.jpg

Shavuot is the “dairy holiday” right?

So that means ….. ice cream!

Here’s a new flavor for you: Hawaij-infused coffee ice cream. It’s like an ultra-rich, coffee-lover’s version of plain old coffee ice cream except that it has a splash of spice. Hawaij spice blend to be specific. A few months ago Pereg sent me some samples of their new Hawaij spice combos.

I used the savory blend for an absolutely fabulous chicken curry (plus several other recipes that I’ll post about some other day).

But the coffee blend (which includes inger, cinnamon, cloves and cardamom) I figured would be useful beyond simply spicing up my afternoon cuppa.

So I used it to make ice cream.

Oh my is all I can say.

If you love coffee ice cream, this one’s for you.

Coffee Ice Cream with Hawaij Spices

  • 1 cup coffee beans

  • 2 cups half and half

  • 1 cup sugar

  • 1/8 teaspoon salt

  • 4 egg yolks

  • 1-1/2 teaspoons Pereg Hawaij coffee spice

  • 1 teaspoon vanilla extract

  • 1 cup heavy cream

Place the coffee beans in a paper or plastic bag and gently tap with a rolling pin or meat mallet to break the beans coarsely. Not all of the beans need to be broken. Place the beans in a saucepan and pour in the half and half. Turn the heat to medium-high and bring the mixture to a boil. Remove the pan from the heat and let steep for at least one hour. Strain the liquid, discard the beans and set the liquid aside. In the bowl of an electric mixer, beat the sugar, salt, egg yolks and Hawaij together at medium speed for 4-5 minutes or until thick and pale. Pour in the strained, steeped cream. Beat the ingredients, starting at low speed and gradually to medium speed, for 3-4 minutes or until the mixture is well blended and a uniform color. Pour the mixture into the saucepan. Cook over medium heat, stirring frequently, for 8-10 minutes or until the mixture has thickened enough to coat the back of a spoon. Stir in the heavy cream. Place the mixture in the refrigerator to cool completely. Stir in the vanilla extract. Freeze in an ice cream maker until thick and cold. Spoon into a container and freeze until firm.

Makes about 5 cups

Sauteed Strawberry Strawberry Shortcake

fullsizeoutput_a678.jpeg

My birthday is in a few days and usually we get together with the kids and grandkids to celebrate at my house. There’s always an apple pie for dessert at some point because I prefer homemade apple pie to birthday cake. And I always have apple pies in the freezer.

But this is an unusual year for our family: graduation and bat mitzvah celebrations, along with several birthdays, Father’s Day and so on — and so — no birthday get-together at my place.

(Actually, at some point during the week I will invite my sister-in-law Eileen and brother Jeff — and I’ll take out some pie for us to enjoy.)

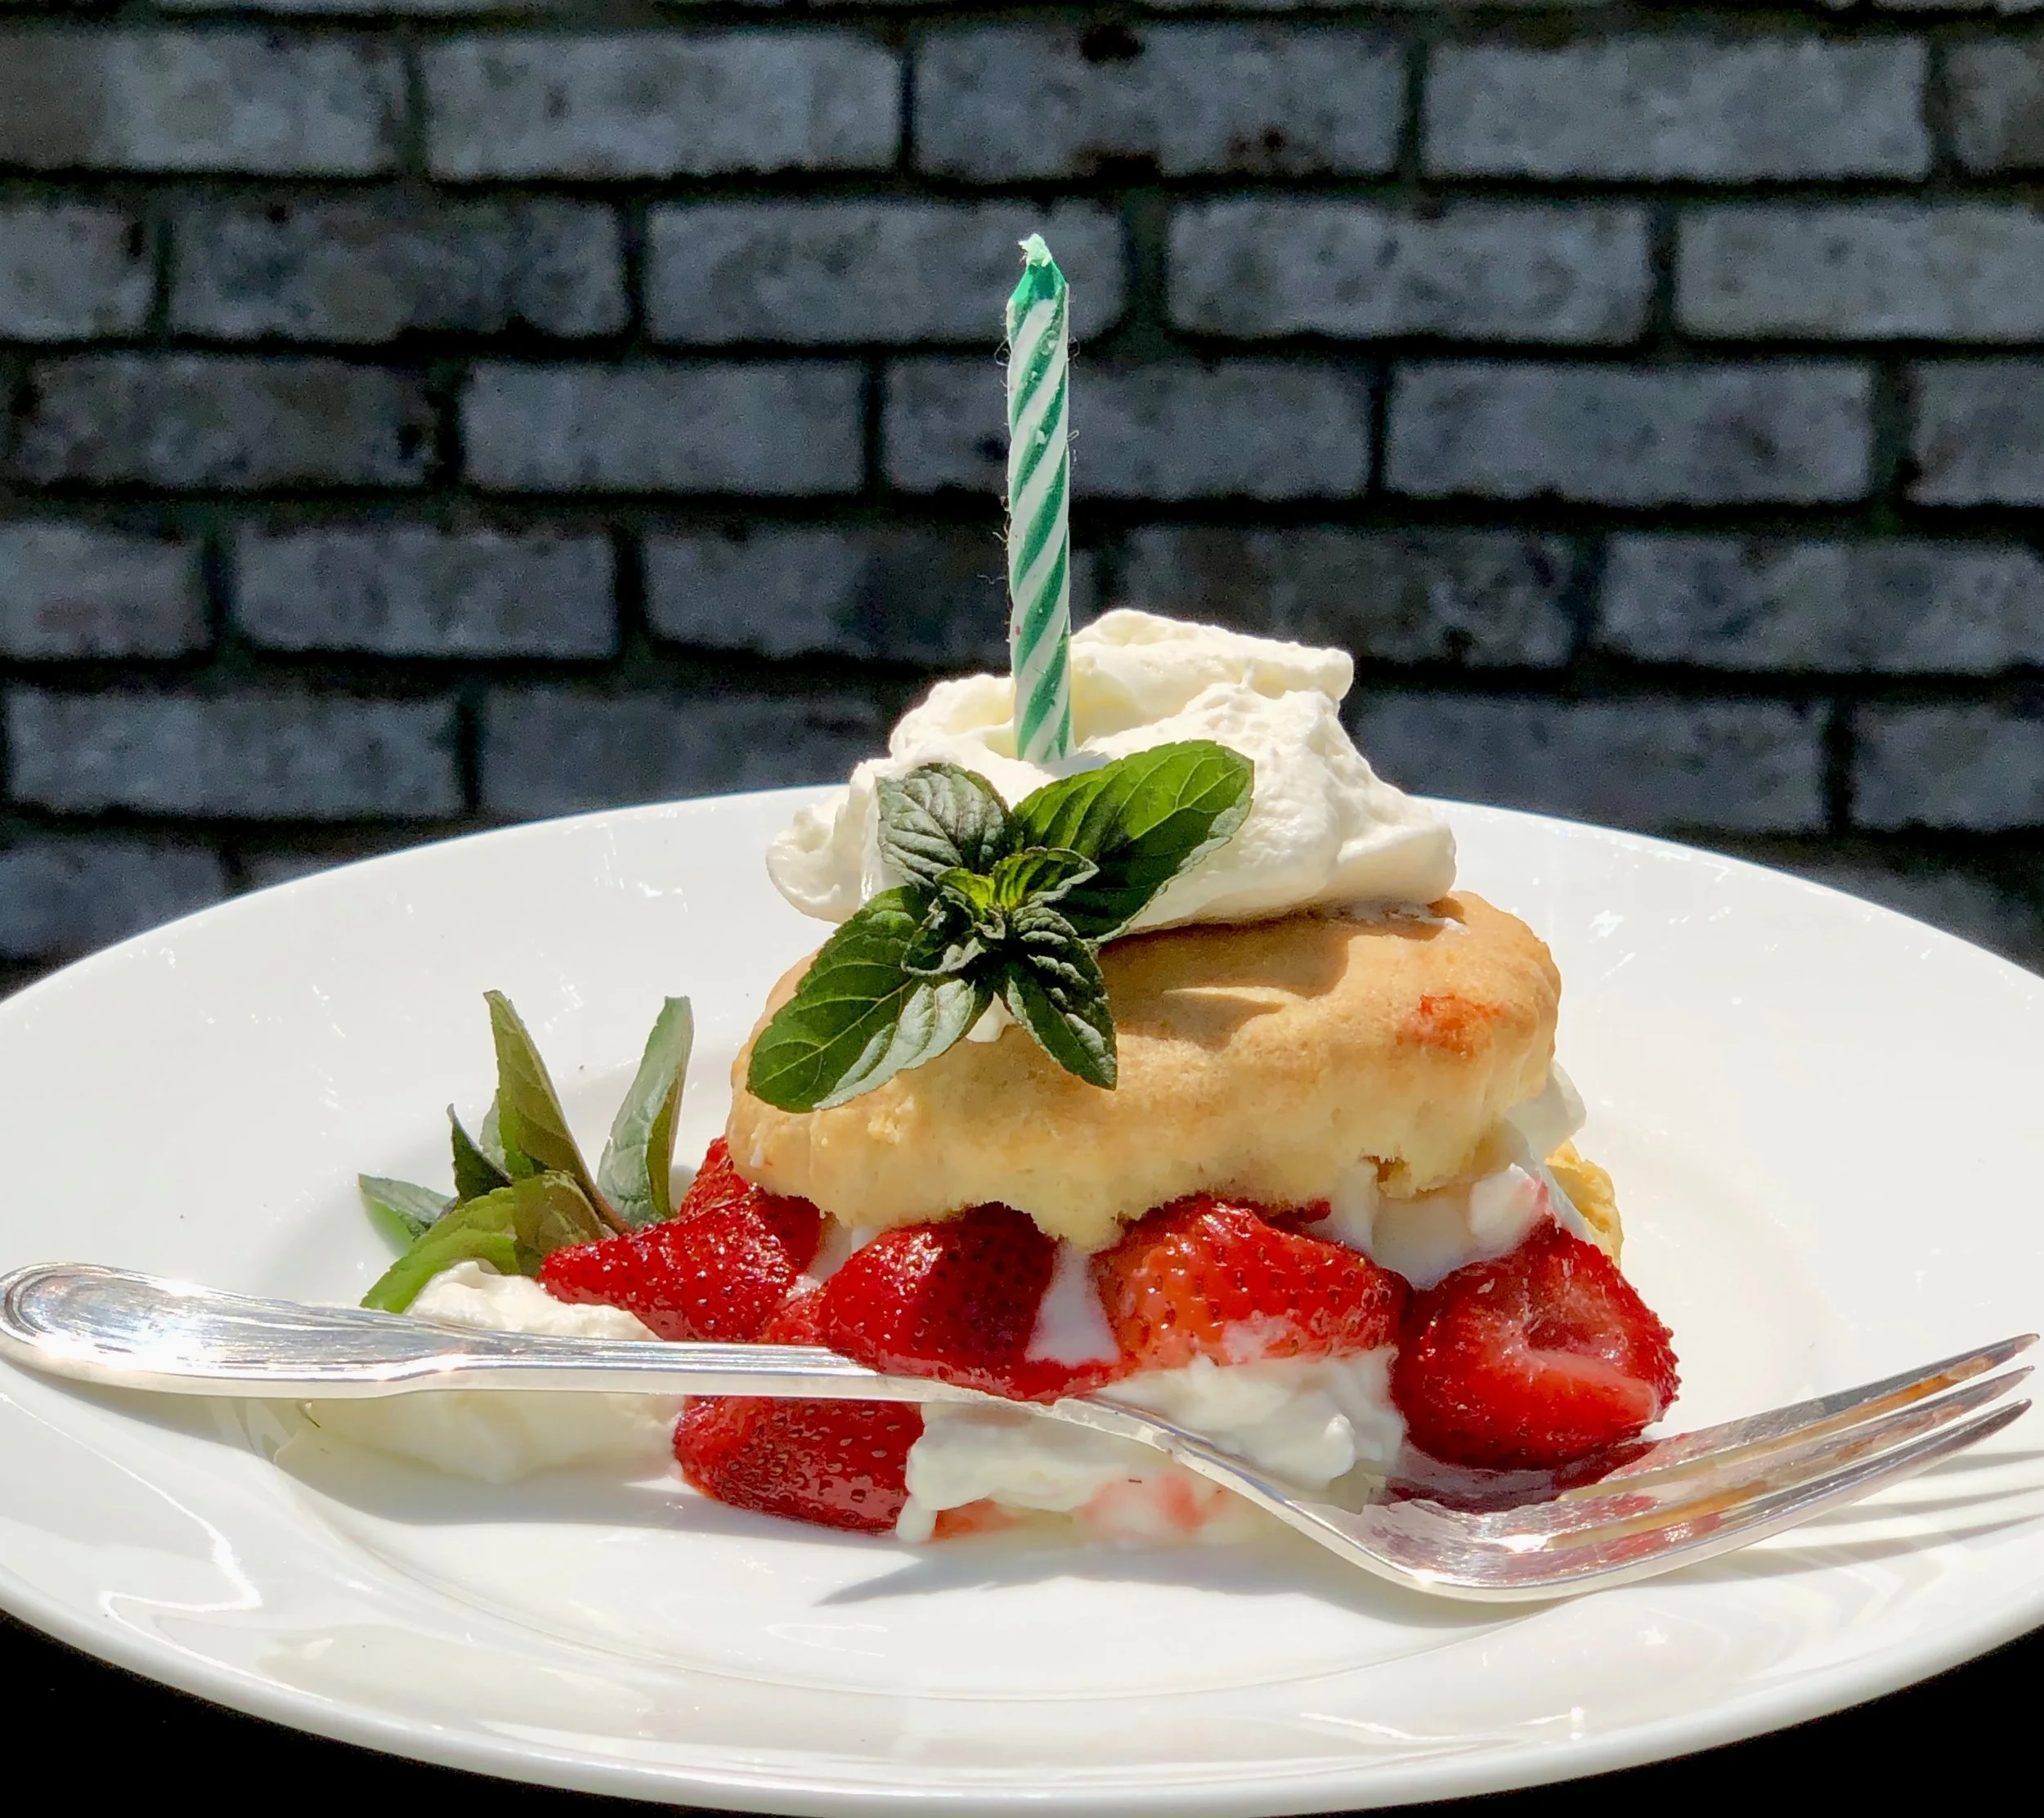
In the meantime, for the two of us, I will celebrate with individual strawberry shortcakes. I made the biscuits already (they’re frozen). Whipped cream takes about 2 minutes in the mixer. I am hoping to find great strawberries — they are in season, so it should be easy.

Last week I actually couldn’t find wonderful berries, even at the Farmer’s market.

So I bought what they had and gave them a quick saute.

Which is what I will do again if the berries aren’t perfect.

This was quite delicious. Here’s the recipe, for strawberry shortcake when you can’t get the best berries.

Sauteed Strawberry Shortcake 

  • 2 tablespoons butter

  • 4 cups cut up fresh strawberries

  • 1 teaspoon sugar

  • 2 tablespoons orange flavored brandy or rum

  • Shortcake biscuits

  • Sweetened whipped cream

  • Fresh mint for garnish

Heat the butter in a saute pan over medium heat. When the butter has melted and looks foamy, add the berries, stir to coat them with butter and cook for one minute. Sprinkle with the sugar, toss and pour in the brandy. Stir, cook briefly and set aside. Cut the biscuits in half. Place the bottoms of each on dessert plates. Layer with some of the berries and some of the whipped cream (reserve some whipped cream for the top). Cover with the biscuit tops. Garnish with a blob of whipped cream and some mint leaves.

 Makes 8 servings


Biscuits 

  • 1-1/2 cups all-purpose flour

  • 1/2 cup cake flour

  • 2 teaspoons baking powder

  • 3/4 teaspoon salt

  • 1/2 teaspoon baking soda

  • 1 teaspoon finely grated lemon peel, optional

  • 8 tablespoons cold butter

  • 2/3 cup buttermilk

Preheat the oven to 400 degrees. Lightly grease a cookie sheet. Mix the flour, cake flour, baking powder, salt and baking soda into a bowl. Stir in the lemon peel, if used. Cut the butter into chunks and add it to the bowl. Work the butter into the flour mixture with your fingers or a pastry blender until the mixture resembles coarse crumbs (or use a food processor on pulse). Pour in the buttermilk and mix until you can form a soft ball of dough. The dough will be slightly sticky. Place the dough on a floured surface and knead a couple of times. Roll the dough gently to 1/2-inch thickness. Cut out circles with a doughnut cutter or the bottom of a glass. Place the circles on the cookie sheet. Bake for about 20-23 minutes or until they have risen and are lightly browned.

 Makes 8

Roasted Vegetable Galette

Roasted Vegetable Galette

Roasted Vegetable Galette

Everyone who knows me or has read a few Mother’s Day posts on my blog knows we don’t celebrate the usual way. We don’t go out to a restaurant or club.

We stay home and have a cookoff.

Yes, we cook and it’s work and a mess but we have the best time ever. Everyone participates (except that some years I am just in charge of the beverages).

We choose a theme, form into teams and each team chooses a recipe. I buy the ingredients a couple of days before and then, on Sunday, my two daughters, their husbands, my husband and my grandkids all get cooking.

Last year our theme was dips. I prepared a tropical salsa.

One year it was chocolate chip cookies.

We’ve done tomato sauce, eggs and so on.

This year we decided on PIE. Each team will make some sort of pie.

There are no rules. They interpret the word (pie) however they wish.

So — apple pie? Sure!

Pizza pie? Of course!

Pot pie? Yes!

The only limit: this will be a vegetarian/dairy meal. So, no beef pot pie.

But — quiche? Why not — it’s a type of open face pie, right?

How about a potato/olive/onion empanada? YUM!

Cabbage pastie? ok!

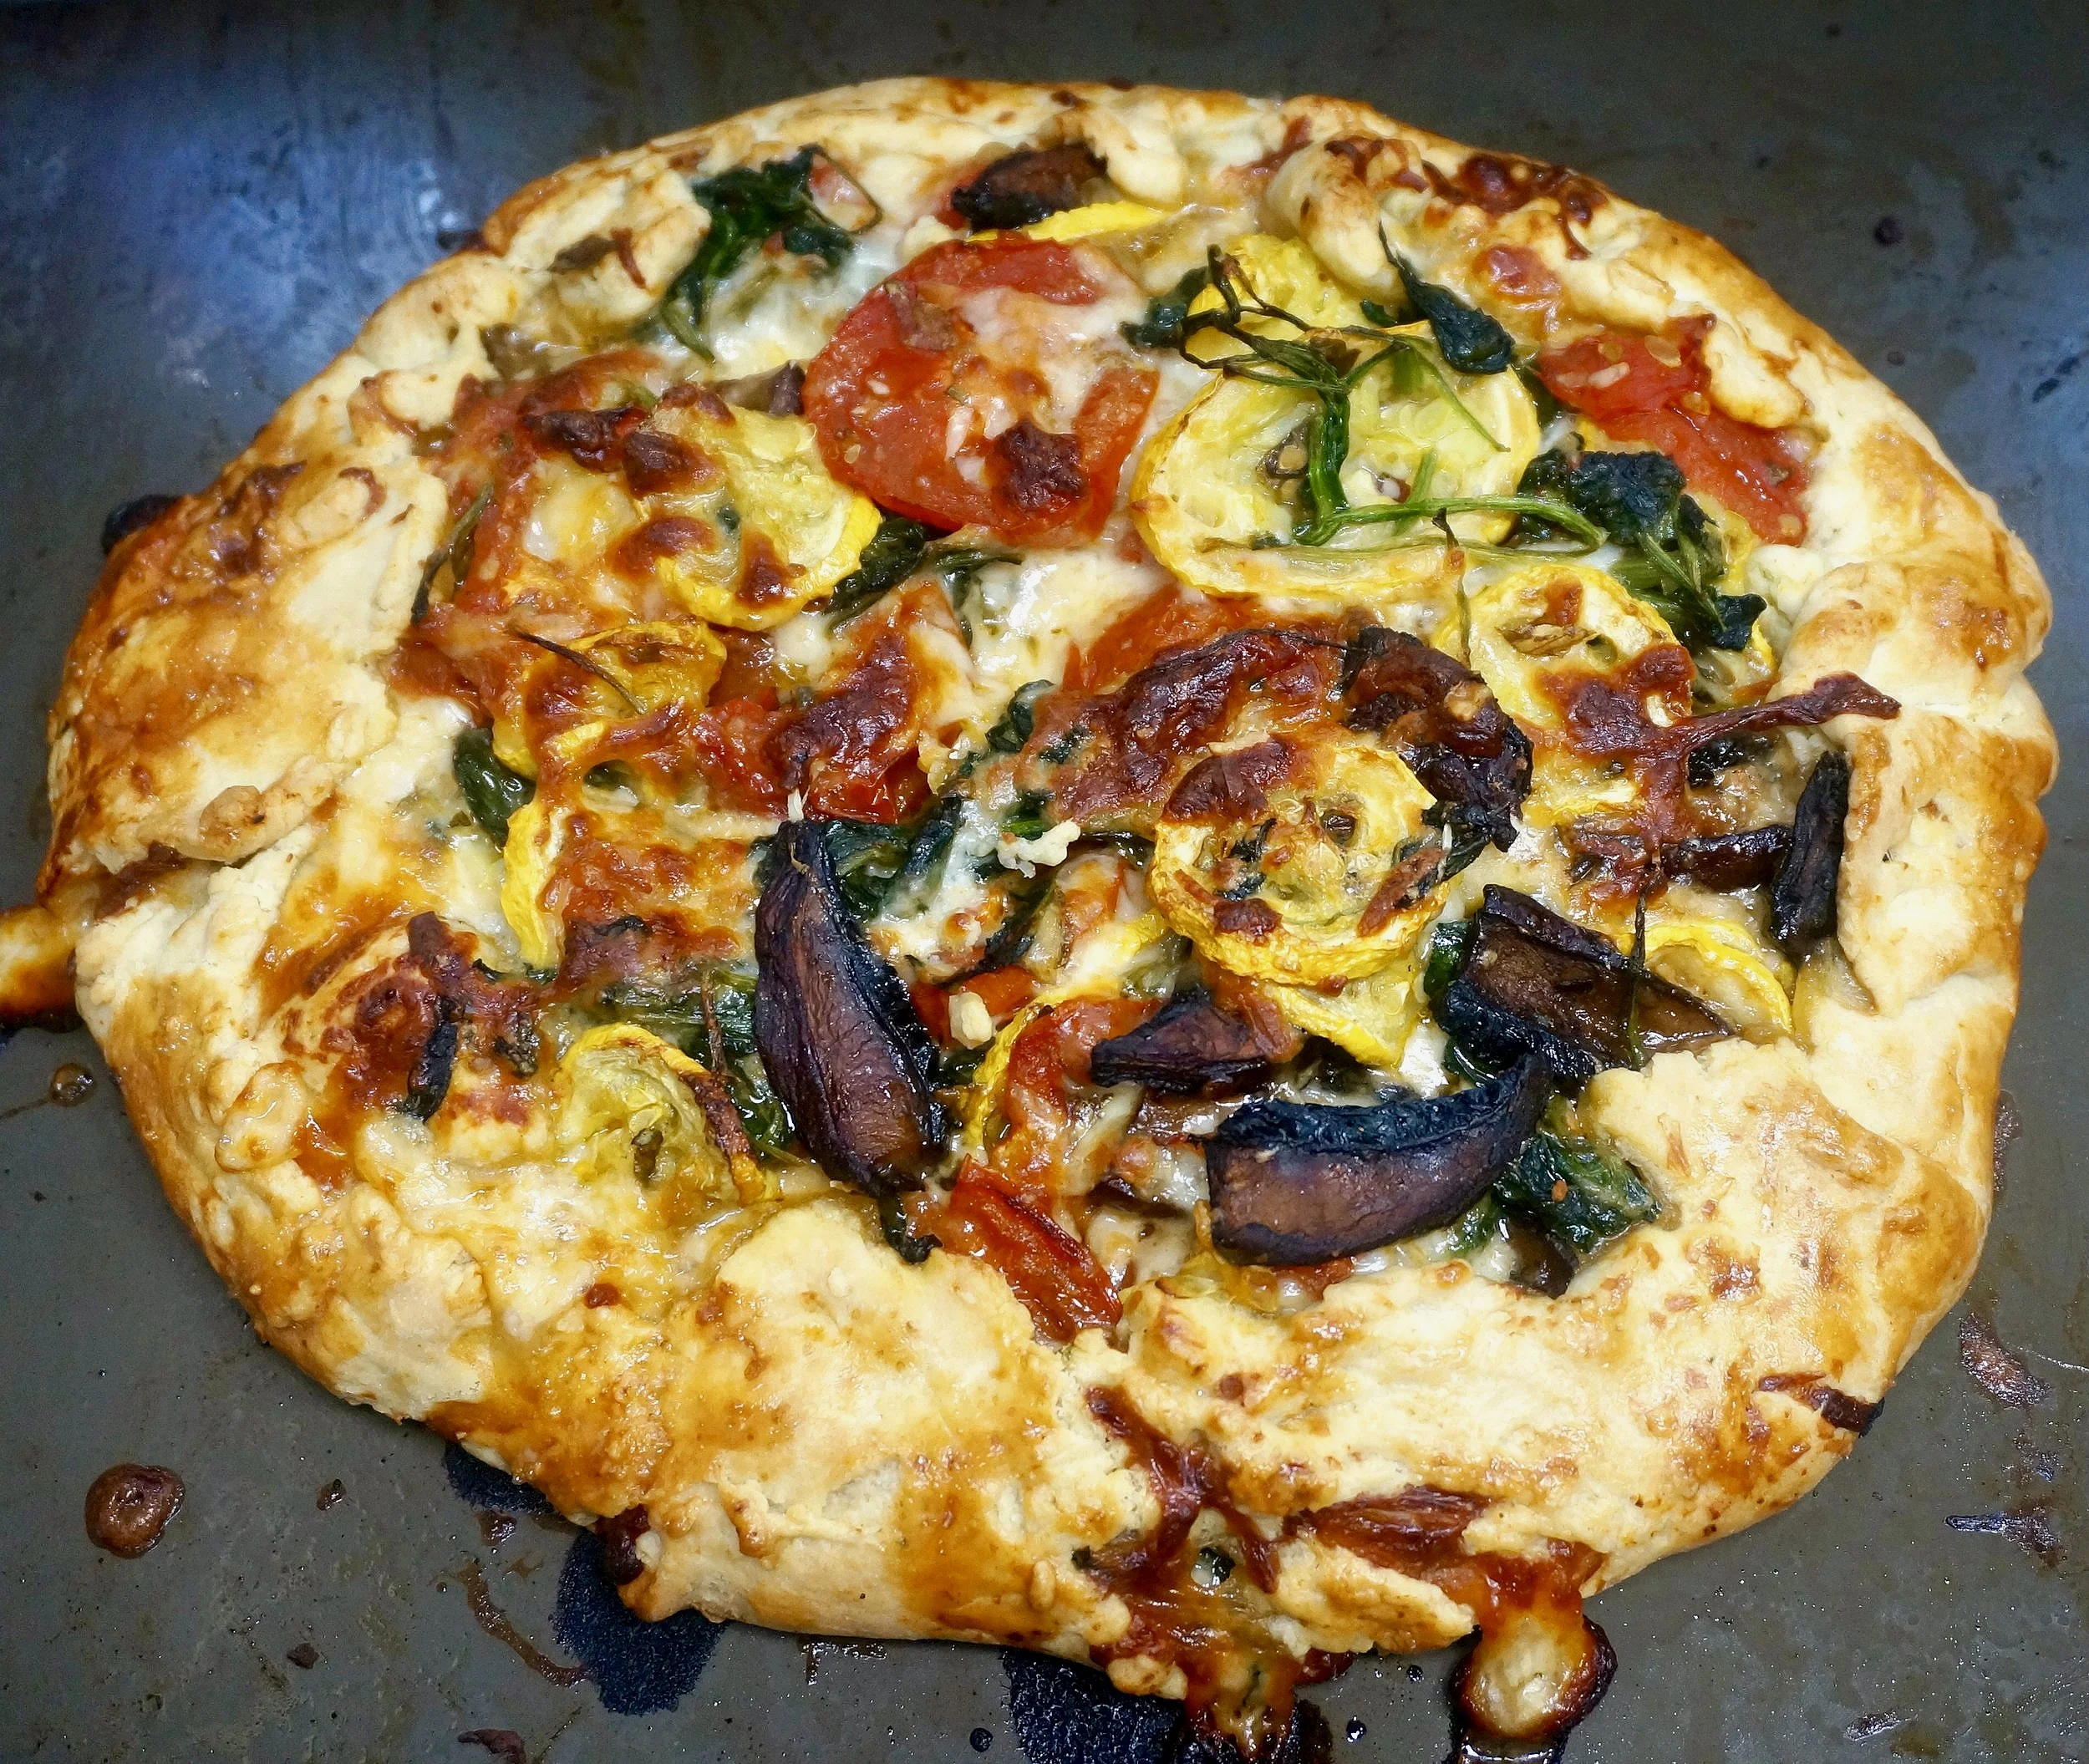
I am thinking of this though: roasted vegetable galette. I make it with pie dough so it qualifies, doesn’t it?

A good Meatless Monday (or any other day) choice.


Roasted Vegetable Galette

  • 1-1/2 cups all-purpose flour

  • 1/2 teaspoon salt

  • 1 tablespoon chopped chives or scallion tops

  • 6 tablespoons butter, cut into chunks

  • 2 tablespoons cold vegetable shortening

  • 3-4 tablespoons milk

  • 2 medium yellow squash, sliced

  • 4-5 plum tomatoes, sliced

  • 1 large Portobello mushroom, sliced

  • 4 tablespoons olive oil

  • salt to taste

  • 1 bunch spinach, washed and dried

  • 2 tablespoons chopped basil

  • 1-1/2 cups (6 ounces) shredded Mozzarella cheese

  • 2-3 tablespoons grated Parmesan cheese

  • 1 egg, beaten, optional

For the crust: mix the flour, salt and chives together in a bowl or food processor. Add the butter and shortening and cut the fat into the flour mixture with your hands or a pastry blender or by processing on pulse until the mixture looks like coarse crumbs. Gradually add 3 tablespoons milk and mix to form a soft dough, adding more milk as needed. Flatten the dough into a disk, wrap and let rest in the refrigerator for at least one hour. Line a large baking sheet with parchment paper. Roll the dough on a lightly floured board into a circle about 12-13 inches in diameter (about 1/8-inch thick) and transfer the circle to the prepared baking sheet.

For the filling: Preheat the oven to 425 degrees. Line a baking sheet with parchment paper. Place the squash, tomato and Portobello slices on the baking sheet and brush on both sides with 3 tablespoons of the olive oil. Roast for 20-22 minutes or until tender. Remove from the oven. Heat the remaining tablespoon olive oil in a sauté pan over medium heat. Add the spinach and cook for 2-3 minutes until softened. Drain any liquid, chop the spinach coarsely and set aside.

Reduce the oven heat to 400 degrees. Scatter the circle of dough with 1 cup of the mozzarella cheese, leaving a border of about 1-1/2 inches. Mix the vegetables together with the basil and place over the cheese. Scatter the remaining mozzarella cheese and the Parmesan cheese on top. Fold the dough over the vegetables but not completely; leave the center open, with 7-8 inches of the vegetables showing. Pleat the dough at the edge to give the galette a rustic look. Beat the egg and brush it onto the dough for a glazed look, if desired. Bake for 35-40 minutes or until the crust is golden brown.

Makes 8 servings

Pizza with Spinach, Tomatoes and Cheese

fullsizeoutput_a3a9.jpeg

Has pizza become the official post Passover food?

I don’t remember that being the case when I was growing up. After Passover, we were full-on with bagels, challah and sandwiches.

So when did this well-loved dish become so extraordinarily popular?

In the first half of the 20th century there were only a few pizza parlors in the United States, all in urban centers such as New York and Boston (and in New Haven, where, in 1925, Frank Pepe set up the still-famous Pepe’s Pizza). But most of the clientele were folks in the local Italian immigrant community.

Pizza became a “thing” in the late 1940s, spurred on by former GIs who had been to Italy during World War II and tasted it there and didn’t want to do without.

Can you blame them?

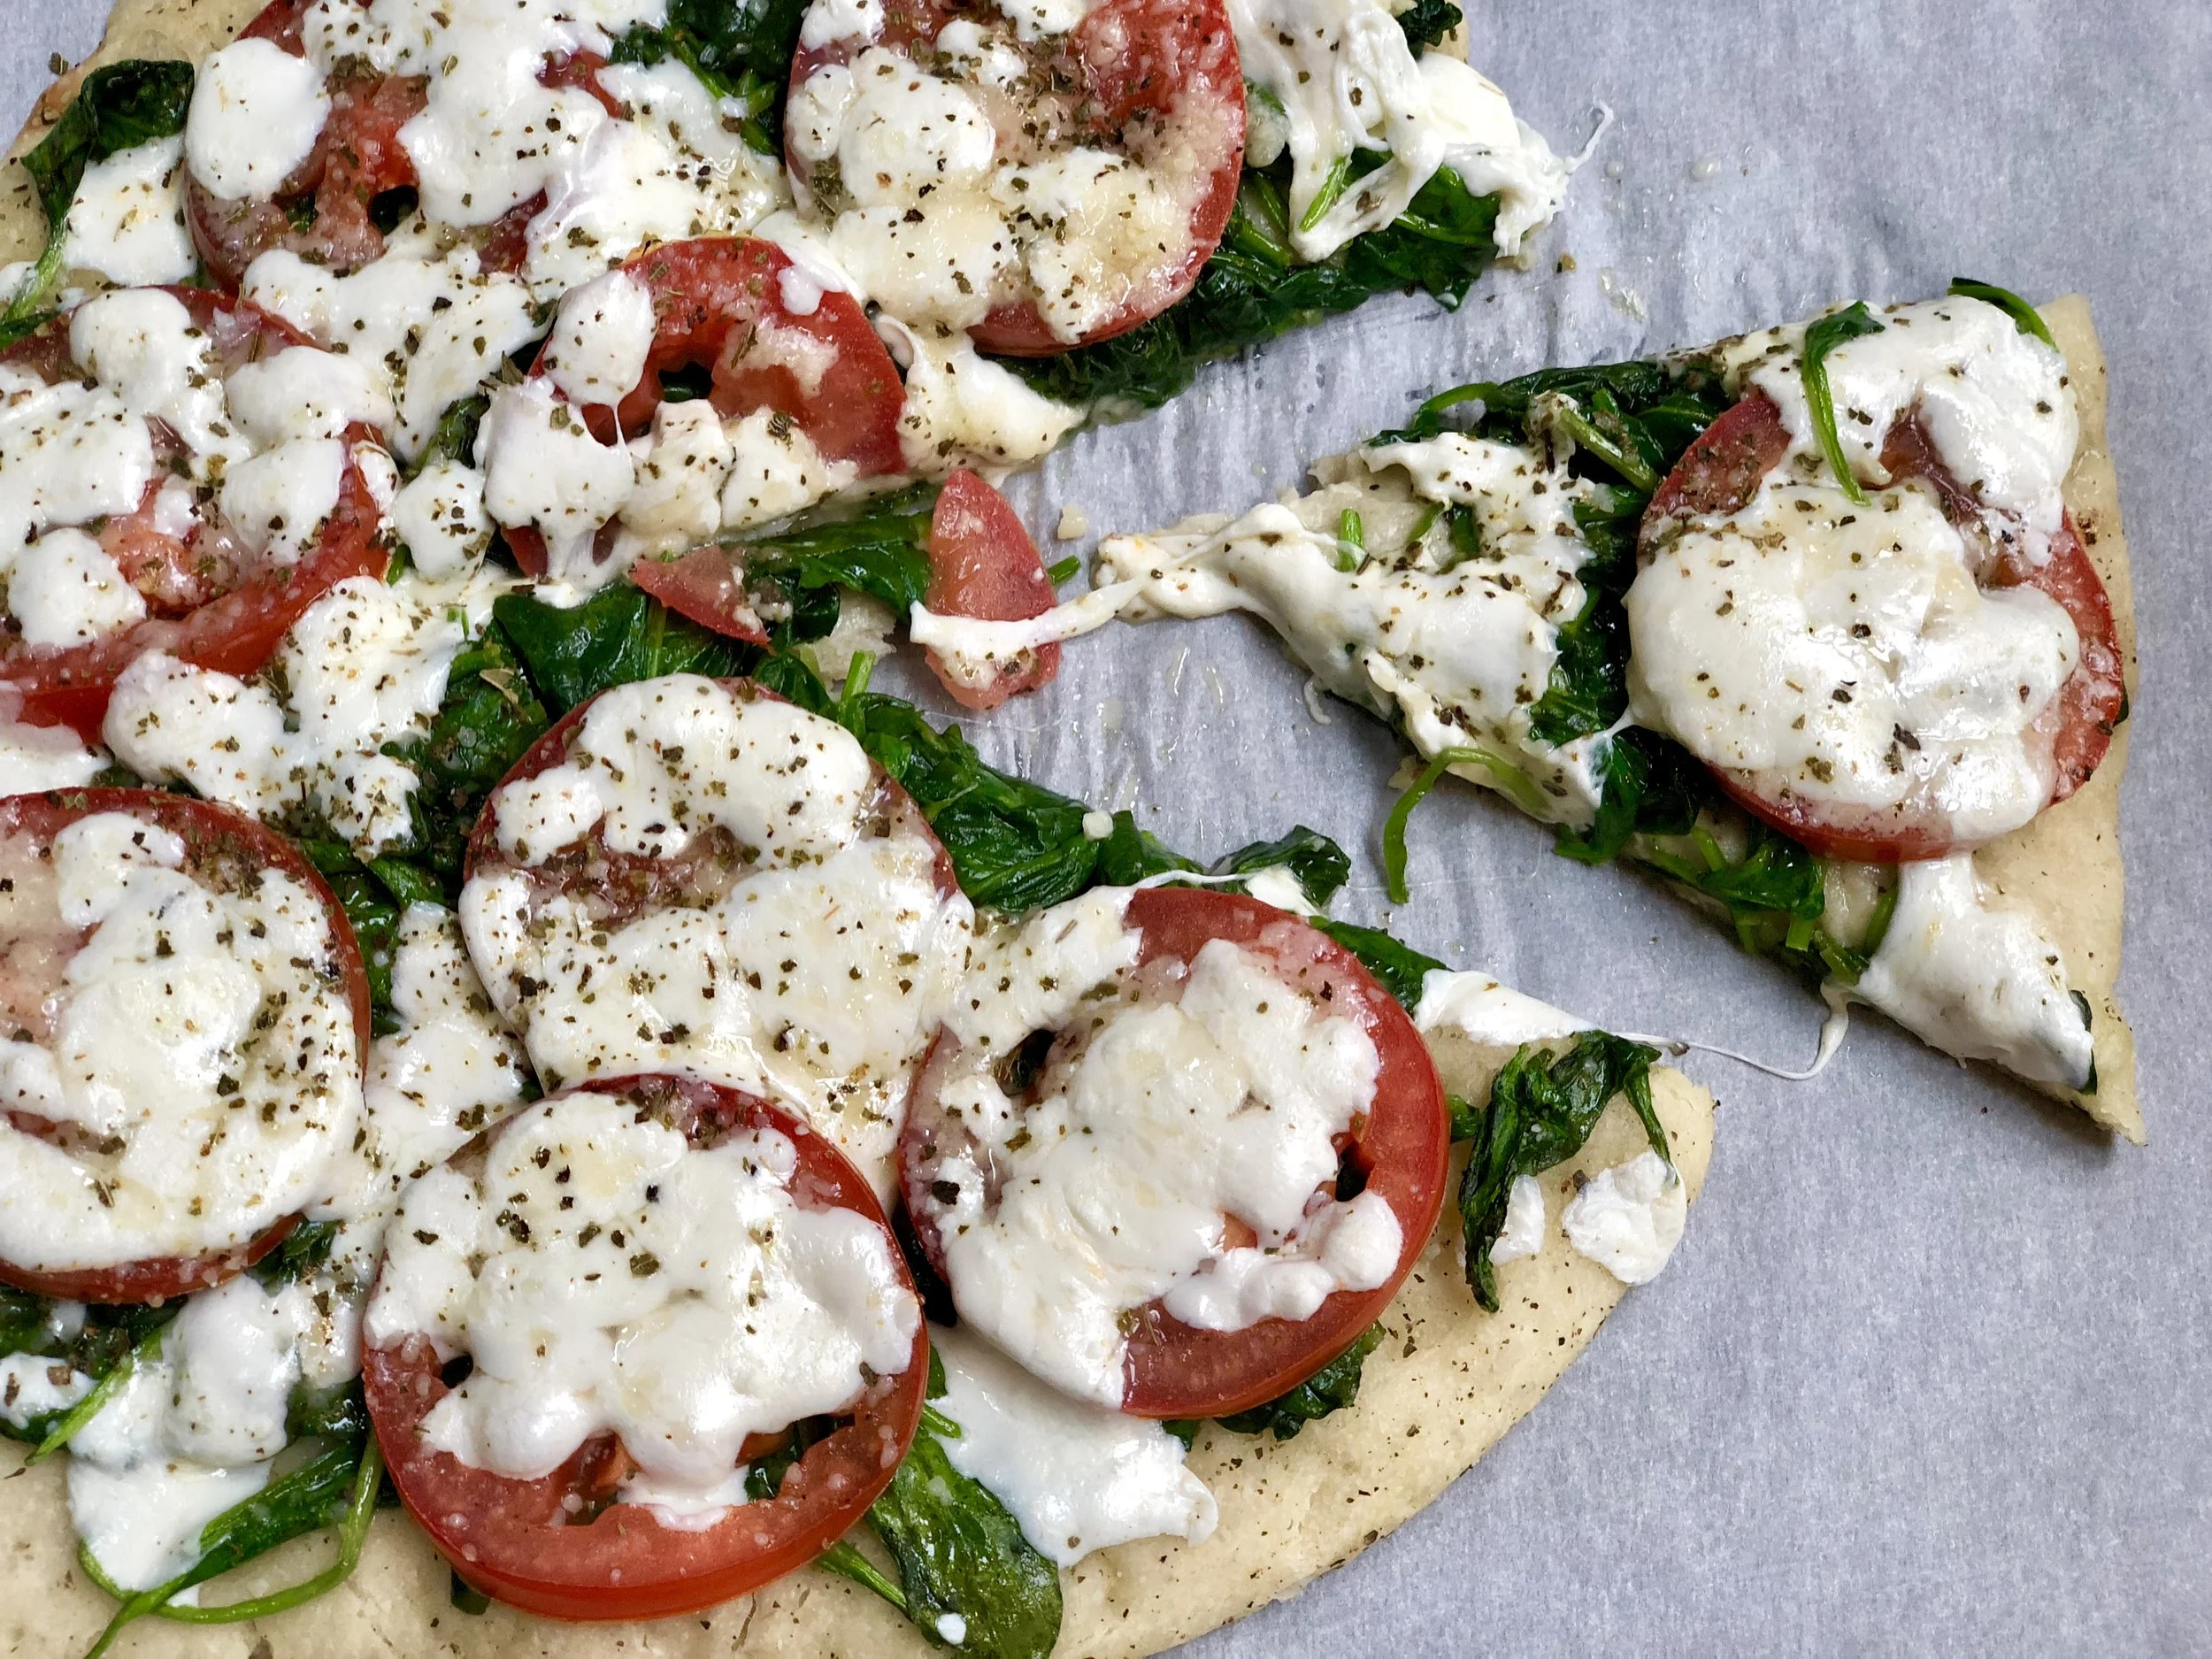
Pizza has since become an iconic American dish, with toppings way way beyond the classic, original Italian Marhgerite.

We have homemade pizza post Passover, because why not!

Also, when we want a meatless meal, because why not!

For Shavuot, the “dairy” holiday, because why not!

As an hors d’oeuvre for a dairy or fish dinner, because why not?

Pizza with Spinach tomatoes and cheese 

  • 1 pizza crust (about 10-inches)

  • 2 tablespoons olive oil

  • 1 large garlic clove, minced

  • 1 bunch fresh spinach, washed and dried (about 6 ounces)

  • 2 medium plum tomatoes, sliced

  • 4 ounces mozzarella cheese, shredded or chopped

  • 2 tablespoons freshly grated Parmesan cheese

  • 1/2 teaspoon dried oregano

Preheat the oven to 450°F. Place the crust on a pizza stone or lightly oiled pizza pan or parchment-lined cookie sheet. Heat 1-1/2 tablespoons olive oil in a sauté pan over medium heat. Add the garlic and cook briefly. Add the spinach and cook for 3–5 minutes or until wilted and all the liquid has evaporated from the pan. If necessary, press the spinach in a sieve to extract liquid. Spread the spinach evenly on top of the crust. Place the tomato slices on top. Sprinkle with the mozzarella cheese. Sprinkle with Parmesan cheese and oregano. Drizzle with remaining half tablespoon olive oil. Bake for 10-13 minutes or until the cheese has melted and the crust is beginning to brown.

 Makes 2 servings


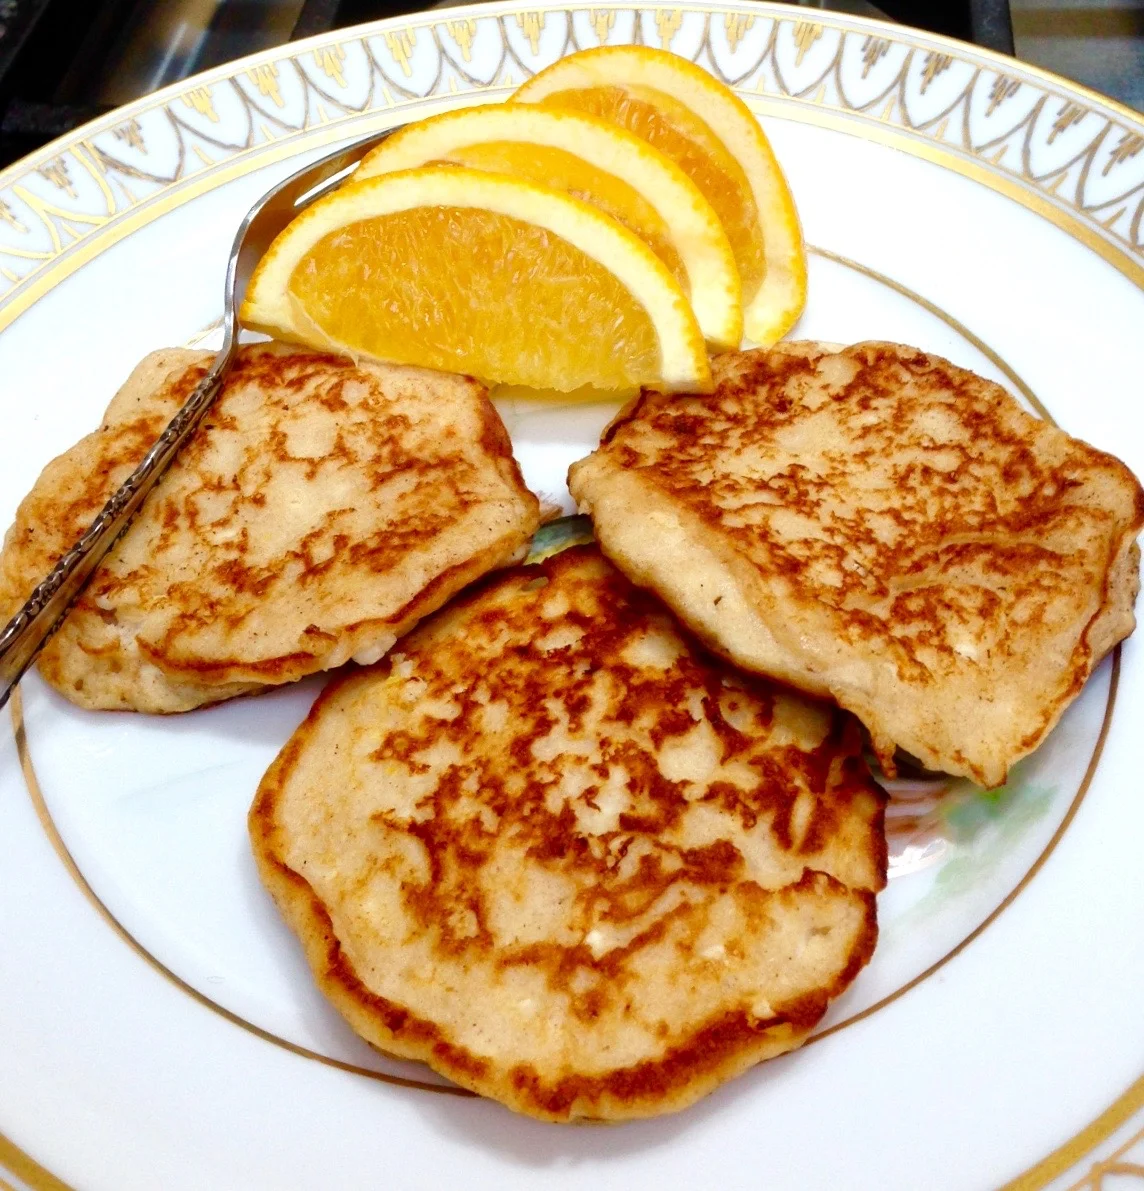
Matzo Cheese Pancakes

Matzo Cheese Pancakes

Matzo Cheese Pancakes

People sometimes laugh at me because we are a year-round matzo family, year-round matzo-brei family.

I mean -- when something is delicious, why wait for Passover?

On the other hand, when Passover comes, I like to branch out from the usual matzo-brei breakfasts -- for instance, with pancakes like these, which are rich and holiday-festive, and also substantial enough for breakfast, lunch and even dinner. 


Matzo Cheese Pancakes

  • 1 cup cottage cheese

  • 1 cup dairy sour cream

  • 4 large eggs

  • 1 teaspoon vanilla extract

  • 1 teaspoon grated lemon peel or one tablespoon grated orange peel

  • 1/2 cup matzo cake meal

  • 2 tablespoons sugar

  • 1 teaspoon potato starch

  • 1/4 teaspoon ground cinnamon

  • salt to taste

  • 1/2 cup raisins

  • butter for frying

In a bowl, combine the cottage cheese, sour cream, eggs, vanilla extract and lemon peel and whisk together until well blended. In a second bowl combine the cake meal, sugar, potato starch, cinnamon and salt. Spoon the liquid ingredients into the bowl with the cake meal and whisk until the batter is smooth and uniform. Fold in raisins, if used.

Heat about a tablespoon of butter in a large sauté pan or griddle over medium heat. When the butter has melted and looks foamy, add batter by heaping tablespoonsful and cook for 1-2 minutes or so until browned on the bottom. Turn the pancakes over and cook for a minute or so on the second side or until lightly browned. Add more butter to the pan as needed to prevent sticking.

Makes about 16

Frozen Dough Hamantashen

fullsizeoutput_a16e.jpeg

I’ve made all sorts of hamantashen over the years. Cake dough. Cookie dough. Pie dough. With all sorts of fillings from old fashioned apricot, prune and poppy seed to nouveau halvah and chocolate mousse/chocolate chip.

I’ve experimented with savory goat-cheese and chili fillings and also barbecued brisket. I even created a recipe for lamb-in-phyllo hamantashen with lemon-tahini sauce. That recipe won an award in a contest sponsored by Soom Foods.

But, to be honest, I like traditional, sweet, mostly apricot or prune hamantashen the best. And this year I read about frozen-dough hamantashen in a post by Melissa Wilkenfeld whose blog, Little Kosher Lunch features kosher lunch-box meals for school kids (I also follow her on Instagram).

So I used her recipe to bake a pile of hamantashen, which were so good it hurt to give any away. But I actually always give food away to my usual “tasters” — all of whom gave high marks to these.

I don’t have enough left for Purim so I will have to make some more. Which I will, because these are awesome.

I asked Melissa for permission to post her recipe. She agreed, also telling me she got the recipe from a friend (Patti Golden).

So, ladies, thank you both for this recipe. A keeper. I’ve changed the language to conform to the way I write recipes, but otherwise, it is yours. Mazal tov.

Happy Purim.

Frozen Dough Hamantashen

  • 8 ounces cream cheese, at room temperature

  • 1/2 pound unsalted butter, at room temperature

  • 1/2 teaspoon salt

  • 2 -1/4 cups flour, sifted

  • milk, water or egg white for sealing

  • Lekvar or jam 

Beat cream cheese, butter and salt in an electric mixer set at medium speed for 3-4 minutes or until smooth and thoroughly blended (or in the food processor with the plastic blade attachment). Gradually mix in the flour on low speed until the dough is a uniform color and pulls together into a ball. 

Form dough into 4 balls, wrap in plastic wrap and refrigerate until firm, about 3 or 4 hours, or overnight. 

Remove one ball of dough and roll out on a floured surface until thin, about 1/8 inch thick.

Cut out circles with a cookie cutter (or use the floured rim of a drinking glass or jam jar). 

Place about one teaspoon of lekvar or jam in the center of each round.

Moisten the edge of the circle with milk, water or egg white.

Fold up three edges of the circle to form a triangular base, pinching at the corners to secure.

Place the filled hamantashen on an ungreased cookie sheet. Reroll scraps of dough to make more hamantashen. Repeat with all balls of dough.

Refrigerate the hamentaschen until ready to bake, at least 30 minutes after shaping.

Preheat the oven to 350 degrees.

Bake for 25-30 minutes or until delicately browned.

Cool on racks.

Makes about 4 dozen 

Banana Bread with Raisins and Almonds

fullsizeoutput_9431.jpeg

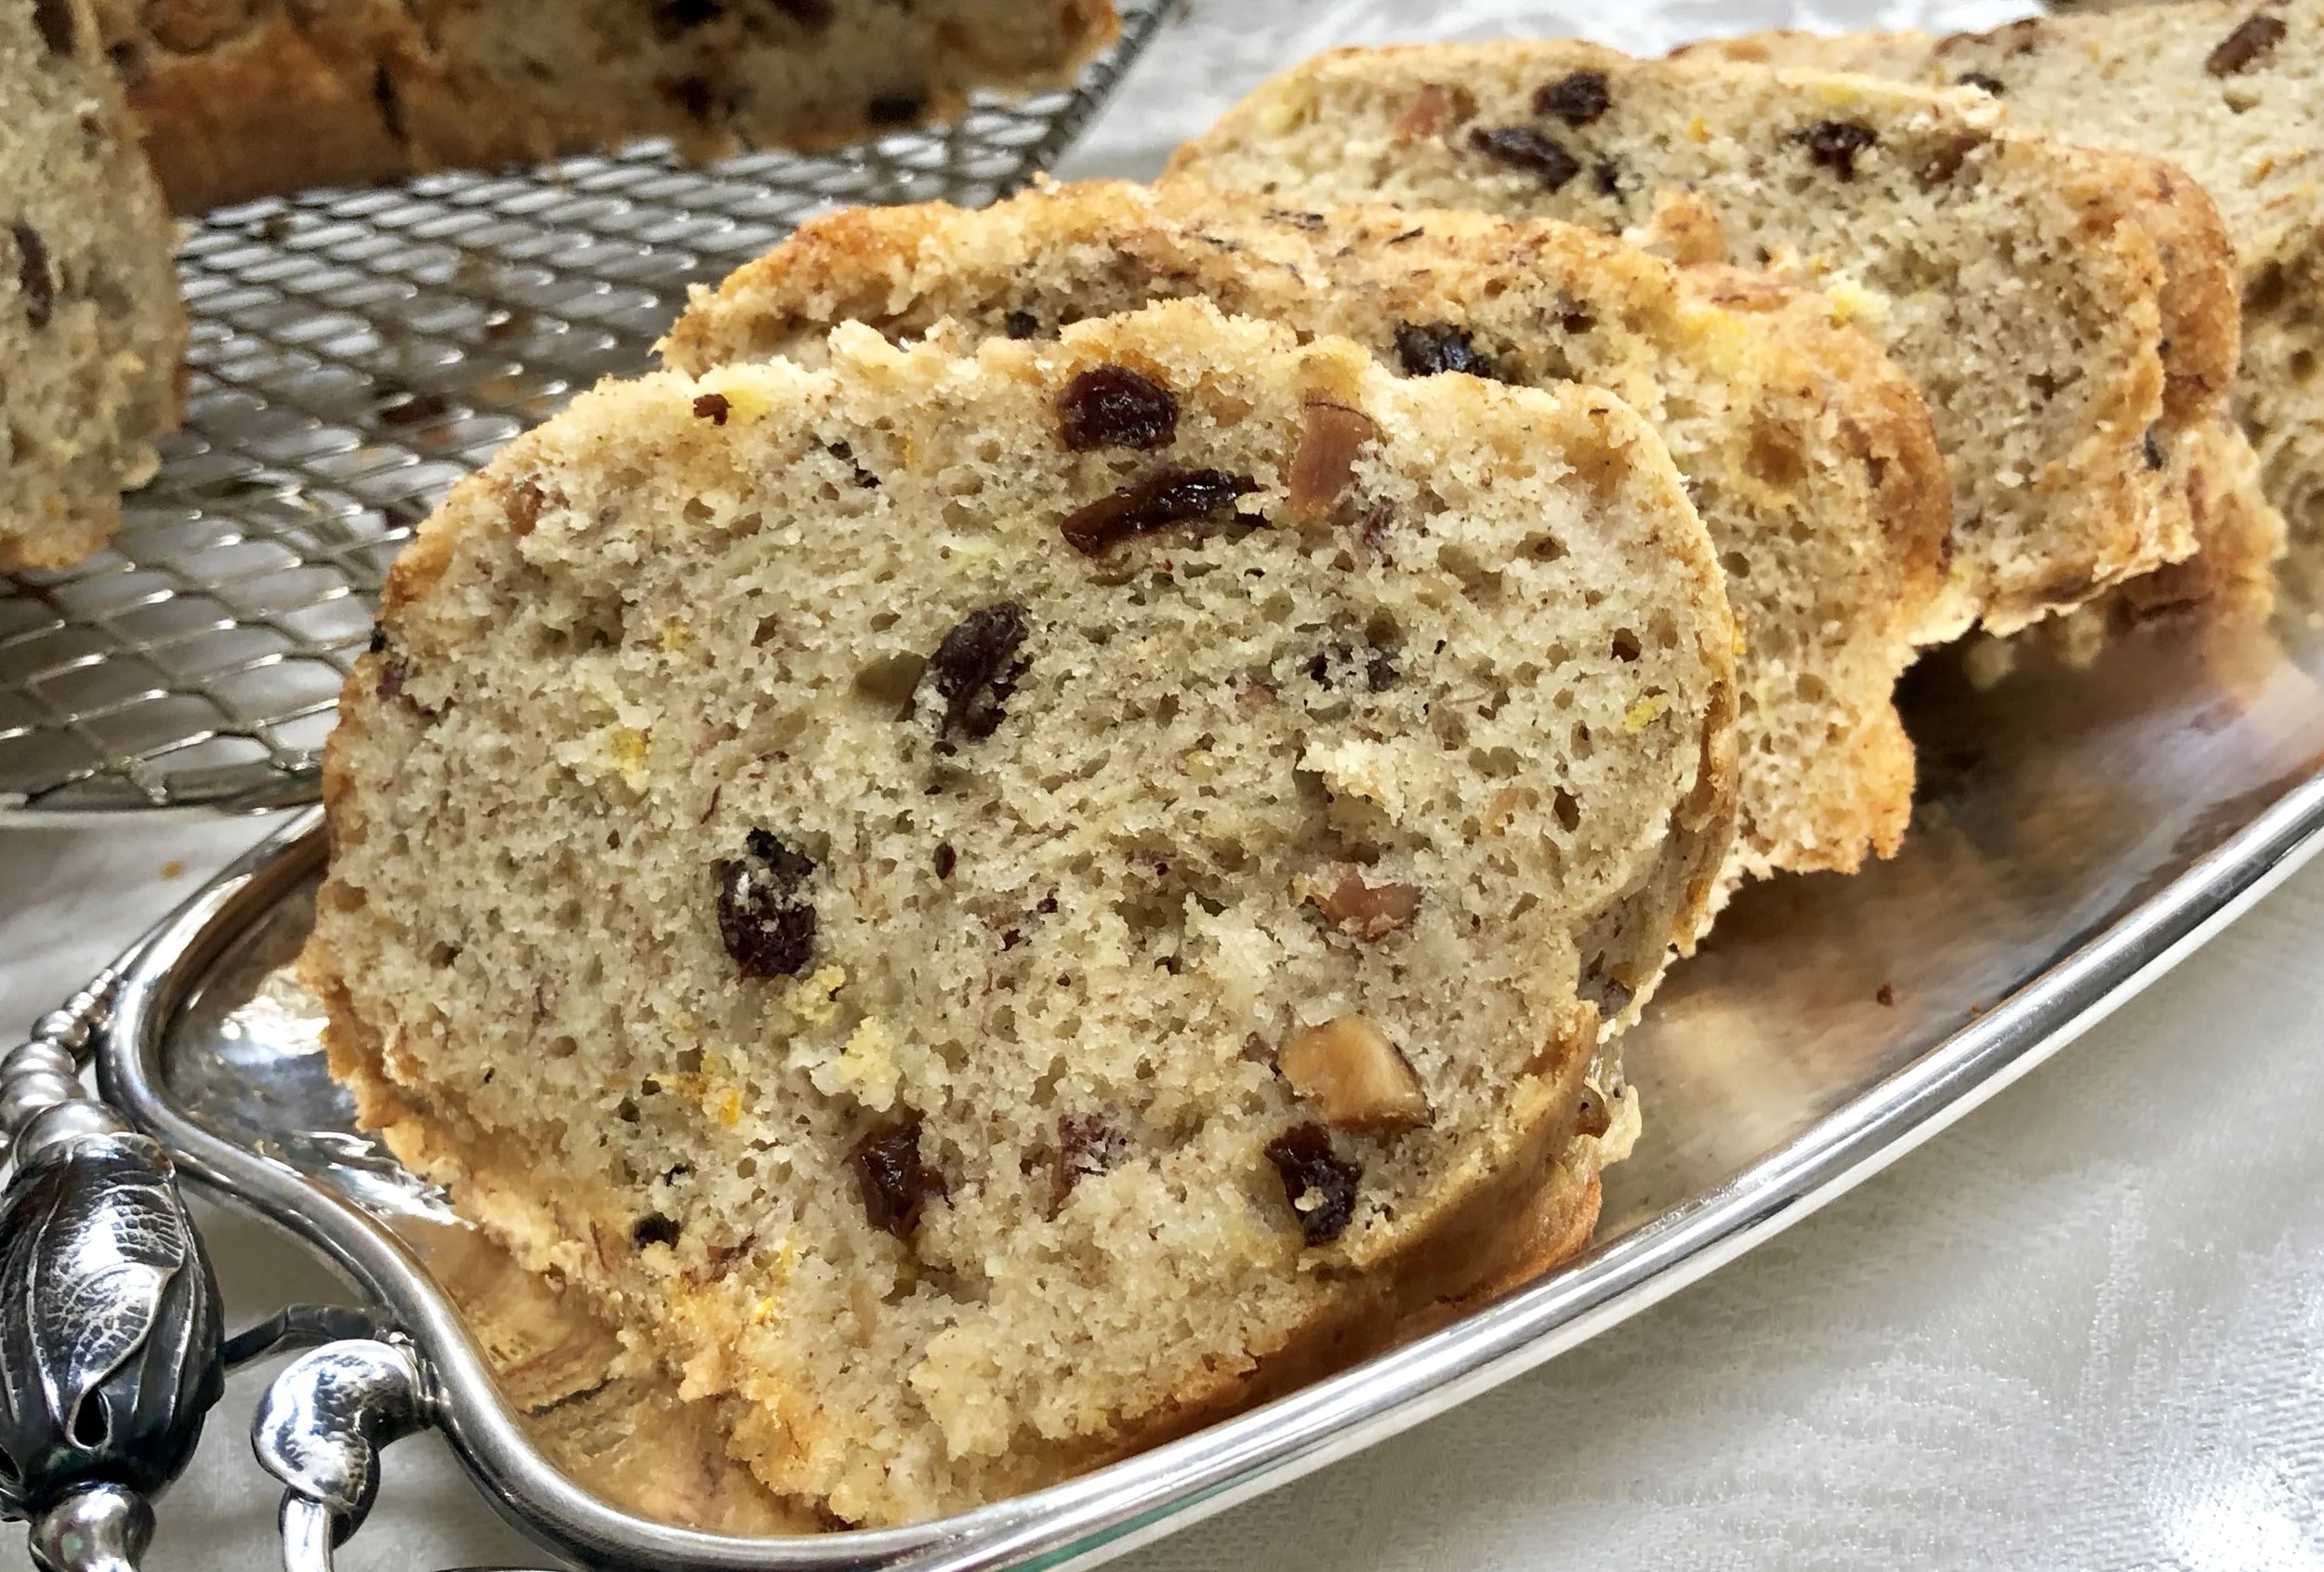
Whenever I bake with raisins and almonds, I am reminded of the old Yiddish lullaby “Roshinkes mit Mandlen,” sung by so many Jewish bubbes to so many babies over so many decades. It’s a lovely song about a goat going to market while an infant sleeps in his young mother’s arms. I remember my parents playing a recording of it sung by Jan Peerce, who at one time was a famous opera tenor. The lullabye is so enchanting, I once made a challah-type yeast bread that included raisins and almonds (in Germany it is known as Hefezopf) and called it Lullabye Bread.

But the other day I had too many bananas. Again. And so I made banana bread with roshinkes und mandlen.

Perfect any time you need a lightly sweet snack. Fitting for Tu B’shevat (which begins at sunset on January 20, 2019).

If you’d like to hear the one and only Jan Peerce singing the lullaby, click here.

Banana Bread with Raisins and Almonds


  • 2-1/2 cups flour

  • 1 teaspoon salt

  • 2 teaspoons baking powder

  • 1/2 teaspoon baking soda

  • 1 teaspoon cinnamon

  • 1 teaspoon grated fresh orange peel

  • 3 large eggs

  • 1 cup sugar

  • 1/2 cup vegetable oil

  • 1 teaspoon vanilla extract

  • 4 very ripe bananas, mashed

  • 1 cup buttermilk

  • 1/2 cup raisins

  • 1/2 cup chopped toasted almonds


Preheat the oven to 350 degrees. Grease and flour a (10-inch) 8-cup bundt pan. Mix the flour, salt, baking powder, baking soda, cinnamon and orange peel together in a bowl and set aside. In the bowl of an electric mixer beat the eggs and sugar at medium speed until thoroughly combined and thick. Add the vegetable oil and vanilla extract and beat the ingredients until thoroughly combined. Add the bananas and buttermilk and beat the ingredients until thoroughly combined. Fold in the raisins and almonds. Pour the batter into the prepared pan and bake for about one hour or until a cake tester inserted into the center comes out clean. Remove from the oven and let cool in the pan for 10 minutes. Remove to a cake rack to cool completely.

Makes one bread, serving 12-16