dairy

Chocolate Truffles

DSC09699.jpg

Chocolate instead of broccoli to stay healthy?

No, not really. But in a recent study the results indicated that eating chocolate might cut a woman’s risk for stroke. Read about it here.

This is not the first time I’ve heard that chocolate is healthy (it has flavanoids, which have anti-oxidant properties, which in turn help lower LDL (bad) cholesterol).

But this is the one of the only times I’ve heard someone caution women not to over-interpret the results. Like, do not substitute chocolate for broccoli. And a cardiologist who was interviewed said that although chocolate may be good for you, maybe the study results would have been similar if they used apple skins or grapes.

I’ve always wondered about some of these studies. I wonder whether you can prove whatever you want depending on how you go about the study.

Well, I am no scientist, so I don’t know.

But I do remember, many years ago, when the information regarding dietary fat was still in its infancy and Nabisco came out with SnackWells, the so-called “healthy” cookies because they were lower fat. And people started eating SnackWells because they thought it was okay. And judging from the number of people I met (and watched at the supermarket) who ate boxes and boxes of those cookies, most didn’t seem to realize that it’s way too many calories and that it might be more harmful than if you ate a butter cookie or two.

So the broccoli warning makes sense.

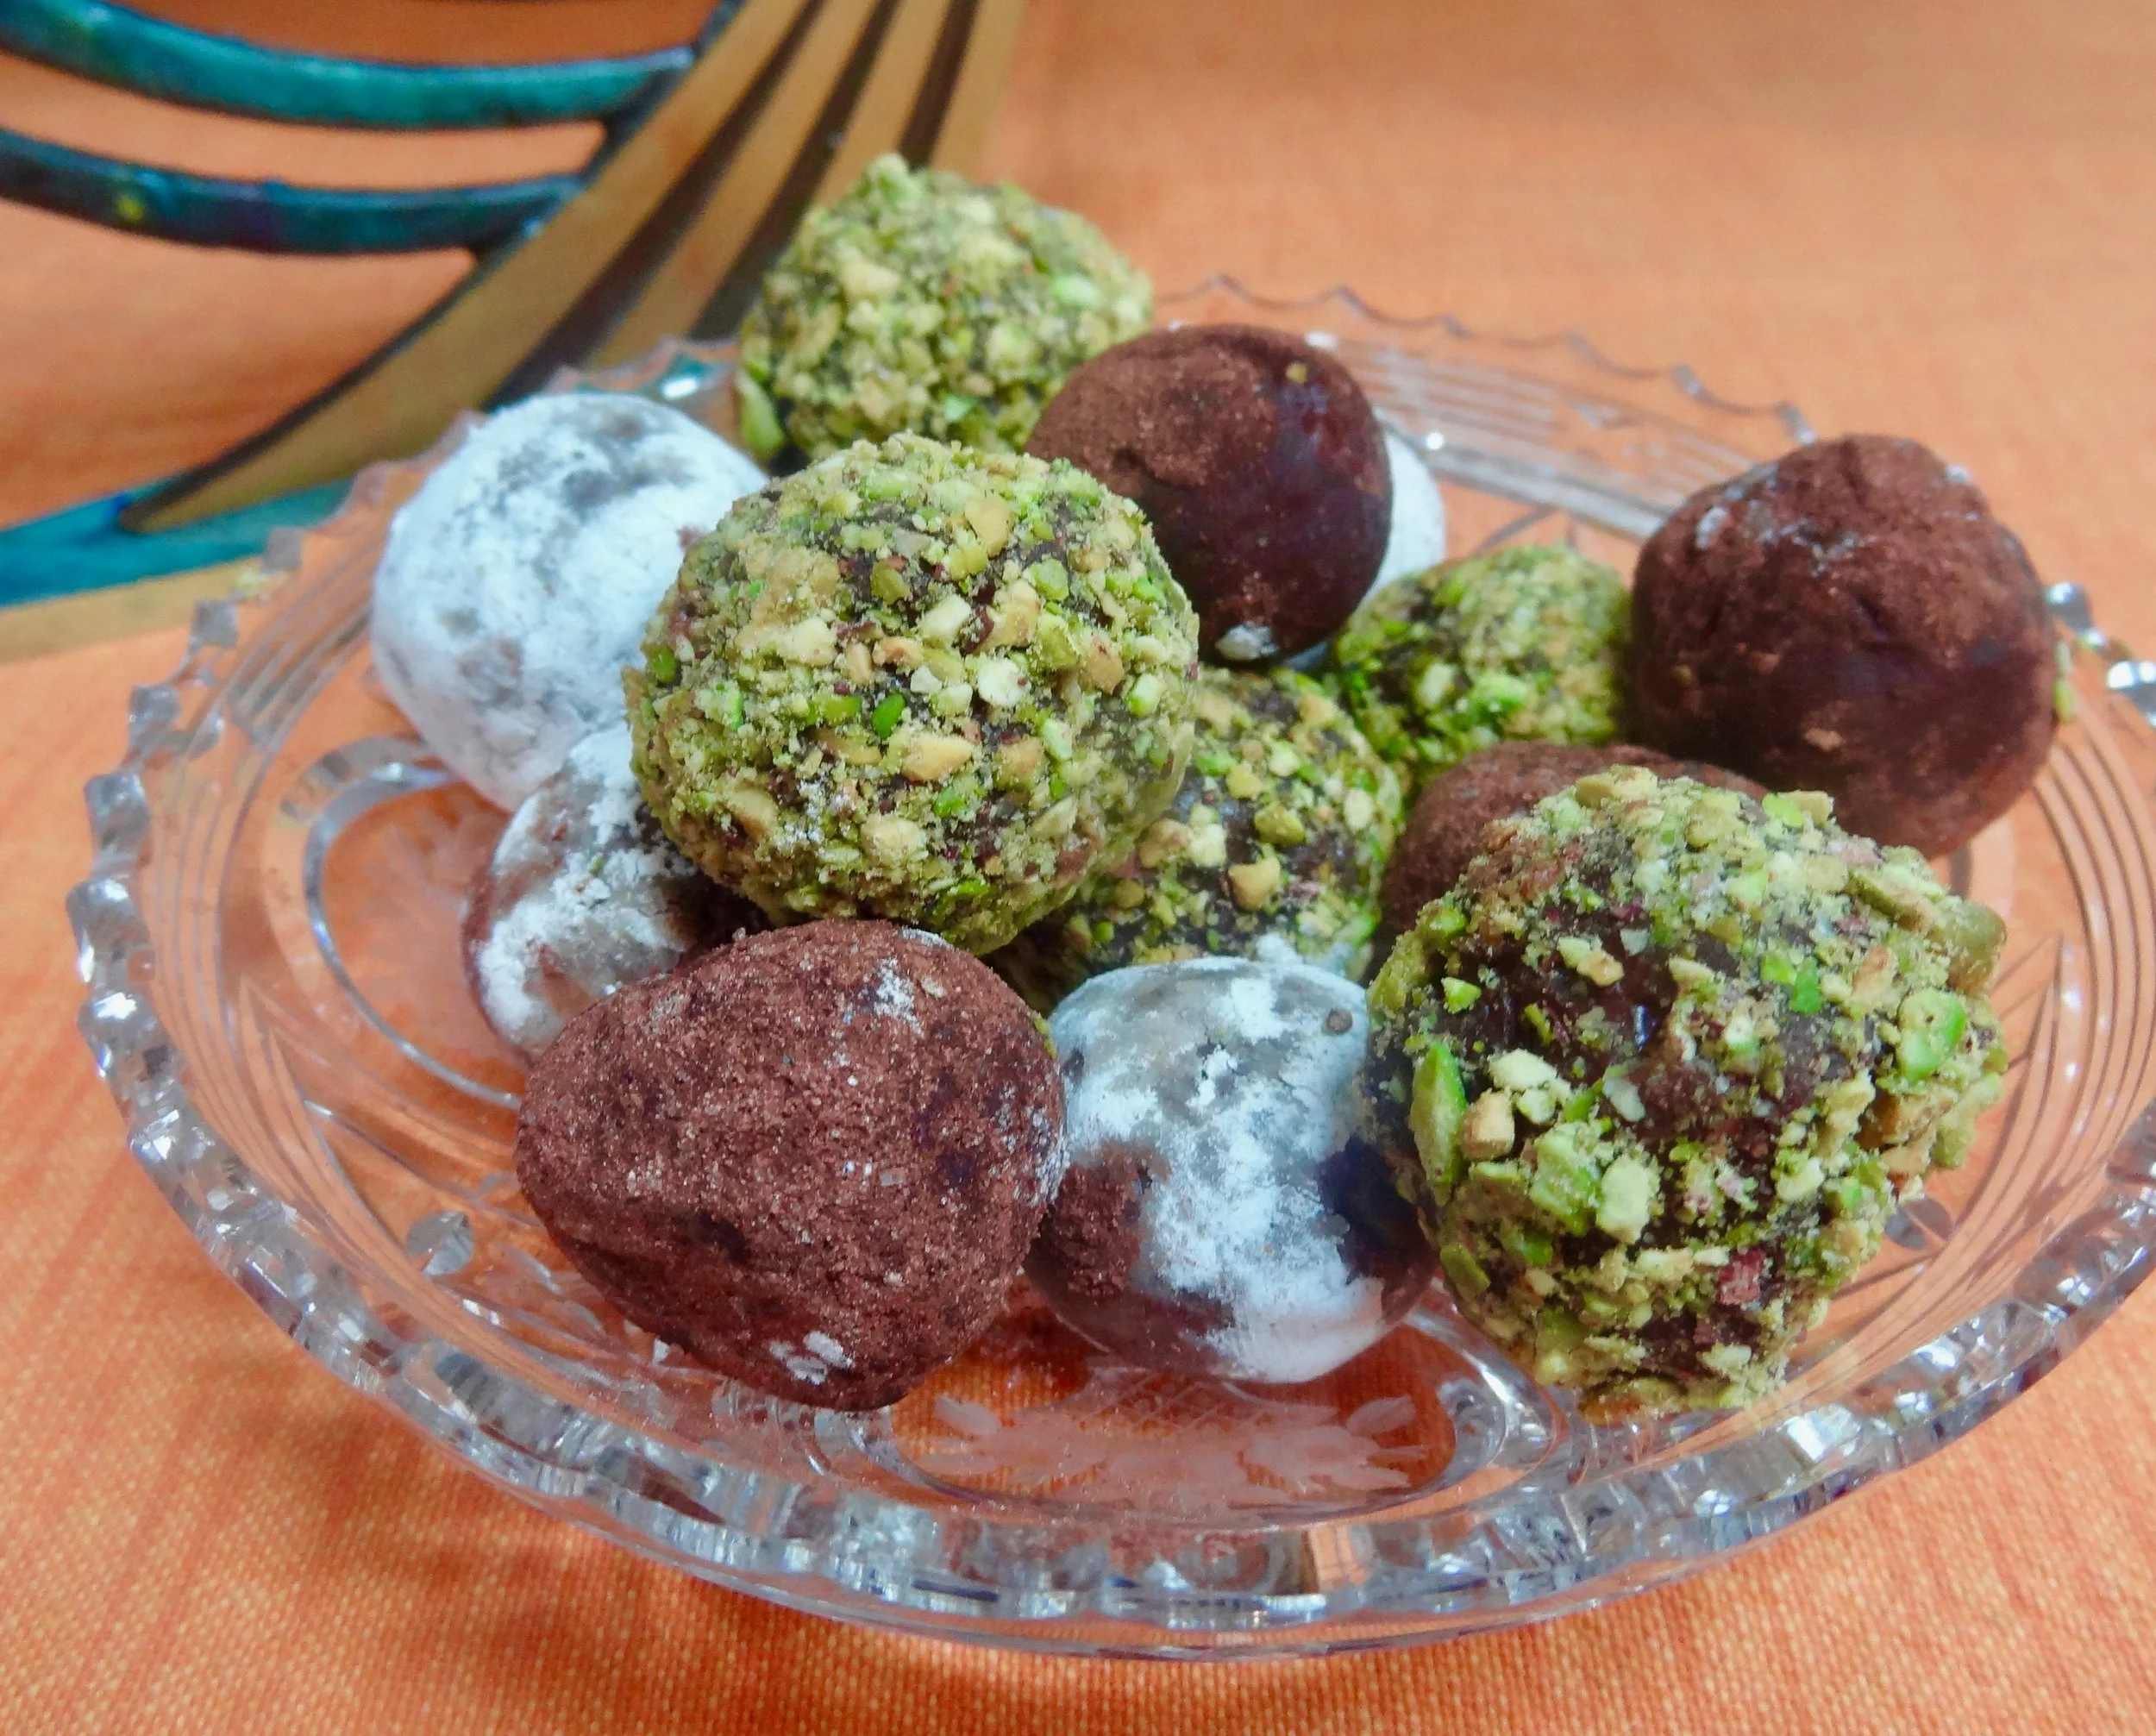
But if you want to eat something delicious and chocolate-y — for your health — try these truffles. They are amazingly easy to make and you can give them away as gifts so they’re good for the upcoming holiday season.

But don’t eat the whole batch at once.

Chocolate Truffles

  • 1/2 pound semisweet or bittersweet chocolate
  • 3/4 cup heavy cream
  • 4 teaspoons brandy or rum or 1 teaspoon vanilla extract
  • 5 tablespoons butter at room temperature
  • 1/2 cup unsweetened cocoa powder, sprinkles, toasted coconut, ground nuts, etc. (approximately)

Chop the chocolate in a food processor into small bits. Heat the cream over medium heat until it is hot and bubbles form around the edges of the pan. With the processor on, pour in the cream through the feed tube and process  until well blended (you may have to scrape the sides of the bowl once or twice). Refrigerate the mixture for 30 minutes. Add the brandy or rum and the softened butter and blend them in thoroughly. Spoon the mixture into a bowl and refrigerate for at least one hour or until the mixture has firmed enough to form a soft “dough.” Take small pieces of the dough and shape into small balls. Place the balls on waxed paper or aluminum foil on cookie sheets. Refrigerate until firm, at least 30 minutes. Roll the balls in cocoa, sprinkles, etc.

Makes about 3 dozen. 

Buttermilk Herb Slaw

I am constantly amazed at how creative people can be with food.

Take cole slaw. As a kid I remember cole slaw as that deli stuff with shredded cabbage and carrots in a thin white liquid that you bought when you were going to eat hot dogs or hamburgers or some sort of deli sandwich, like corned beef on rye.

My grandmother made her own cole slaw, which she referred to as “cull sloy.”

But now, in specialized food stores, supermarkets and bodegas everywhere, you can find a variety of “slaws,” which after all, just means “salad.” My local store offers “Asian Slaw” and “Health Slaw” in addition to plain old Cole Slaw.

But I like to make my own because that way I can get creative too. Like with this recipe — I like the tangy taste of buttermilk and it lets you cut down on the fatty mayonnaise of a standard recipe. The shredded snow peas add a rich, green color and a crispiness. Adding lots of fresh herbs gives it the refreshing taste of summer.

Btw, if you think it’s silly to buy buttermilk because you’re never going to use it for anything else, read this.

Buttermilk Herb Slaw

  • 6 cups shredded cabbage
  • 1 cup shredded snow peas
  • 1-1/3 cups buttermilk
  • 1/4 cup mayonnaise
  • 2 tablespoons cider vinegar
  • 2 tablespoons sugar
  • 1/4 cup chopped chives or scallion
  • 1/4 cup chopped fresh parsley
  • 2 tablespoons chopped fresh dill (or use a mixture of herbs)
  • 1 teaspoon salt or to taste
  • pinch or two of cayenne pepper

Place the cabbage and snow peas in a large bowl an toss to distribute them evenly. In another bowl, combine the buttermilk, mayonnaise, vinegar, sugar, chives, parsley and herb, whisk the ingredients and pour over the vegetables. Toss the ingredients and let rest for at least 15 minutes. Before serving, taste for seasoning and add salt and cayenne pepper to taste.

Makes 8 servings

Vanilla Ice Cream

Anyone who thinks vanilla is boring, should read this column that appeared in the Guardian (U.K.) last week (I heard about this article from Sprinklefingers). 

http://www.guardian.co.uk/lifeandstyle/wordofmouth/2011/mar/01/consider-vanilla

The author, Oliver Thring rightly concludes that if you say that vanilla is boring, you probably haven’t tasted the real thing.

The real thing is a long, slender, pliable brown pod filled with teeny seeds. It has a bright, distinctive taste, but it never tramples your taste buds. Split the pod and plop it, or part of it, into custard and taste how it transforms the flavor into something sweet and floral but subtle. Use it for ice cream or to flavor a canister full of sugar. Use real vanilla in cake batter. Or to infuse vinegar, rum or vodka. 

I could go on and on. I’ve always loved vanilla, even back in the old days when my cousin Leslie told me that the little specks in the ice cream I was eating were dirt.

She always chose chocolate.

But as any vanilla aficionado knows, anything made with chocolate is nowhere unless it contains some vanilla to give it a boost. Hot chocolate, for example — make it without a bit of vanilla and you’ll notice it’s missing. Ditto brownies and chocolate cake.

For those who know the truth — and those who want to understand what the vanilla thing is all about — try this recipe for Vanilla Ice Cream.

Vanilla Ice Cream

  • 2 cups whole milk

  • 2 cups heavy or whipping cream

  • one vanilla bean, split open

  • 2 1-inch strips lemon peel

  • 3 large eggs

  • 3 large egg yolks

  • 2/3 cup sugar

Place the milk, cream, vanilla bean and lemon peel in a small saucepan and cook over medium heat until the liquid is hot and bubbles have formed around the sides of the pan. Set aside to cool. Beat the eggs, egg yolks and sugar together with an electric mixer set at medium speed until the mixture is thick and pale (4-5 minutes). Gradually add the milk mixture to the egg mixture, stirring to blend ingredients to a uniform color. Remove the vanilla bean (you can wipe it off and use it to flavor sugar, vinegar, rum or vodka). Heat the mixture, stirring frequently, until it has thickened, but do not let the mixture come to a boil. Let the mixture cool, then freeze in an ice cream maker according to manufacturer’s instructions. Makes 1-quart+

Soggy Cheesecake Crust

static1.squarespace-1.jpg

Hi Leslie - sorry that your cheesecake crust comes out soggy. It may be that water leaks into the seams of the springform pan. You can line the bottom with tin foil (overhang it), then attach the side, then take the overhanging part and crumple it to try to seal all the edges. That may help.

On the other hand — it may be the recipe. It’s important to bake the crust for at least 10 minutes in a preheated 350 degree oven. Then let it cool. Then fill it.

Another trick you can try — add some ground nuts to the crumbs. Nuts always crisp up nicely and stay crispy better than crumbs do.

Another tip: bake the crust for 10 minutes, brush it with an egg wash (beat an egg with a small amount of water) and bake for another 3-4 minutes.

And another: let the crust cool, then layer on a thin layer of melted chocolate, jam, lemon curd or the like. This adds a flavor dimension of course, but it also helps keep the crust crispy.

After sitting in the fridge, even after all that, eventually cheesecake crust will become soggy just from the moisture in the cheese. But the tips above will help get you a better crust at least at the beginning.